I am a DevOps Engineer with 3 years of hands-on experience in automating infrastructure, optimizing CI/CD pipelines, and implementing cloud-native solutions. Skilled in tools like Kubernetes, Docker, Terraform, Jenkins, and AWS, I focus on delivering scalable, reliable, and efficient systems. Passionate about sharing knowledge, I write blogs on best practices, emerging technologies, and practical solutions in DevOps and cloud engineering. Let's build resilient systems together!
Introduction
In the fast-paced world of software development, integrating security into every phase of the development process is essential. Known as DevSecOps, this practice ensures security is a shared responsibility within the Continuous Integration and Continuous Deployment (CI/CD) pipeline.
This blog will guide you through building a robust DevSecOps CI/CD pipeline using Jenkins, a leading automation server. We will integrate key security tools to enhance the pipeline's security:
By the end of this blog, you'll understand how to configure Jenkins with these security tools to create a secure and efficient CI/CD pipeline. This approach helps detect and mitigate security risks early, ensuring your codebase remains secure and compliant with industry standards.
Let's dive into the world of DevSecOps and start building a secure CI/CD pipeline!
Trivy
Trivy is a tool that scans container images for vulnerabilities. It checks for security issues in your application and its dependencies, helping ensure your containers are safe to use.
SonarQube
SonarQube is a tool that analyzes your source code for bugs, vulnerabilities, and code quality issues. It helps you write cleaner, safer, and more maintainable code by identifying problems early in the development process.
OWASP Dependency-Check
OWASP Dependency-Check is a tool that identifies vulnerabilities in your project's third-party libraries and dependencies. It scans your project to find and report any known security issues in the software components you are using.
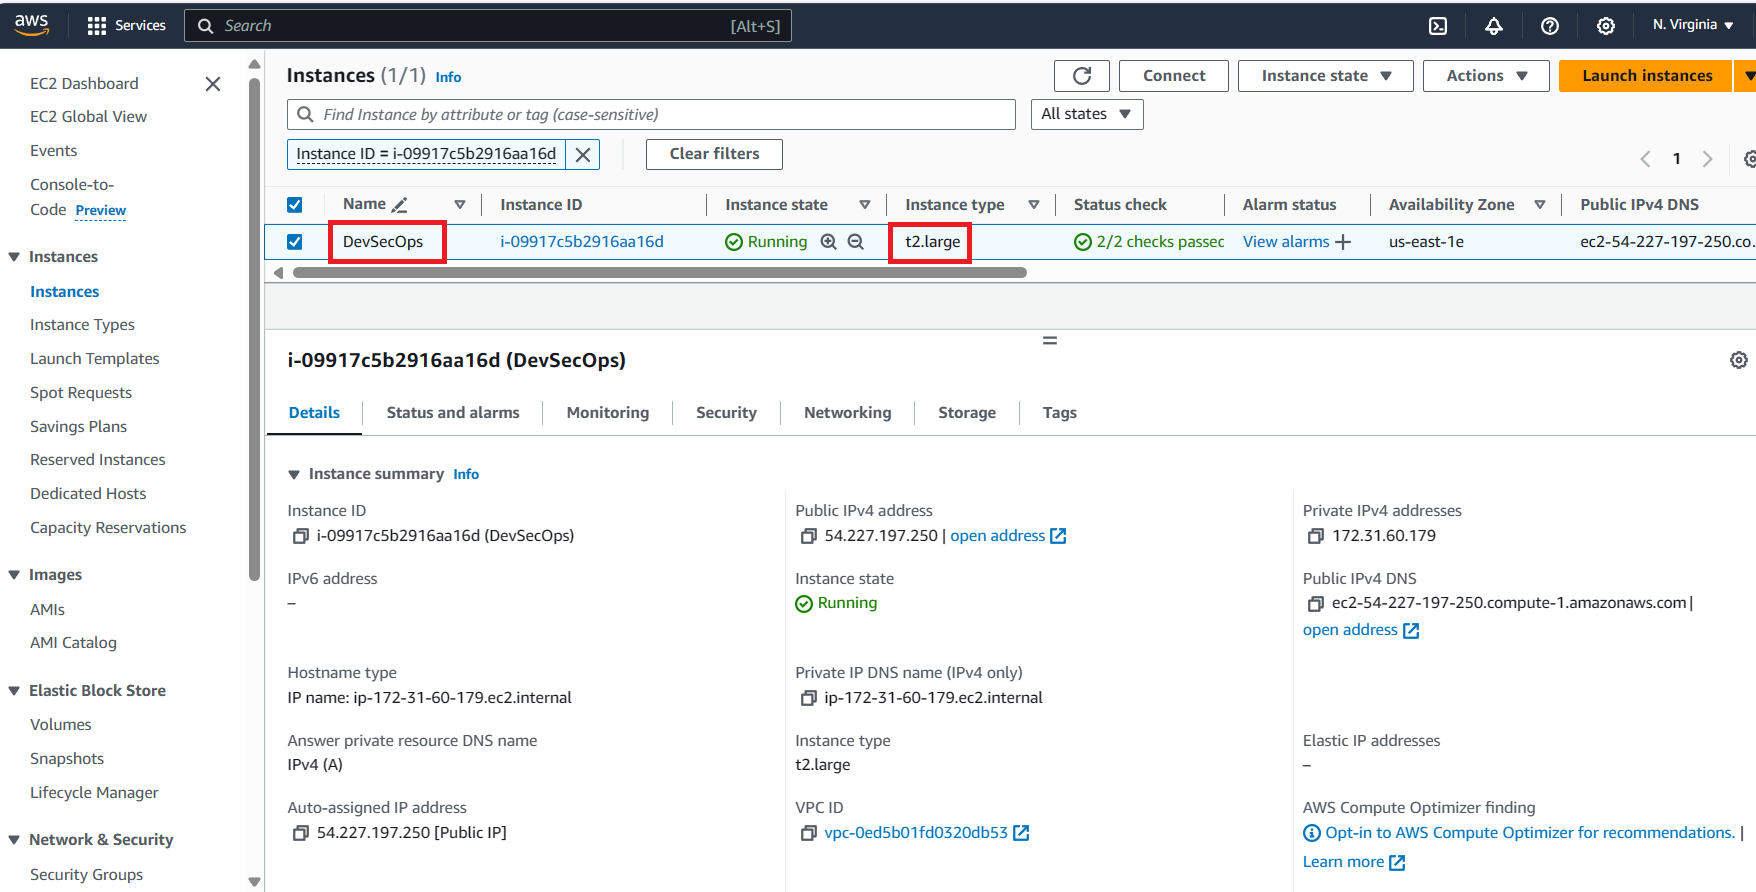
Step 1: Launch an ec2 instance with the following configuration
AMI: ubuntu
Instance type:t2 large
port 22, 80,443,8080, 9000, 5173 are opened
storage: 30 GiB
Step2: Install docker
sudo apt update
sudo apt-get install docker.io -y
sudo apt-get install docker-compose-v2 -y
docker ps
sudo usermod -aG docker $USER
sudo reboot
Step 3: Install and Setup Jenkins, SonarQube and Trivy
Install Jenkins
before install Jenkins it requires Java to run Jenkins
sudo apt update
sudo apt install fontconfig openjdk-17-jre
java -version
openjdk version "17.0.8" 2023-07-18
OpenJDK Runtime Environment (build 17.0.8+7-Debian-1deb12u1)
OpenJDK 64-Bit Server VM (build 17.0.8+7-Debian-1deb12u1, mixed mode, sharing)
Install and setup and unlock Jenkins
sudo wget -O /usr/share/keyrings/jenkins-keyring.asc \
  https://pkg.jenkins.io/debian-stable/jenkins.io-2023.key
echo "deb [signed-by=/usr/share/keyrings/jenkins-keyring.asc]" \
  https://pkg.jenkins.io/debian-stable binary/ | sudo tee \
  /etc/apt/sources.list.d/jenkins.list > /dev/null
sudo apt-get update
sudo apt-get install jenkins
sudo usermod -aG docker jenkins
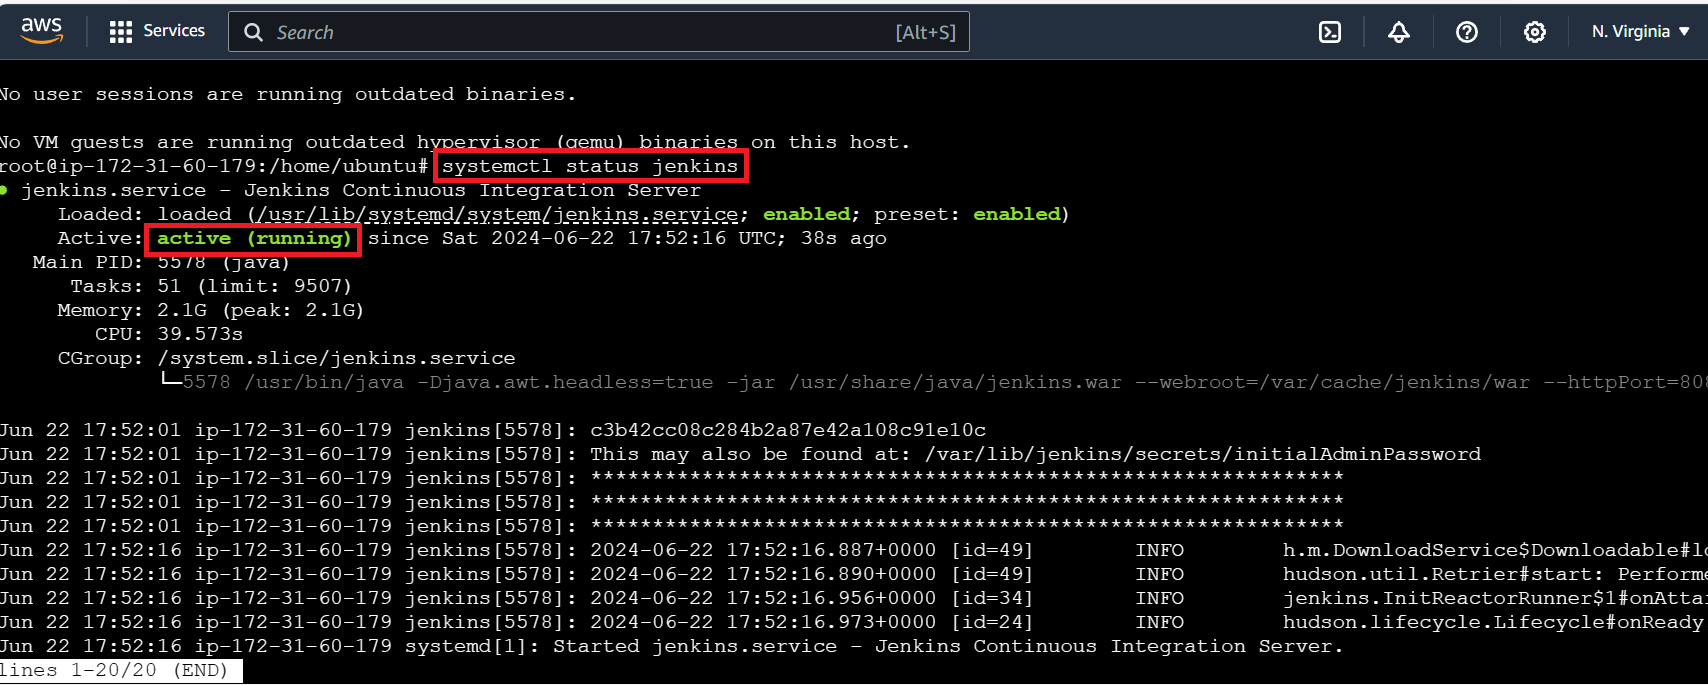
Execute the below command to check the status of Jenkins
systemctl status jenkins
Unlock jenkins
access jenkins server on public Ip address of ec2 instance using port 8080
http://54.227.197.250:8080
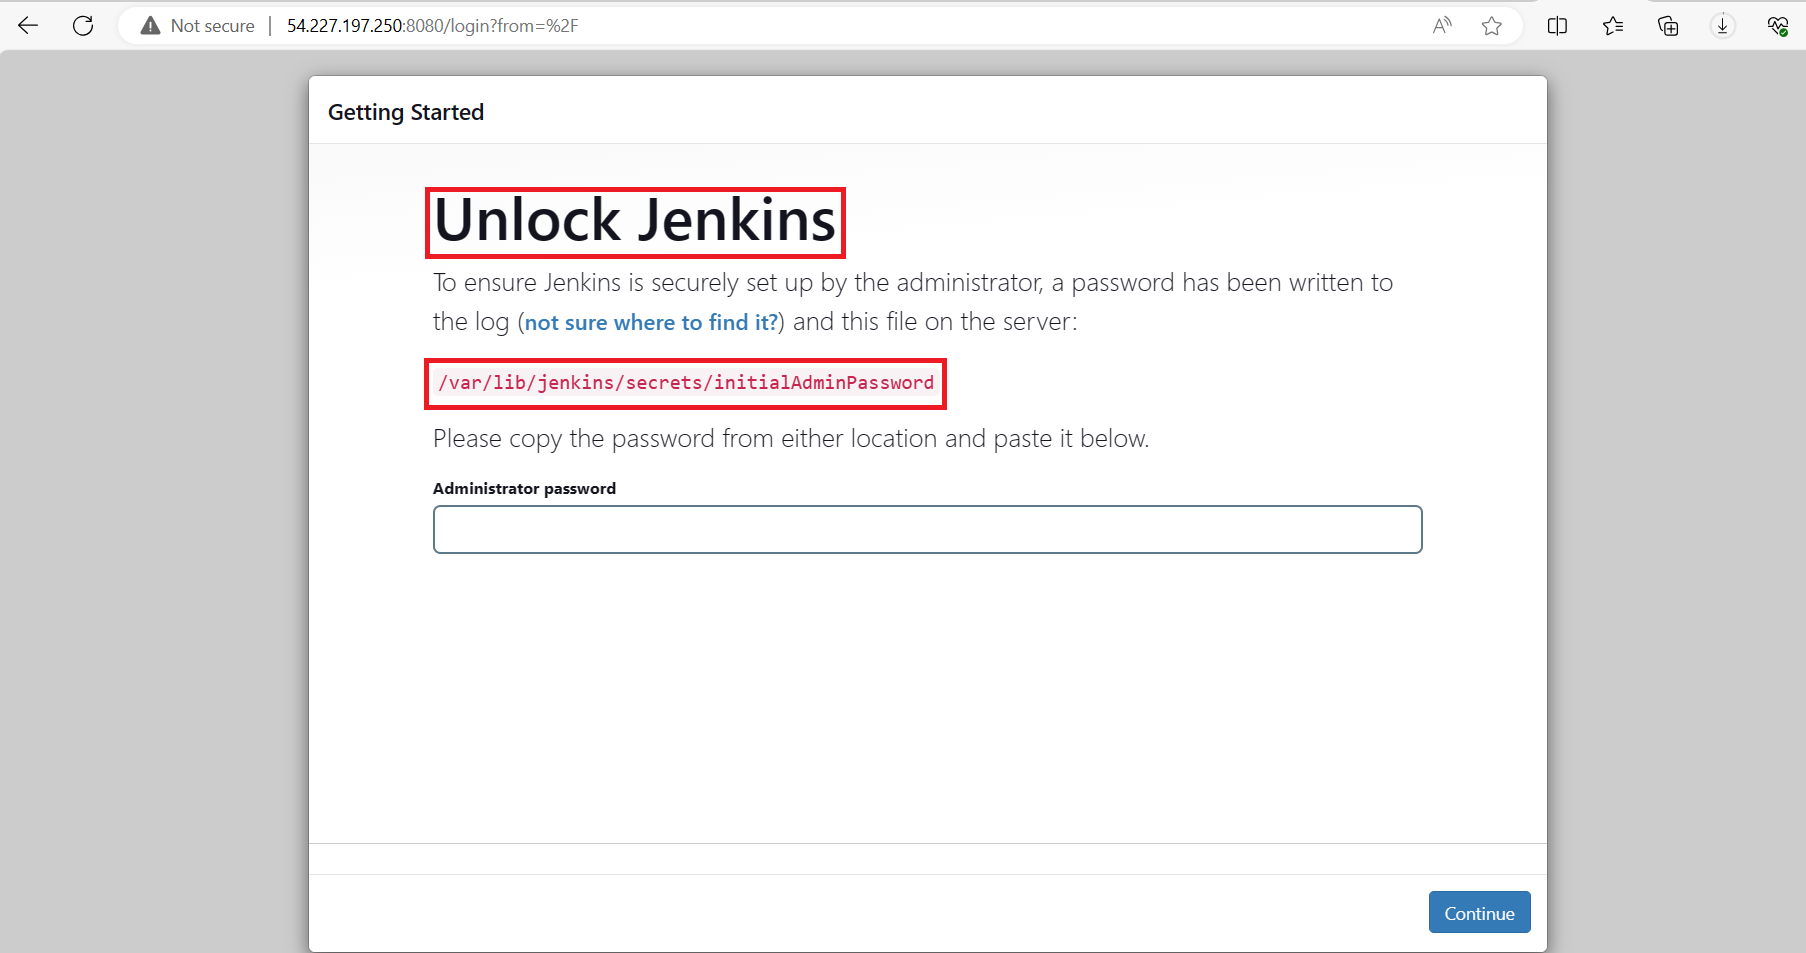
to get the Administrator password go on ec2 instance and execute below command
sudo cat /var/lib/jenkins/secrets/initialAdminPassword

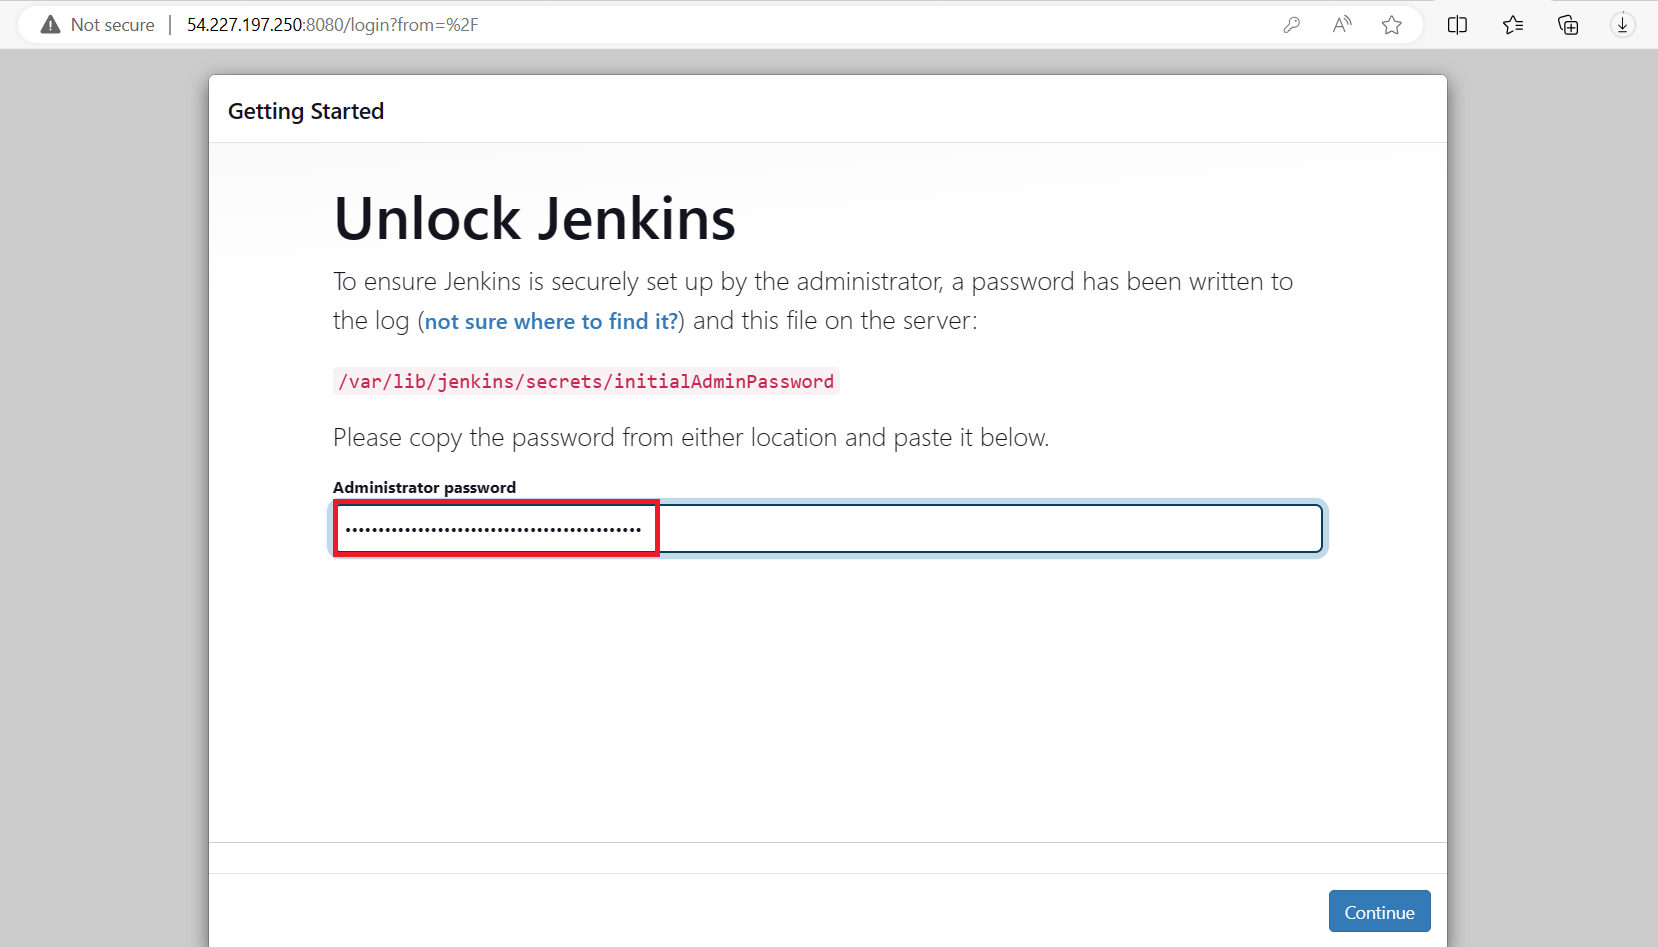
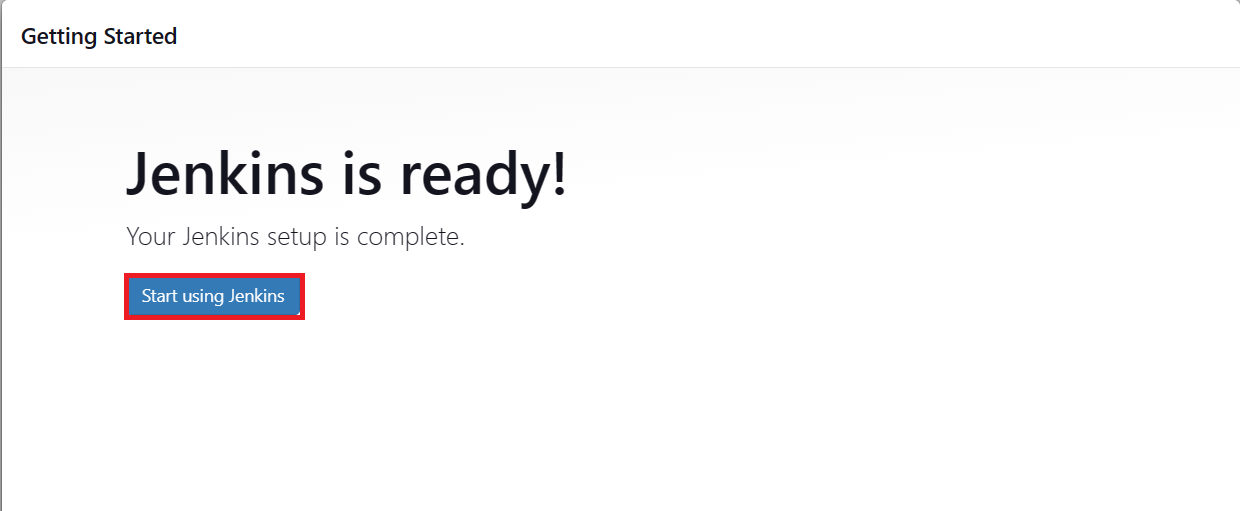
Your Jenkins is Ready!
Install and setup SonarQube
Here we are installing SonarQube through docker image
execute below command
docker run -itd --name sonarqube-server -p 9000:9000 sonarqube:lts-community
access the SonarQube server with public IP address of an ec2 server
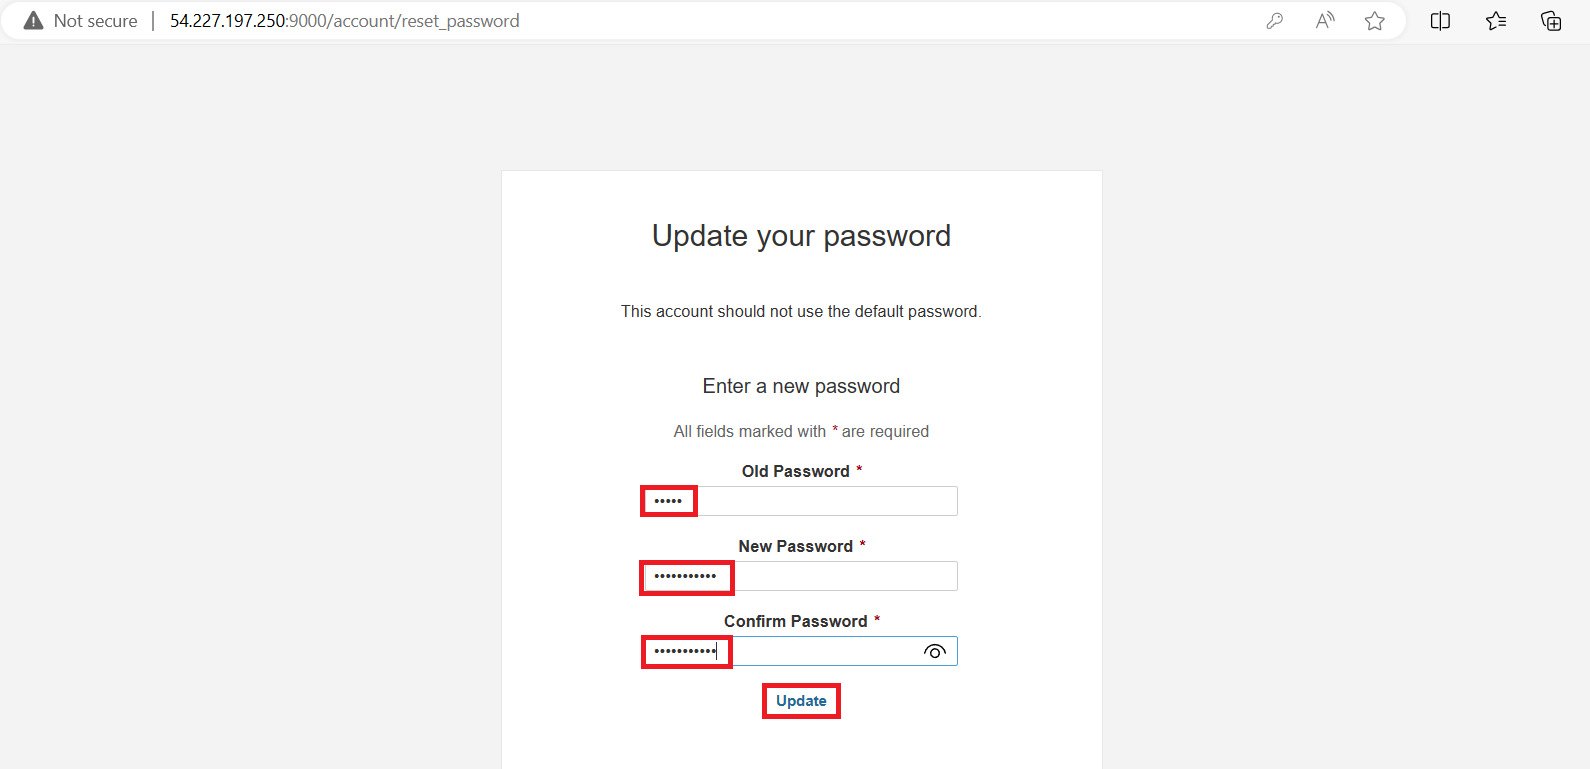
Initial user Id and password is admin
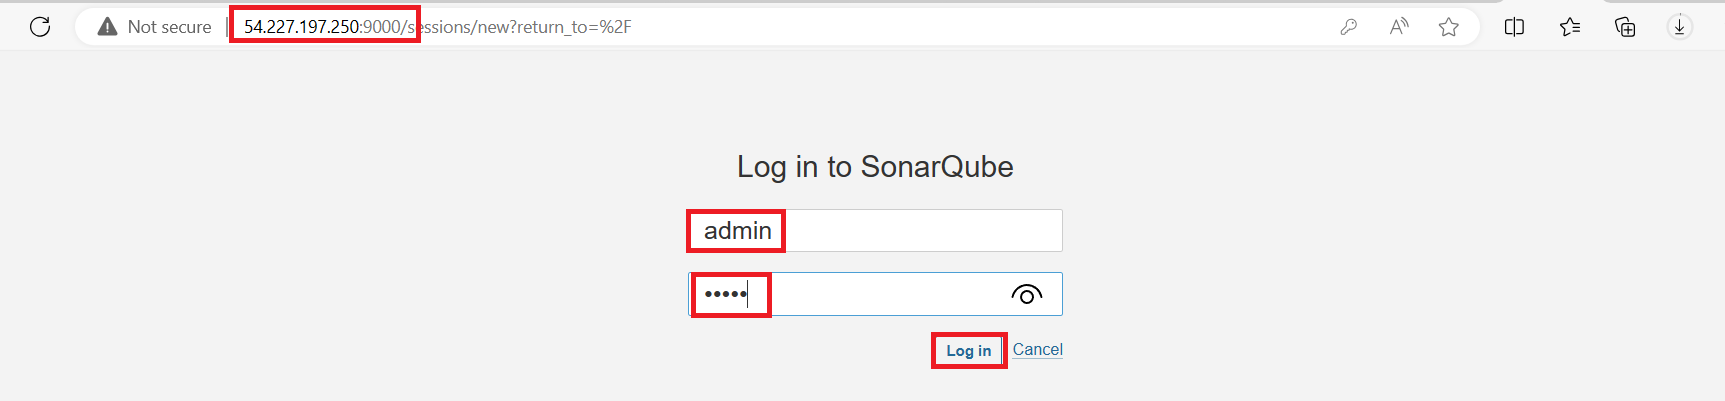
update your password here
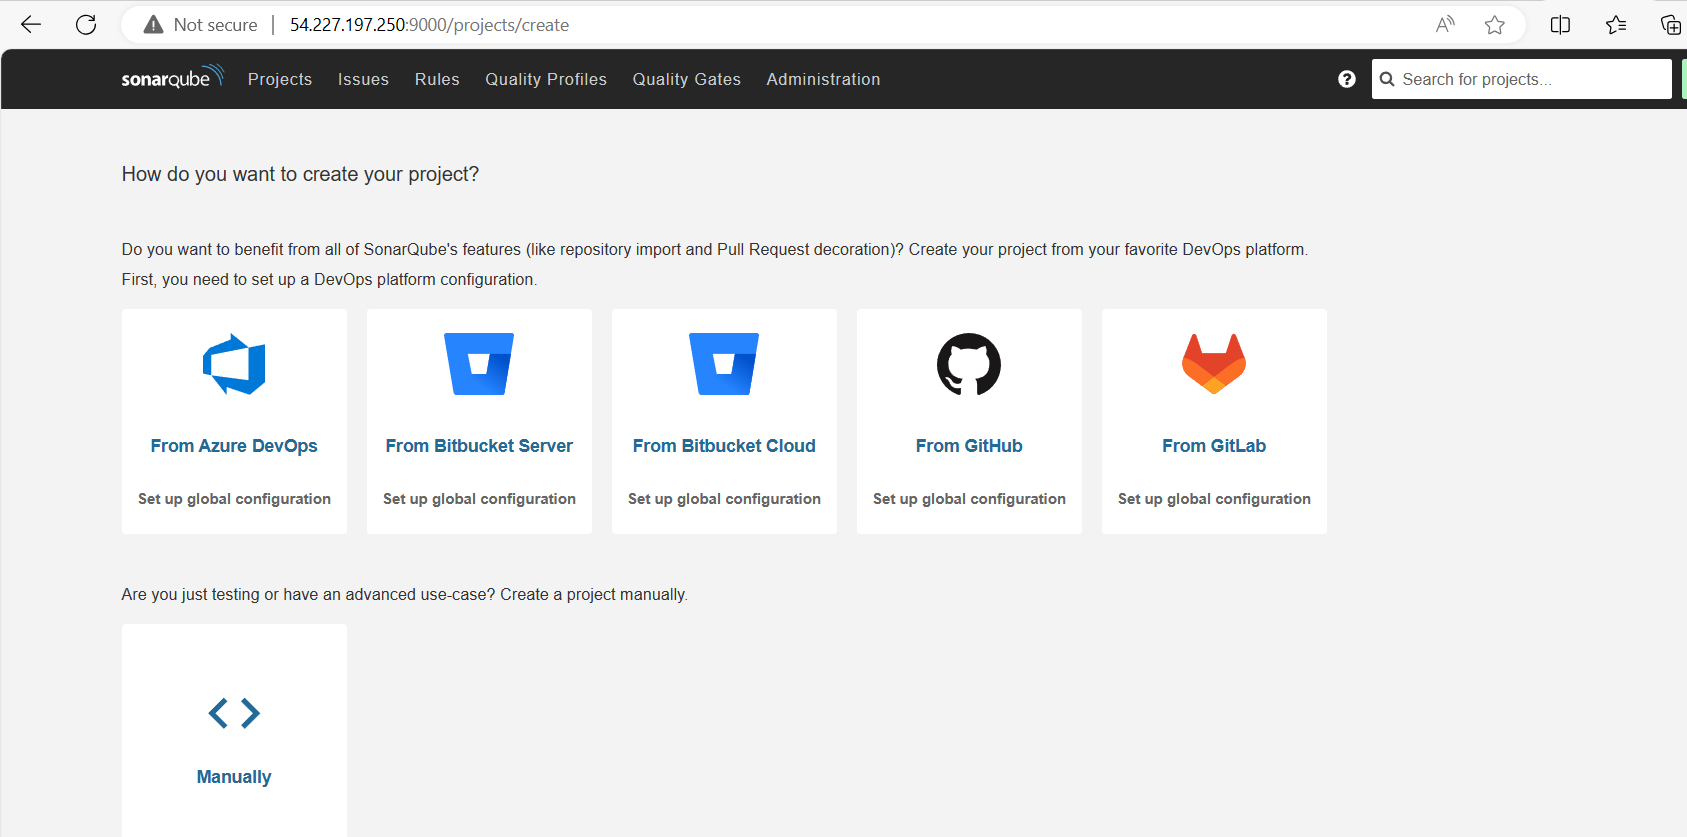
Here you are good to go with SonarQube!
Trivy-Installation and Setup
sudo apt-get install wget apt-transport-https gnupg lsb-release
wget -qO - https://aquasecurity.github.io/trivy-repo/deb/public.key | gpg --dearmor | sudo tee /usr/share/keyrings/trivy.gpg > /dev/null
echo "deb [signed-by=/usr/share/keyrings/trivy.gpg] https://aquasecurity.github.io/trivy-repo/deb $(lsb_release -sc) main" | sudo tee -a /etc/apt/sources.list.d/trivy.list
sudo apt-get update
sudo apt-get install trivy
trivy --version
trivy image imagename
trivy fs --security-checks vuln,config  Folder_name_OR_Path
trivy image --severity HIGH,CRITICAL image_name
trivy image -f json -o results.json image_name
trivy repo repo-url
trivy k8s --report summary cluster
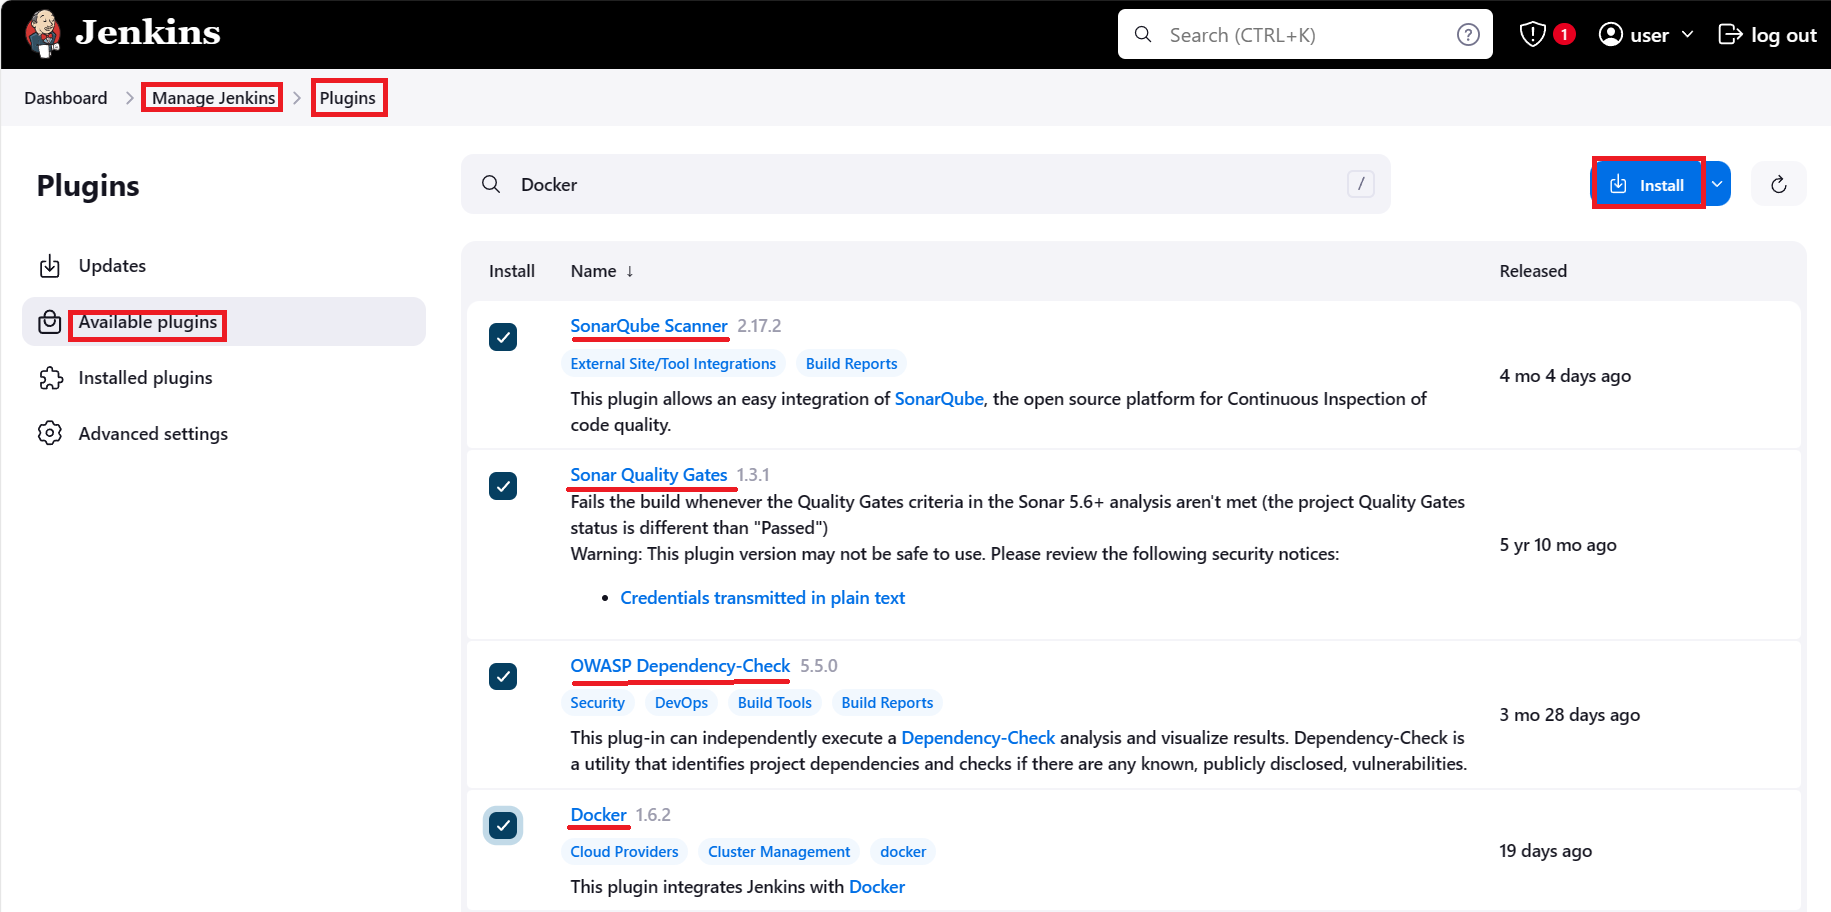
Step 4: Navigate to the jenkins and install required plugins
jenkins-> manage jenkins-> plugins->available plugins
Install the below plugins
SonarQube Scanner (Version2.17.1)
Sonar Quality Gates (Version1.3.1)
OWASP Dependency-Check (Version5.5.0)
Docker (Version1.6.2)
Step 5: Integrate Jenkins with SonarQube
Navigate to the sonarqube portal
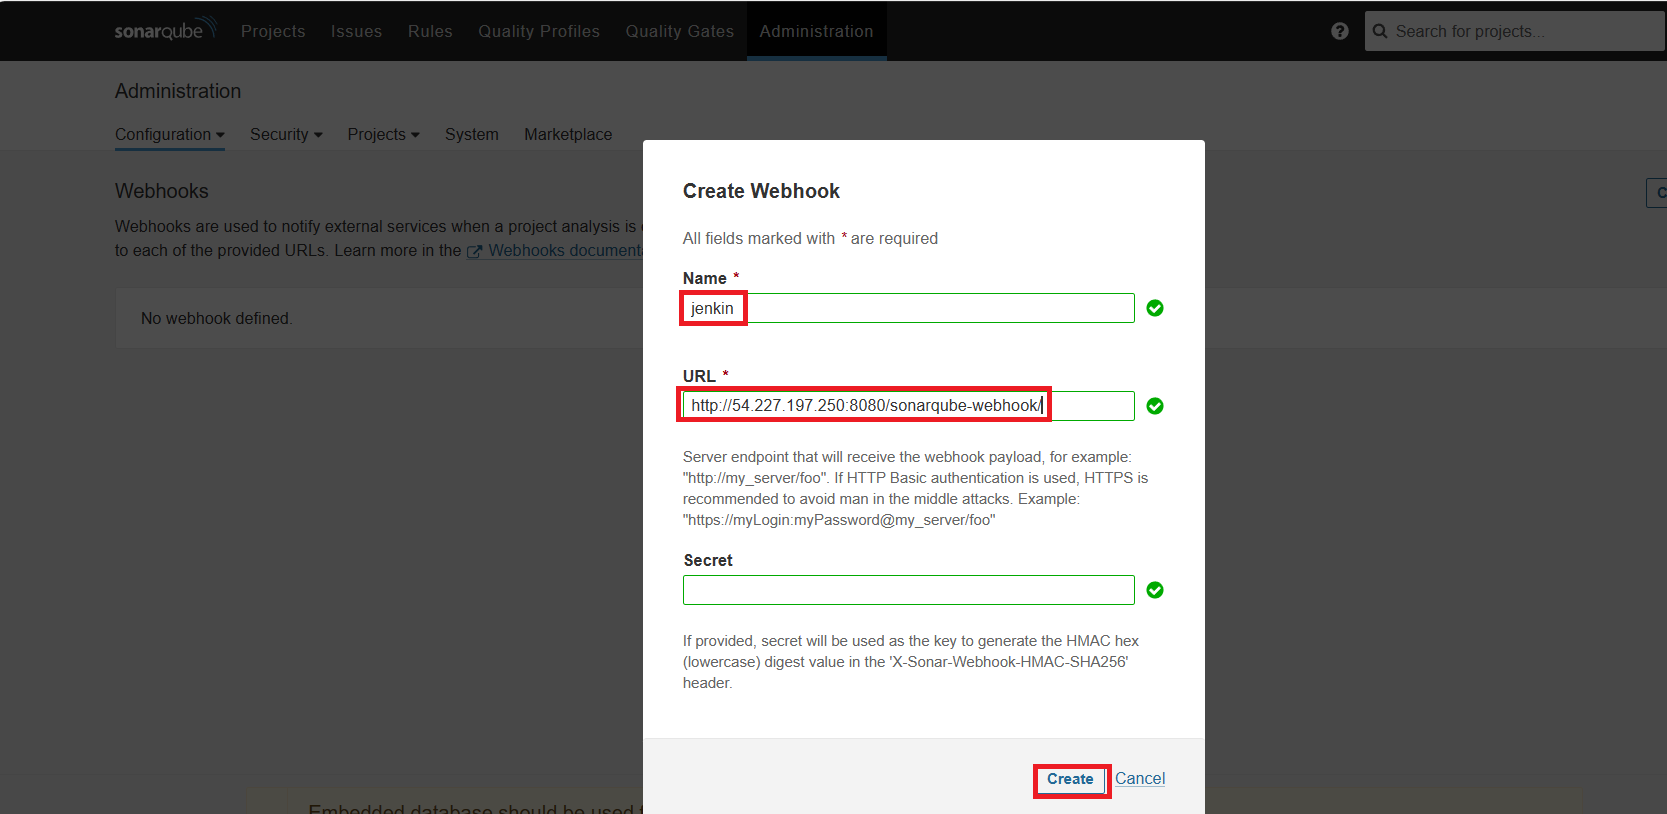
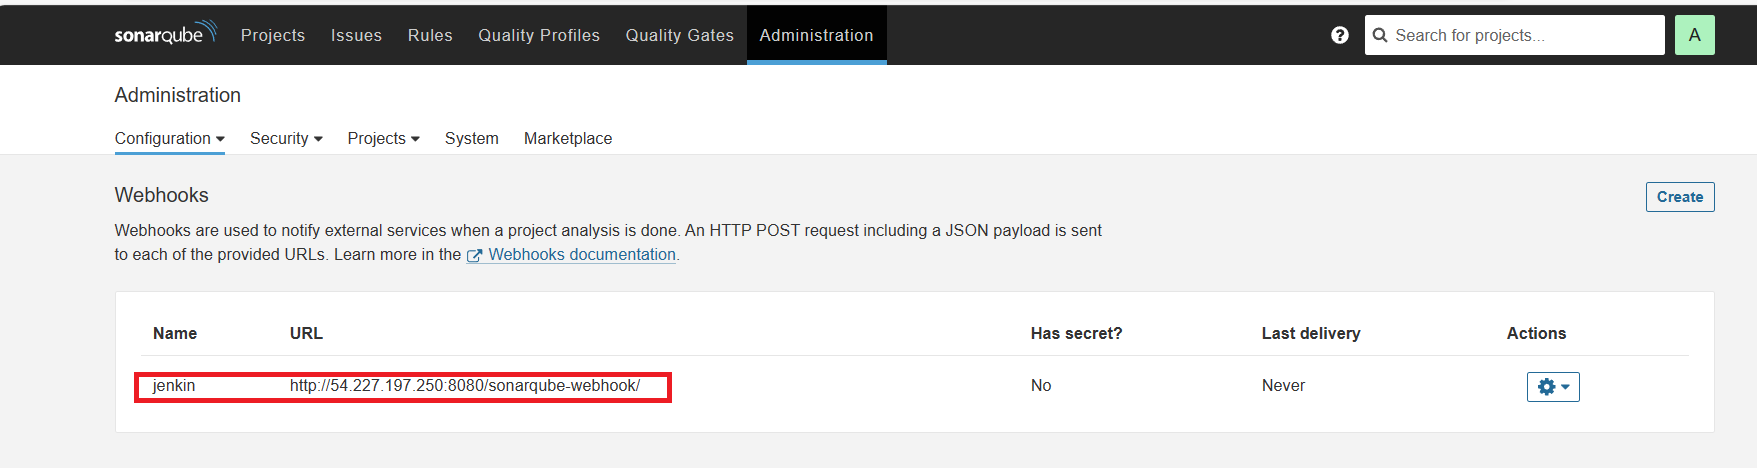
Administration -> configuration ->webhooks
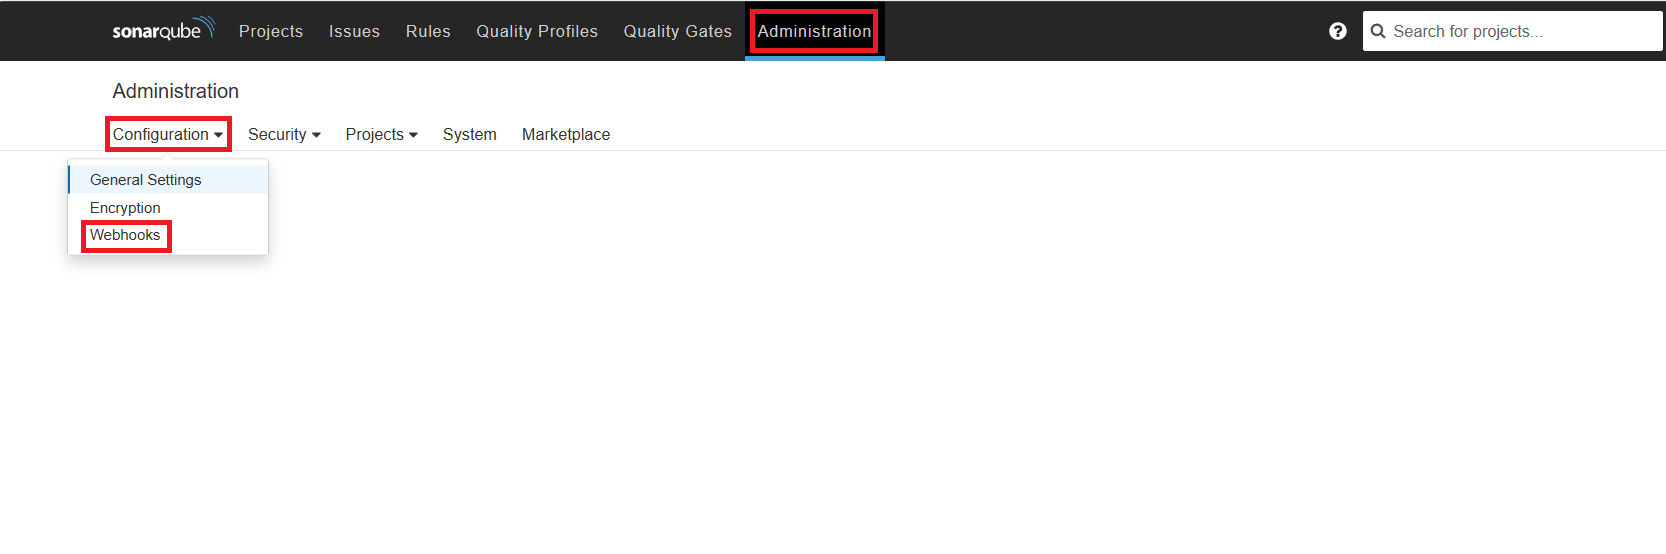
The URL is your jenkins URL
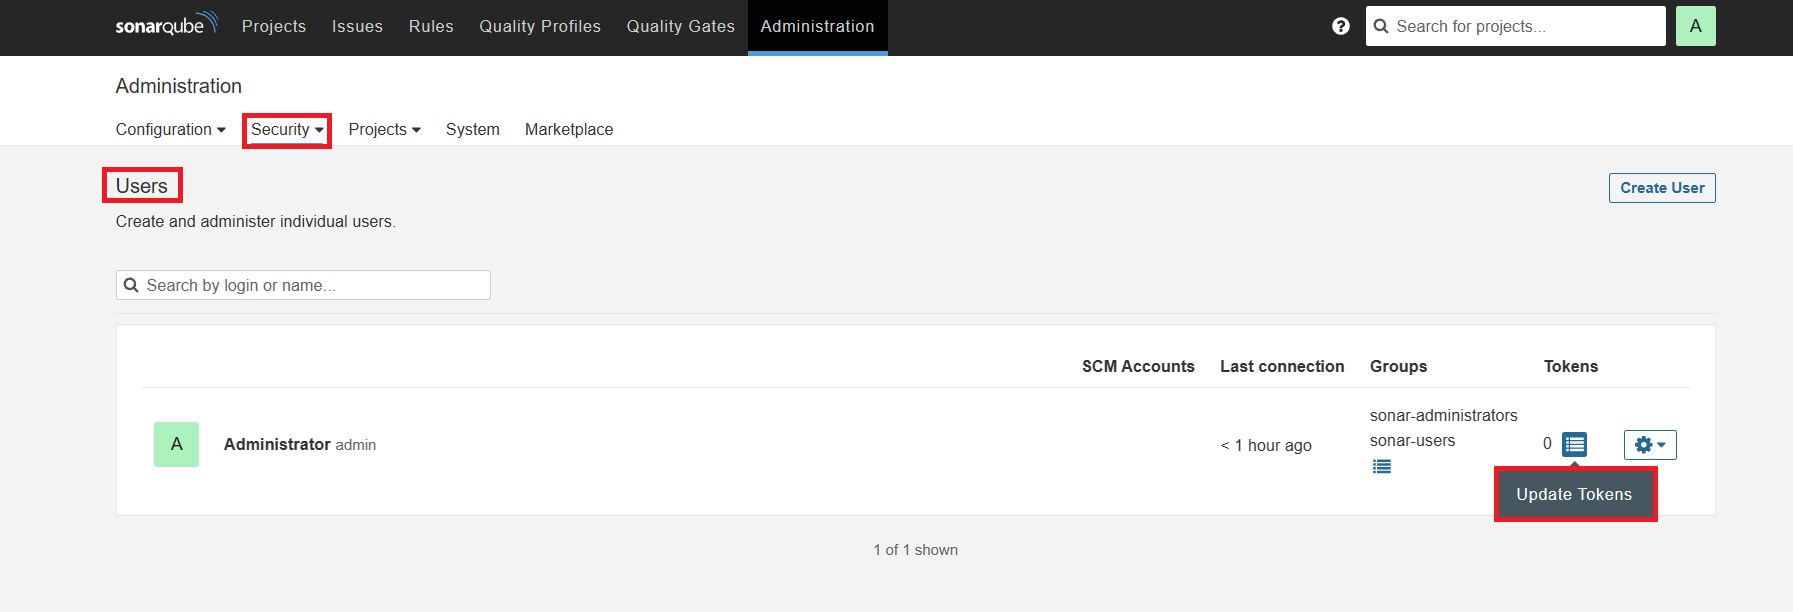
Now create Access token for that go to security on SonarQube portal
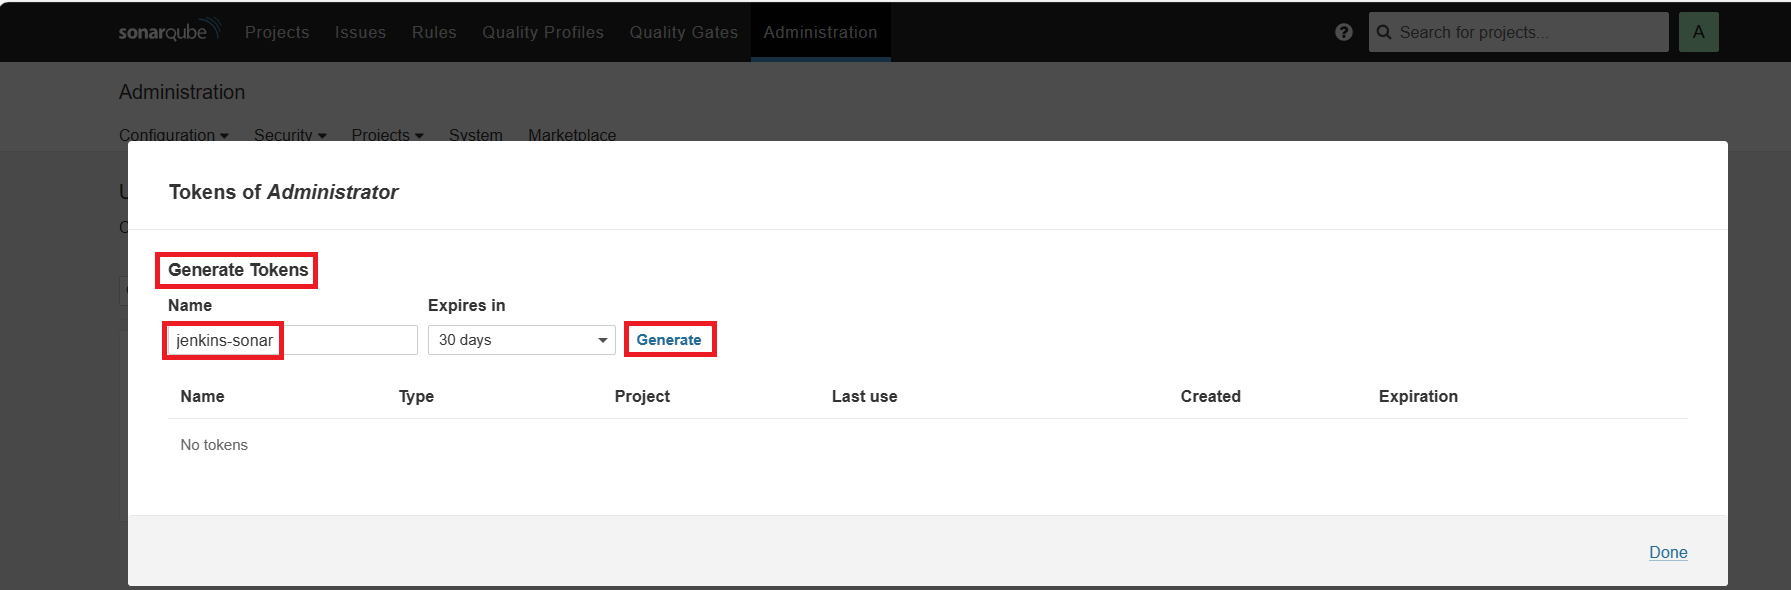
Copy the Token
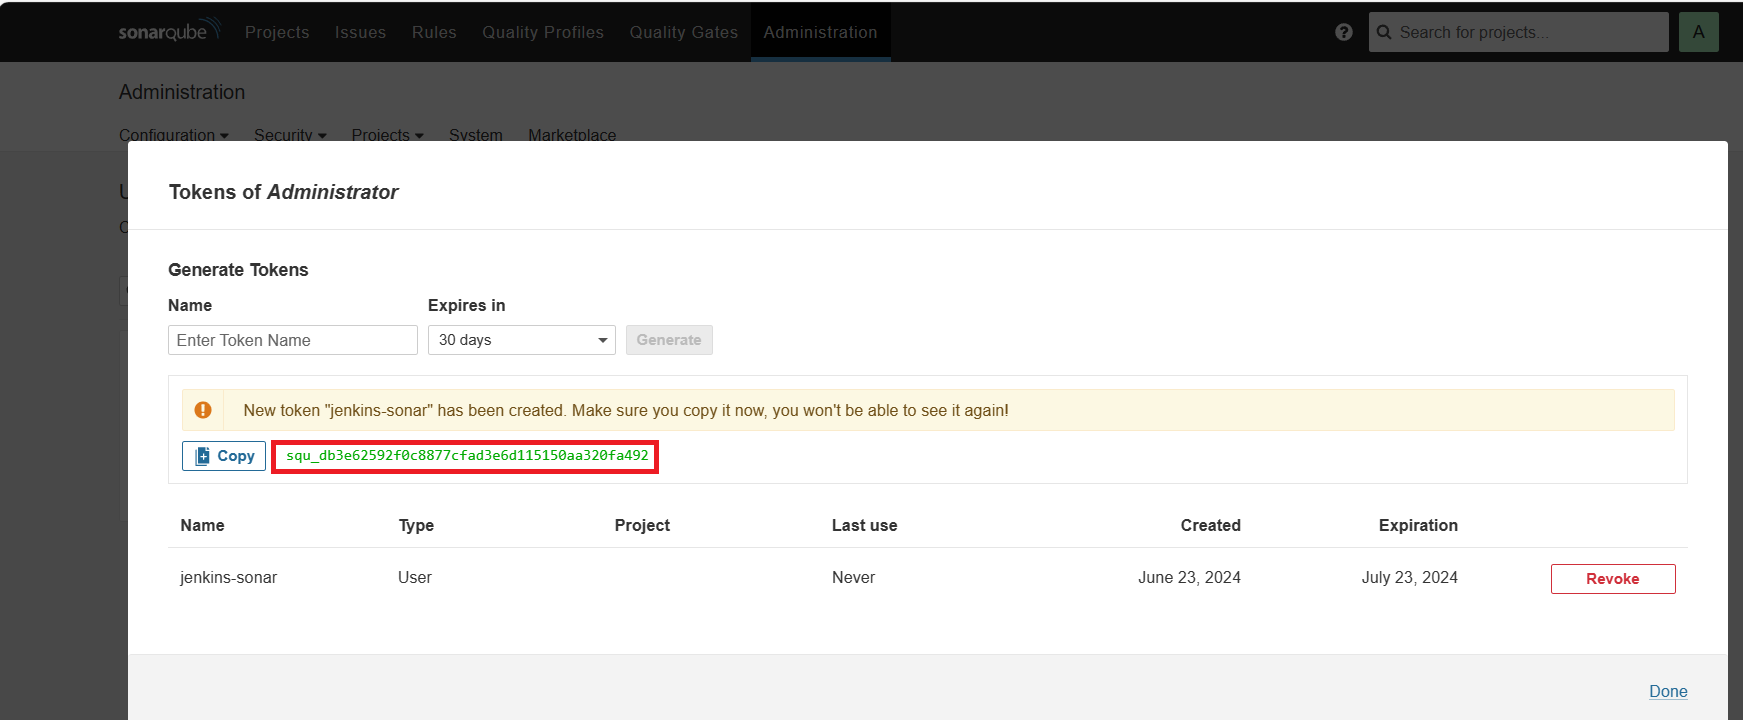
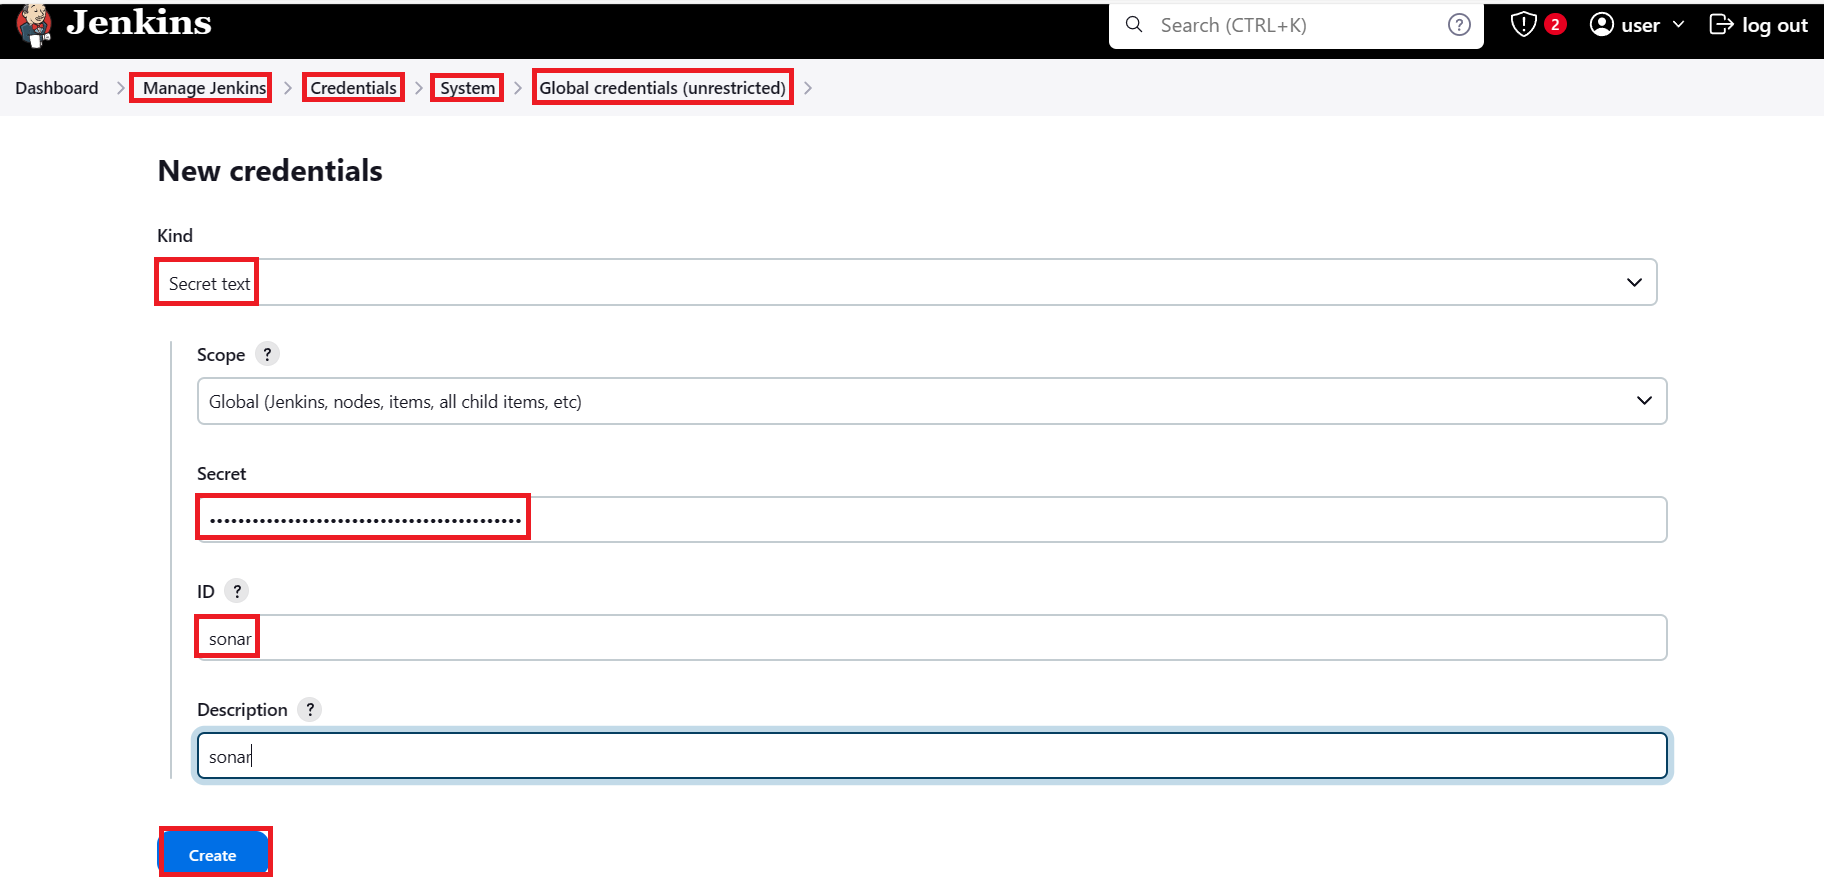
Navigate to the jenkins dashboard Add the token we created earlier
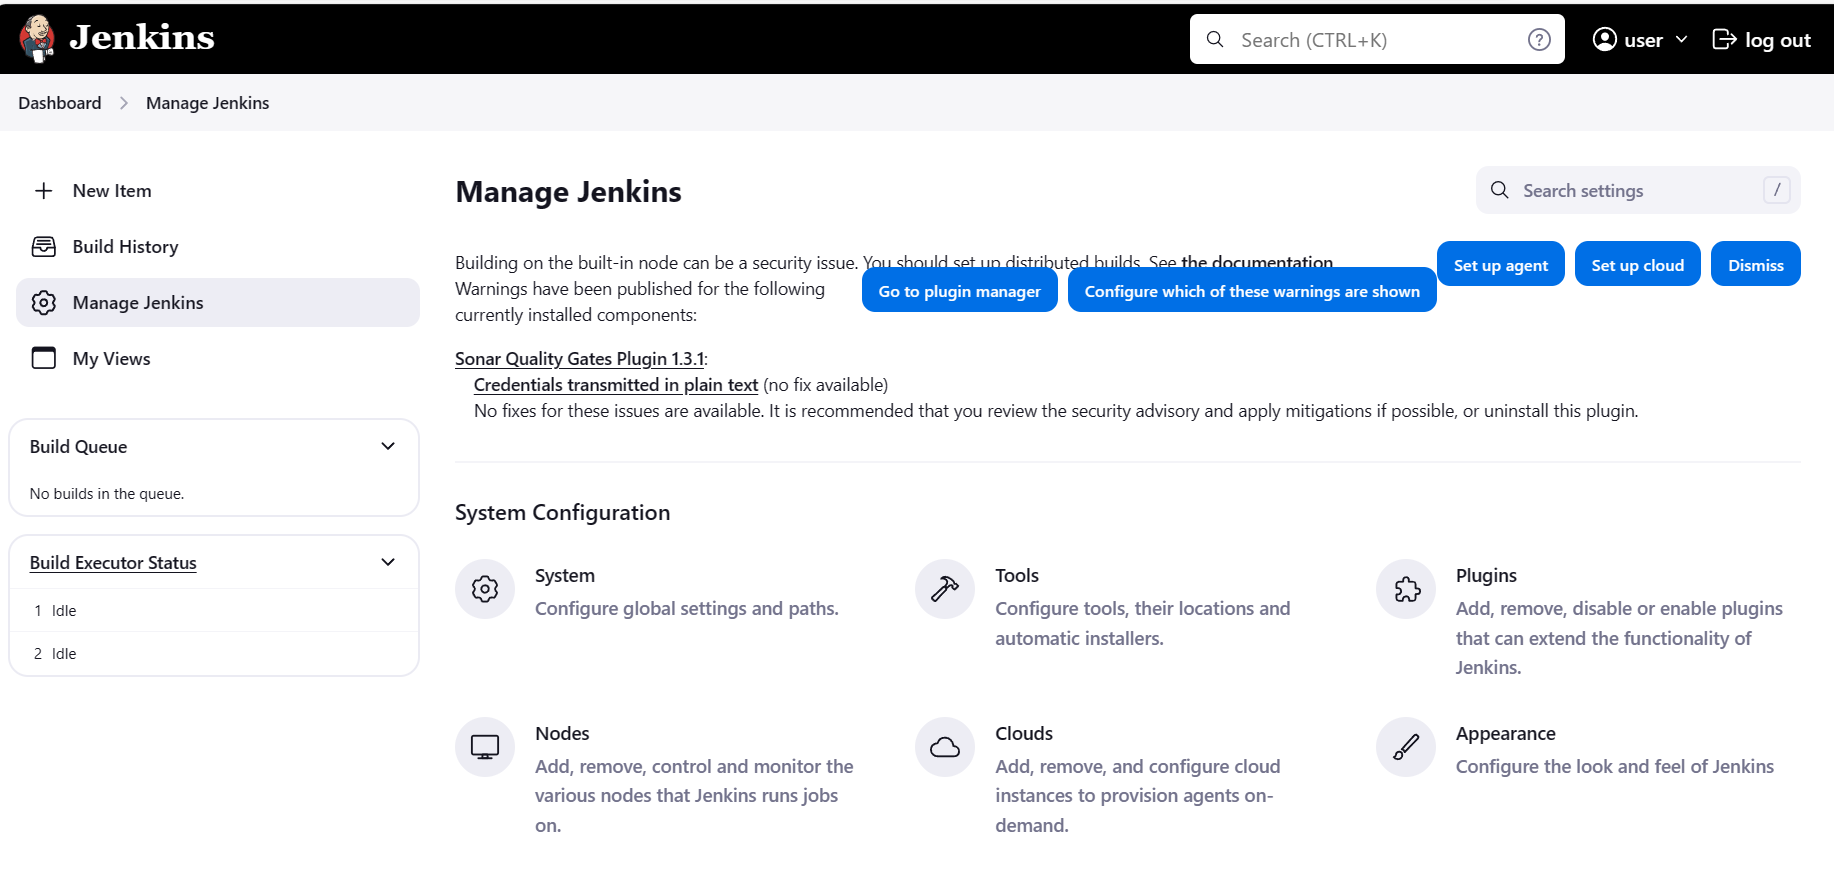
Navigate to manage jenkins ->systems
Following this, we'll establish the connection between the SonarQube server and Jenkins
Search for SonarQube Installation add information and save
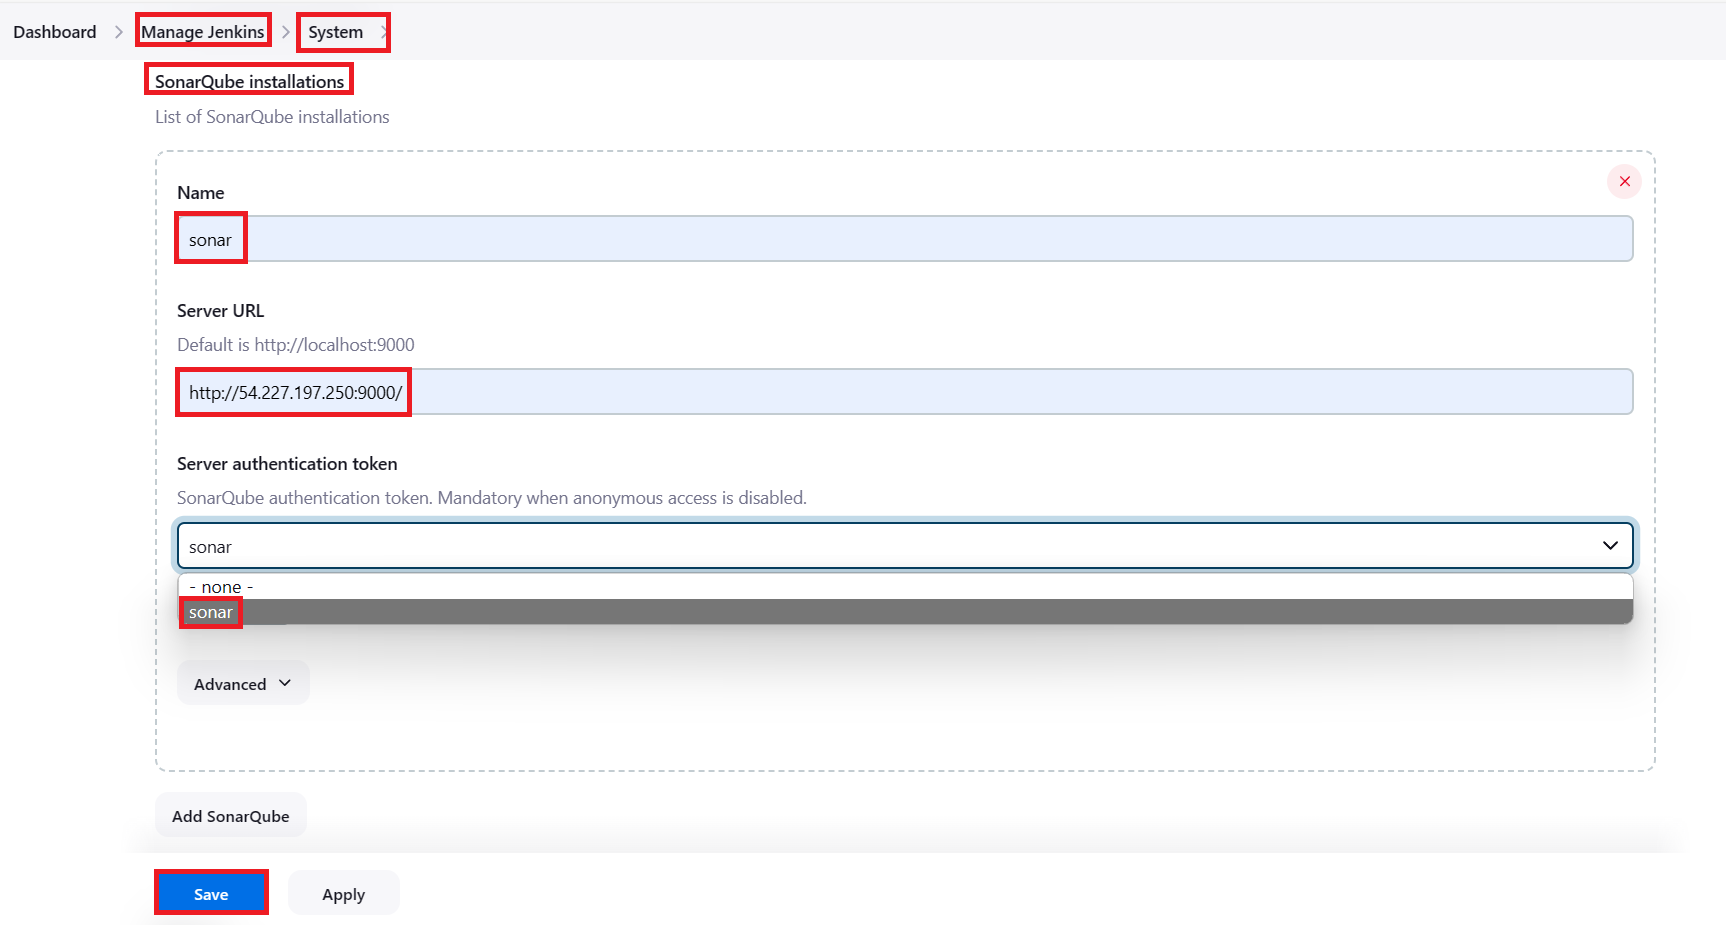
The integration of the Jenkins and SonarQube has been done
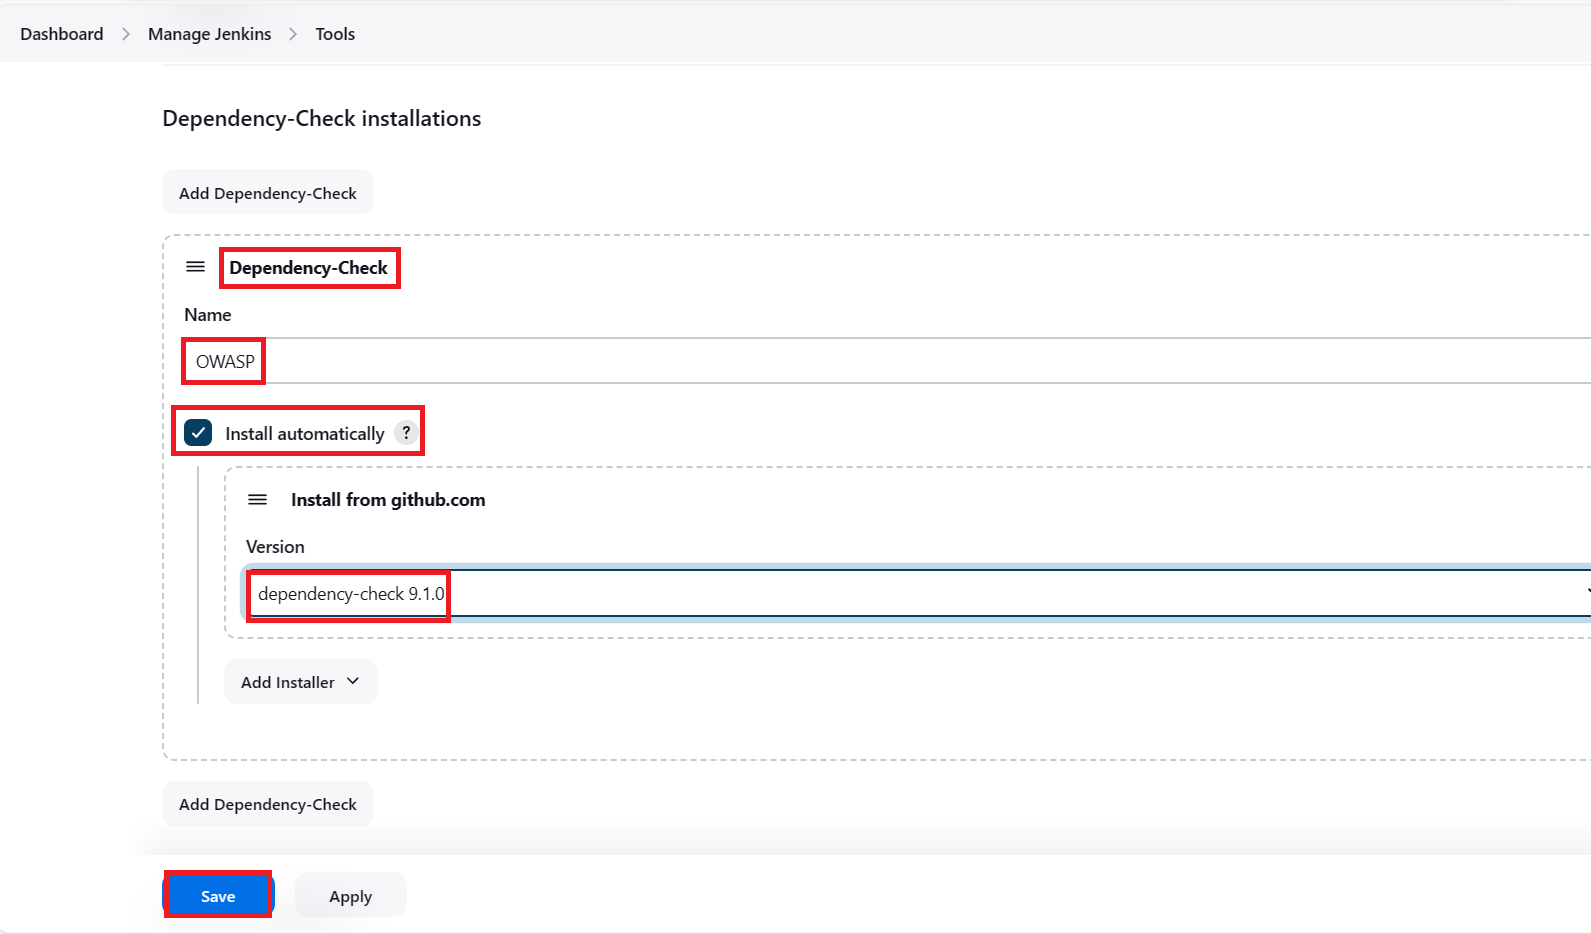
Step 6: Install the quality gates for sonarqube and add dependency check OWASP
Navigate to jenkins -> manage jenkins -> tools
search for SonarQube scanner installation
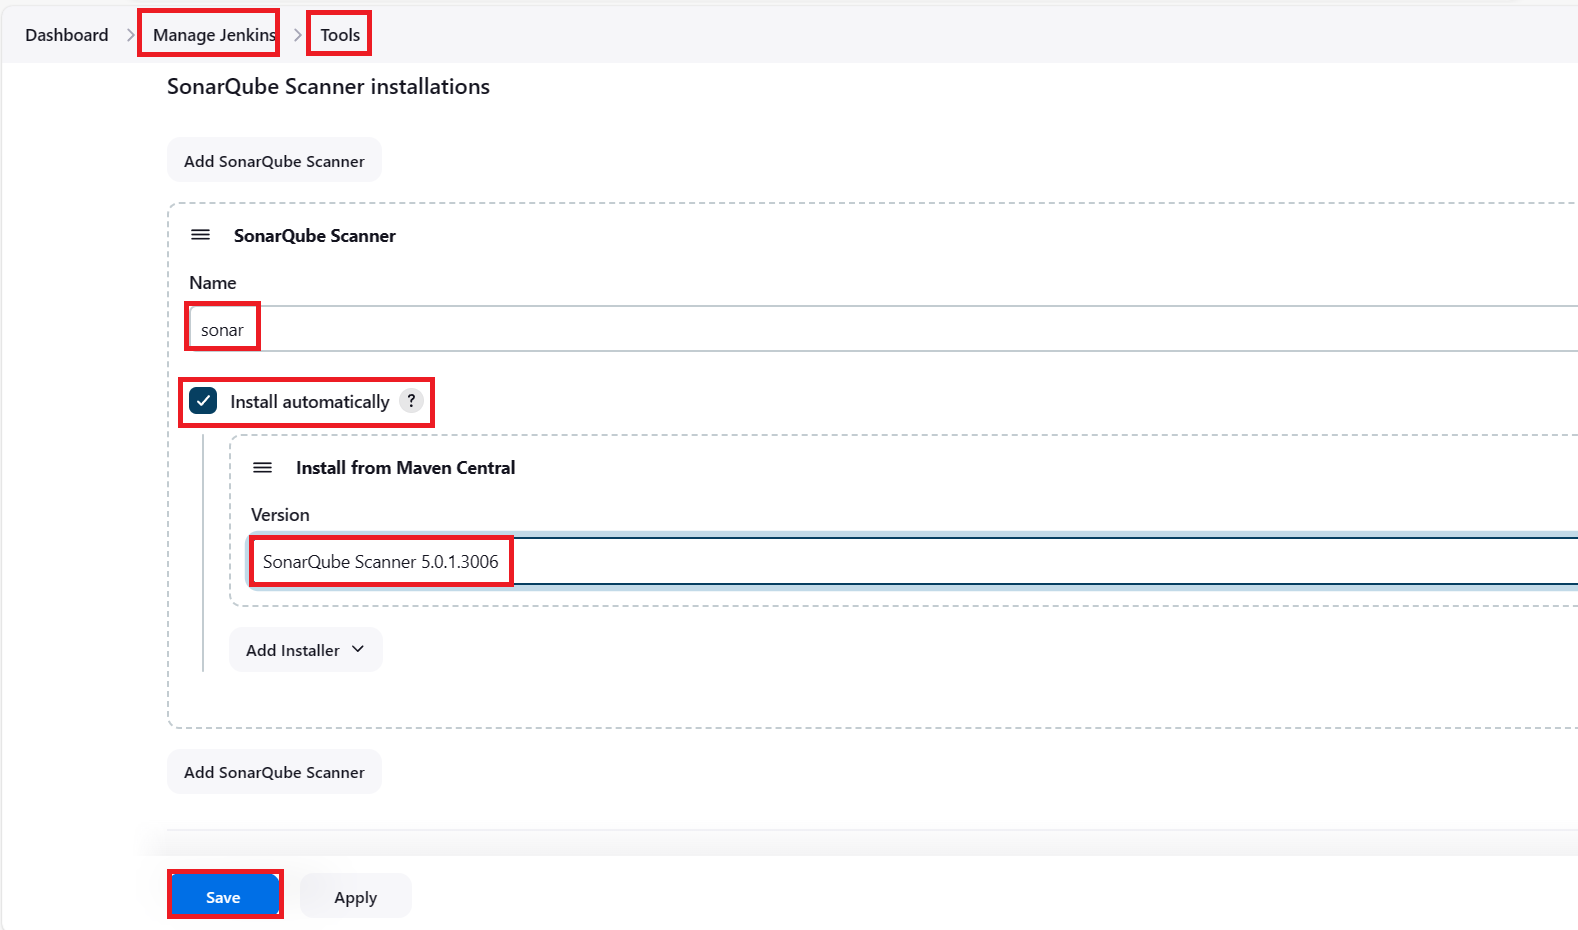
again, navigate to the manage jenkins -> tools & search for Dependency-Check Installation
Step 7: Get the Source Code
Step 8: Create A jenkins CICD pipeline Job
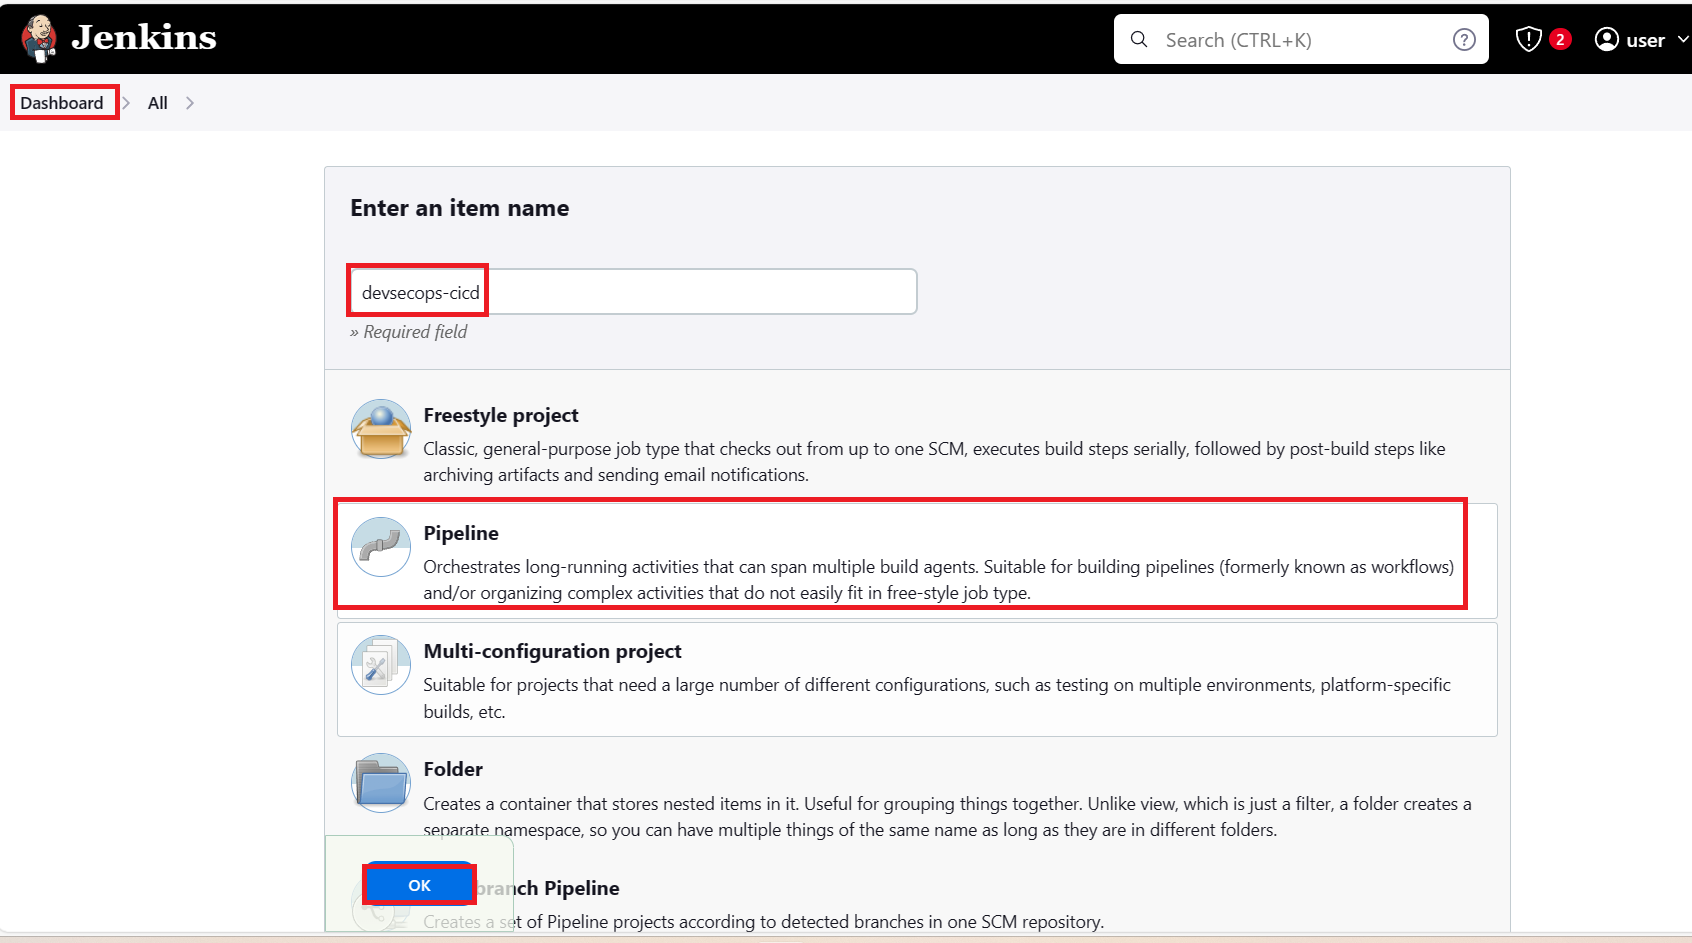
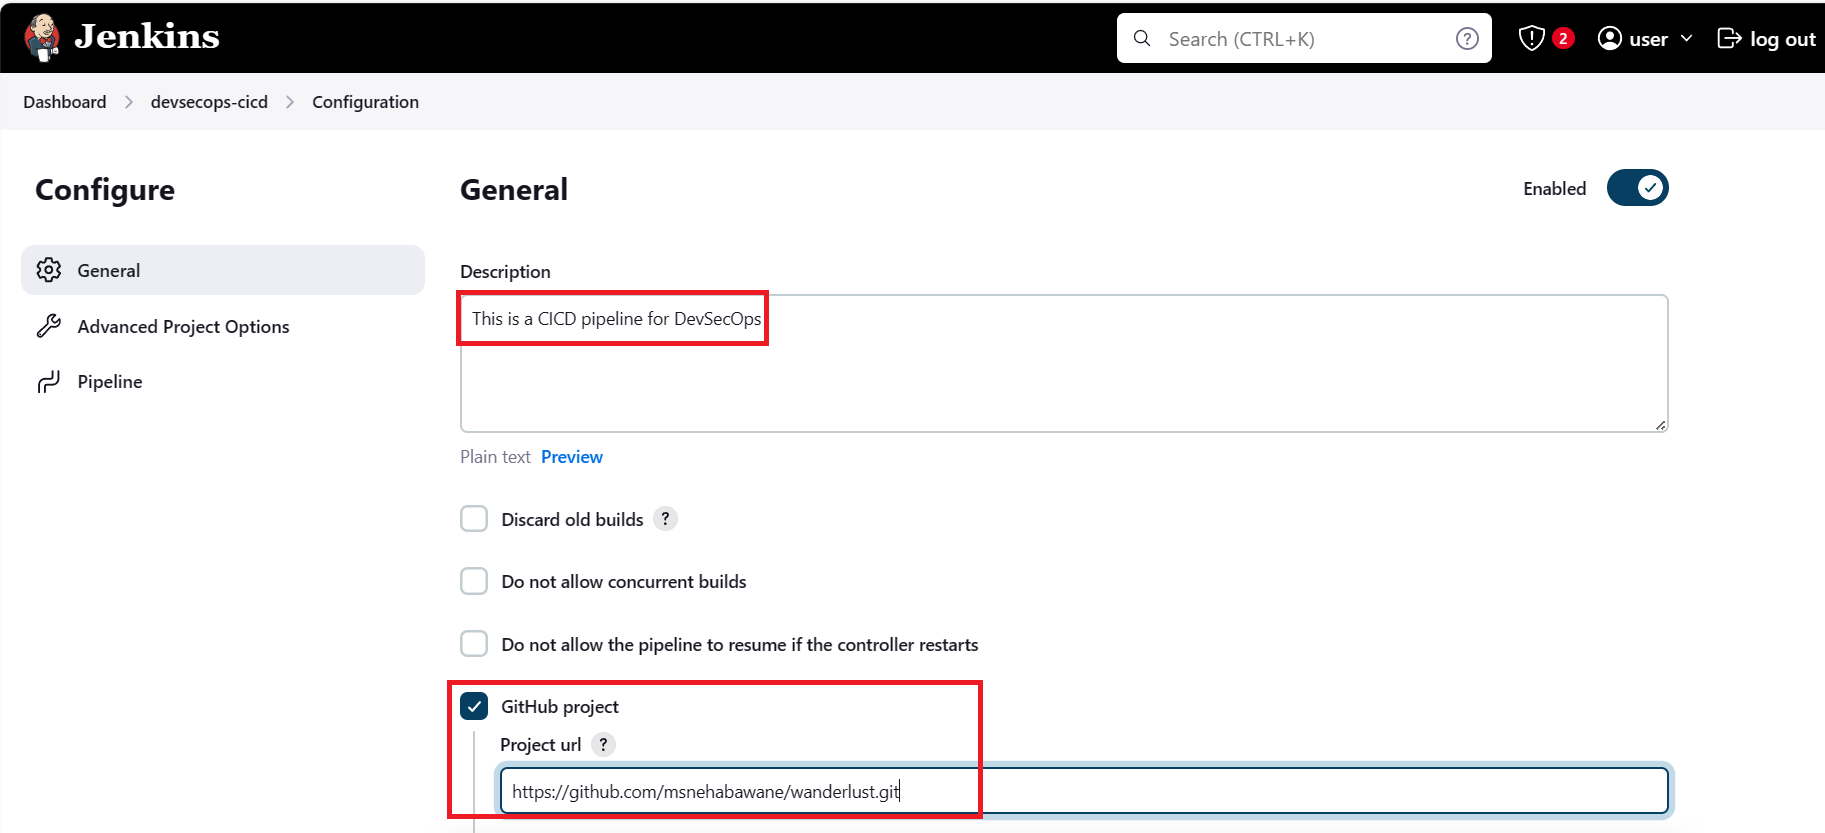
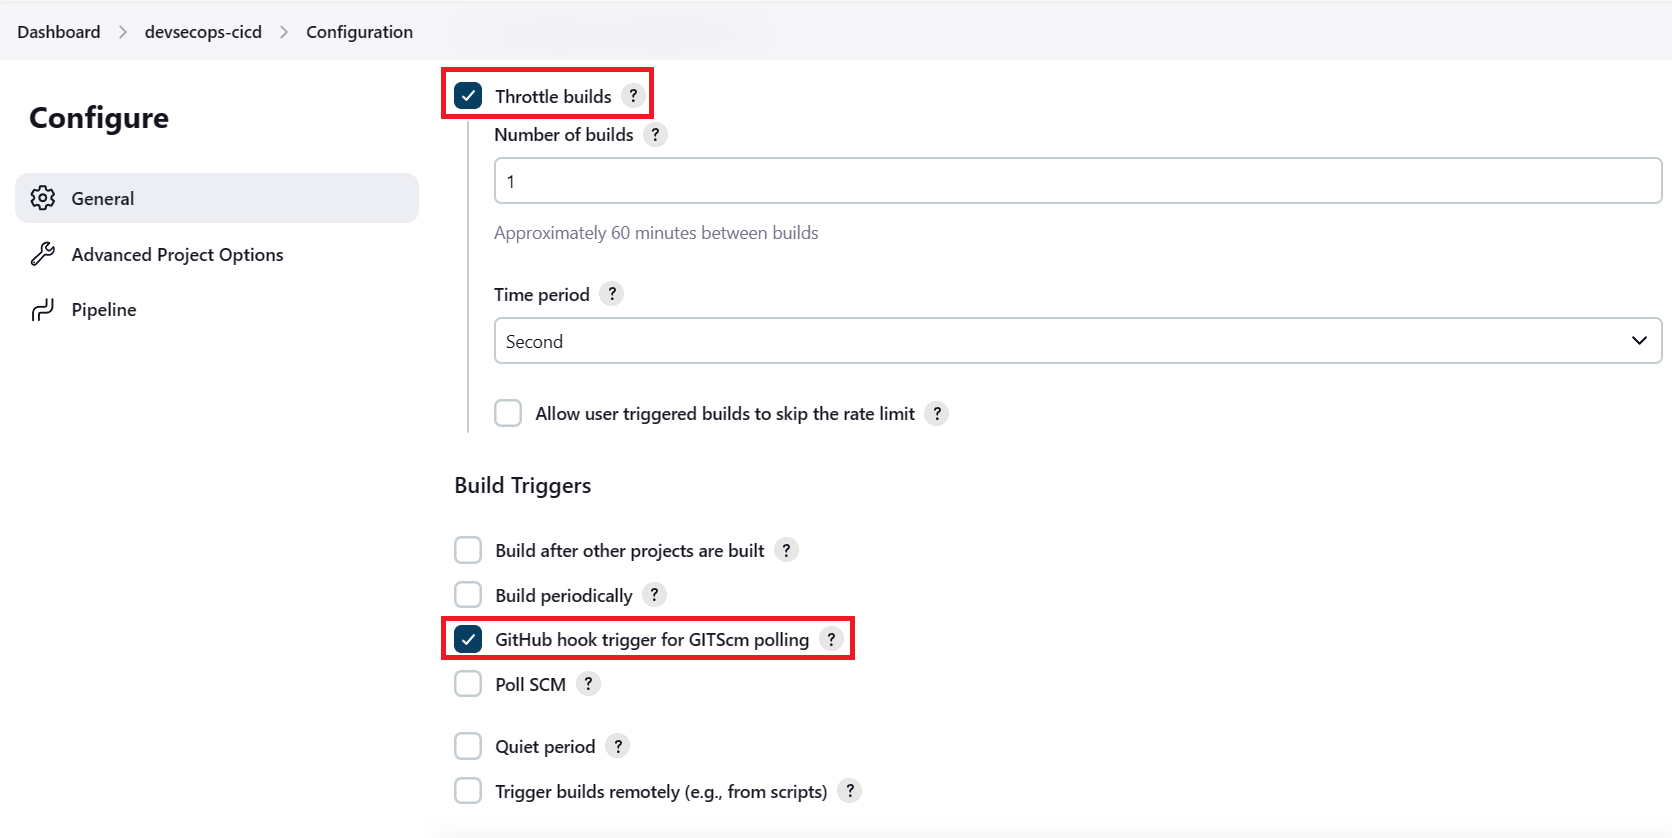
Write a CICD Pipeline script here and click on save
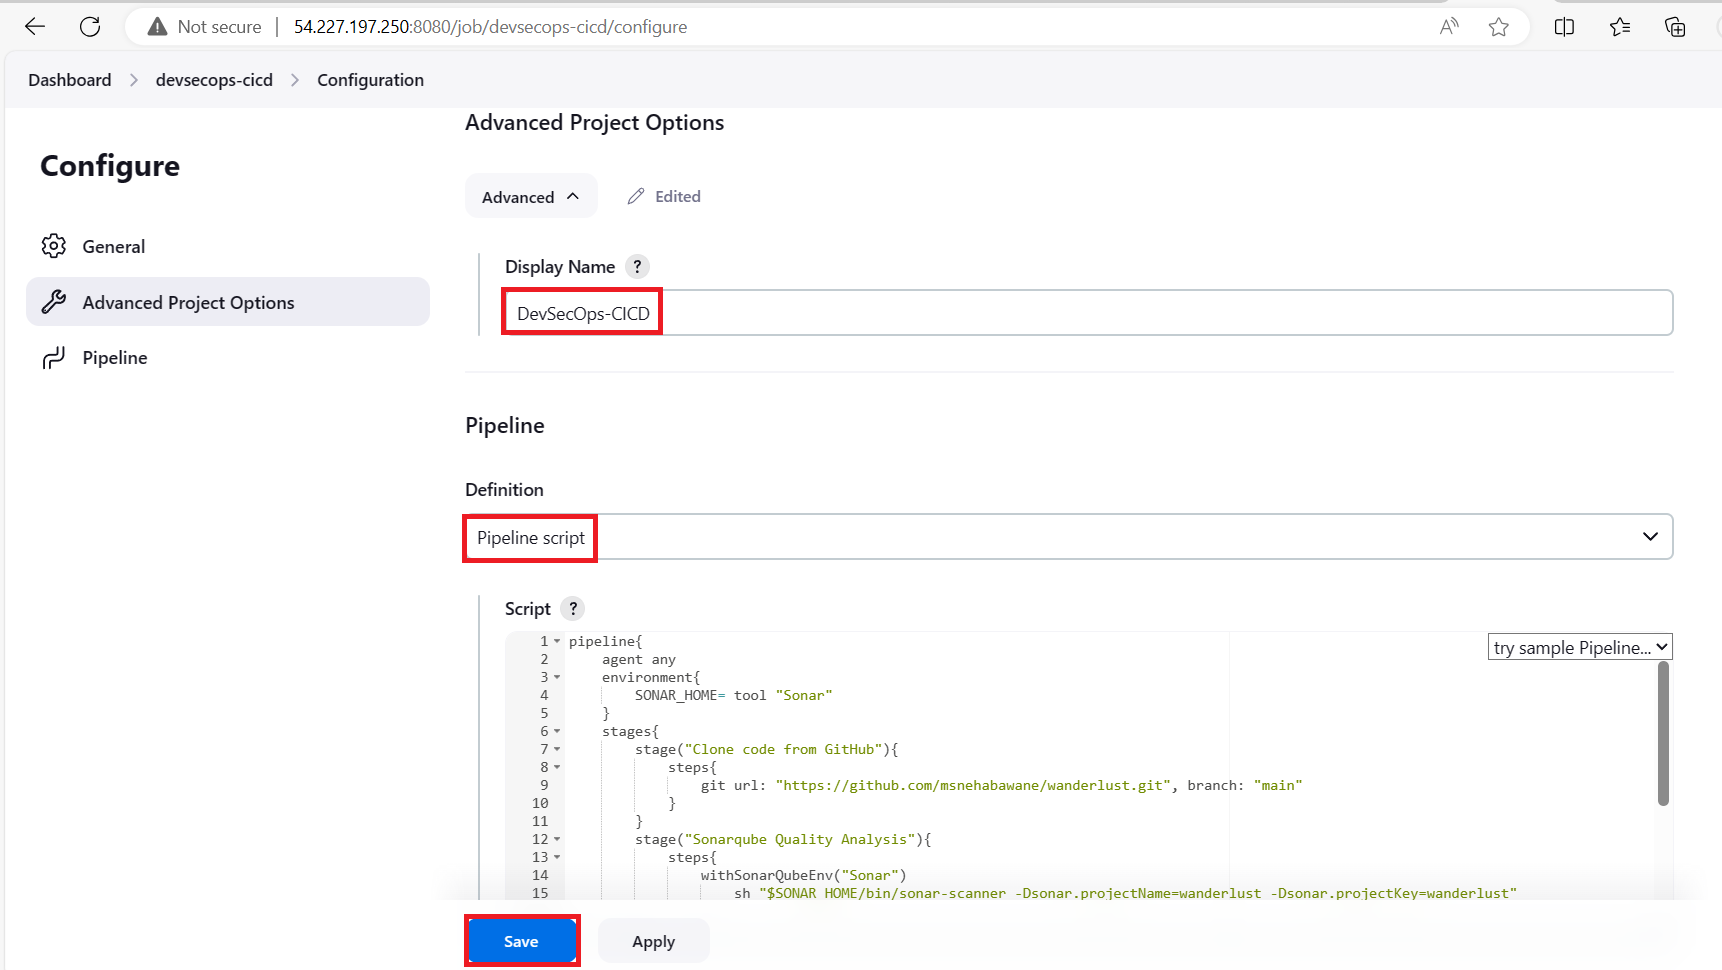
In this, we will create a pipeline for jenkins
This Jenkins pipeline automates the continuous integration and deployment process for application. It comprises several stages:
Code: Clones the source code from a GitHub repository.
SonarQube Analysis: Conducts static code analysis using SonarQube to assess code quality.
SonarQube Quality Gates: Sets quality gates based on SonarQube analysis results.
OWASP: Utilizes OWASP dependency checker to scan for vulnerabilities in dependencies.
Trivy: Conducts vulnerability scanning on the Docker image using Trivy.
Deploy: Deploys the application using Docker Compose.
pipeline{
    agent any
    environment{
        SONAR_HOME= tool "sonar"
    }
    stages{
        stage("Clone code from GitHub"){
            steps{
                git url: "https://github.com/msnehabawane/wanderlust.git", branch: "devops"
            }
        }
        stage("Sonarqube Quality Analysis"){
            steps{
                withSonarQubeEnv("sonar"){
                    sh "$SONAR_HOME/bin/sonar-scanner -Dsonar.projectName=wanderlust -Dsonar.projectKey=wanderlust"
                }
            }
        }
        stage("OWASP Dependency Check"){
            steps{
                dependencyCheck additionalArguments: '--scan ./', odcInstallation: 'OWASP'
                dependencyCheckPublisher pattern: '**/dependency-check-report.xml'
            }
        }
        stage("Sonar Quality Gate Scan"){
            steps{
                timeout(time: 2, unit: "MINUTES"){
                    waitForQualityGate abortPipeline: false
                }
            }
        }
        stage("Trivy File System Scan"){
            steps{
                sh "trivy fs --format table -o trivy-fs-report.html ."
            }
        }
        stage("Deploy using Docker Compose"){
            steps{
                sh "docker compose up -d"
            }
        }
    }
}
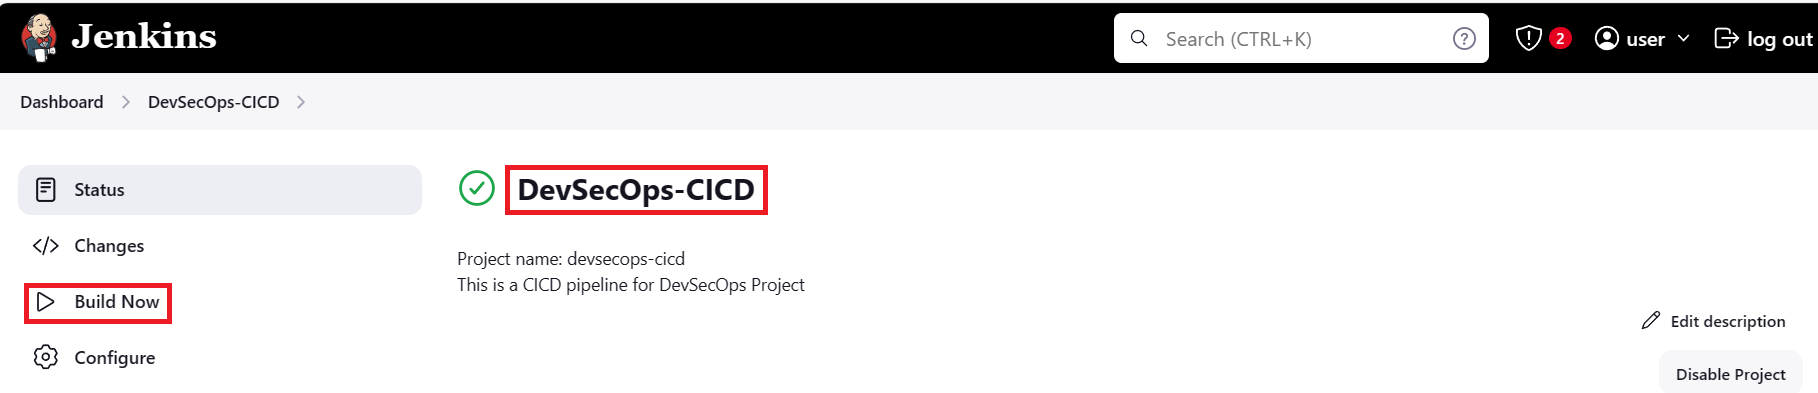
Click on Build Now
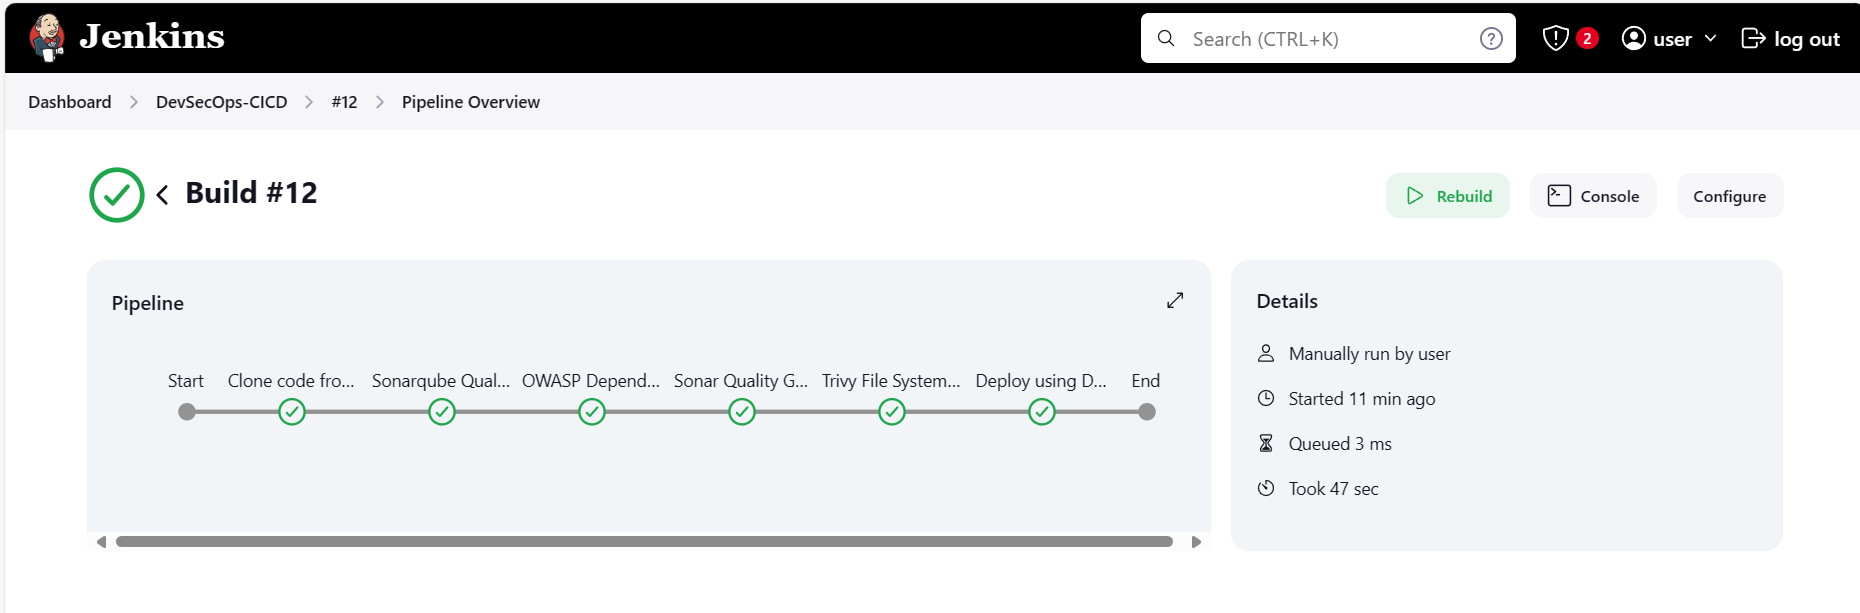
Our pipeline executes each stage successfully, ensuring a smooth and efficient build process at every step.
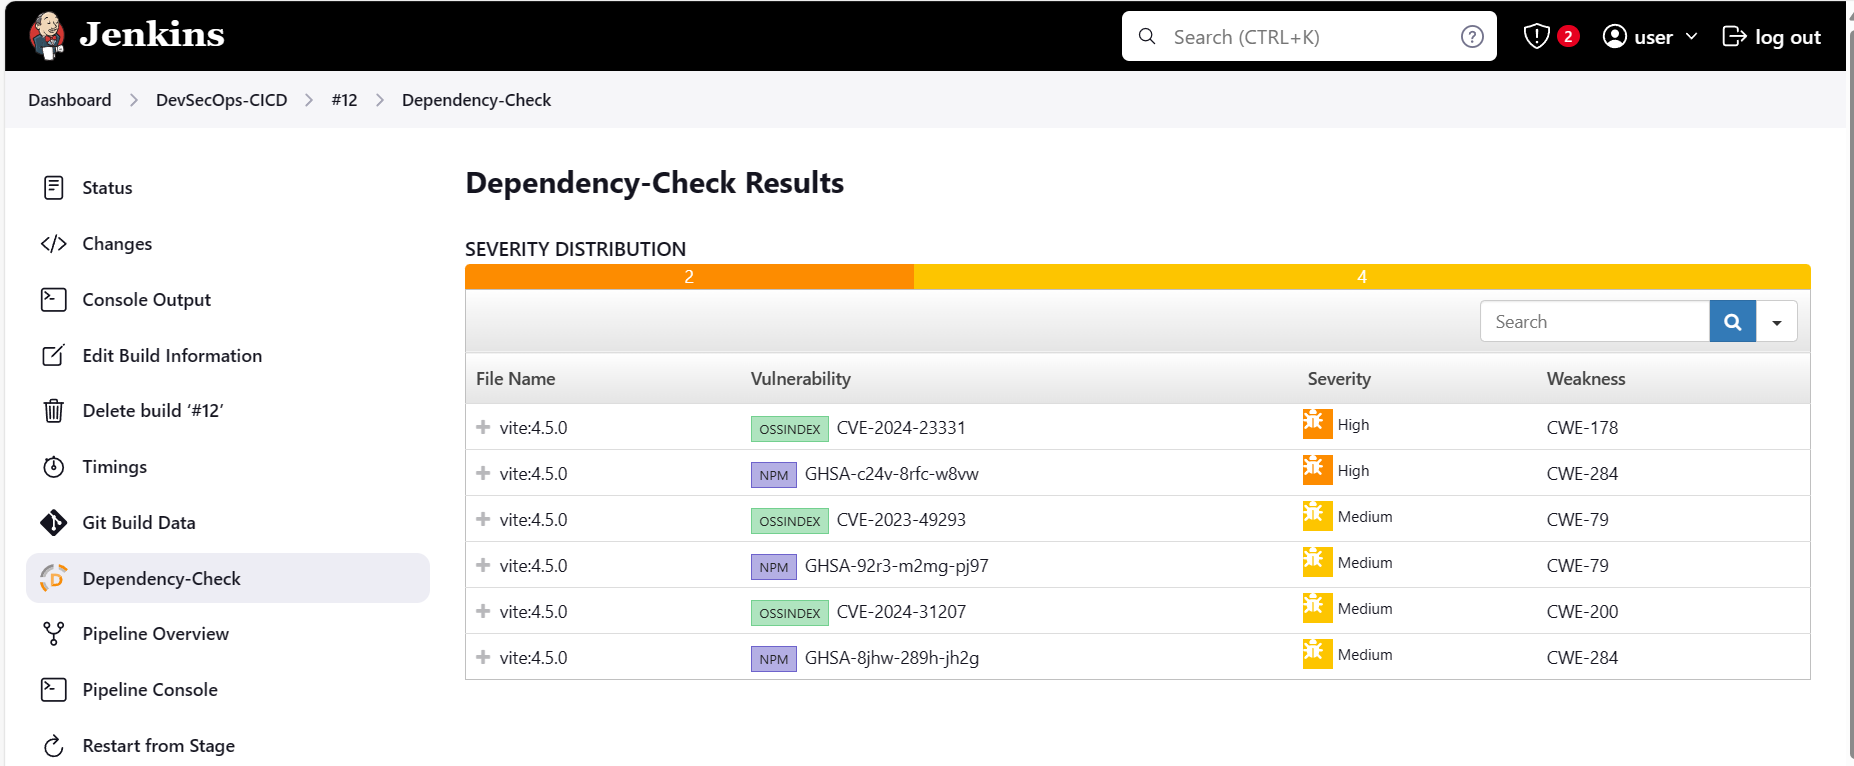
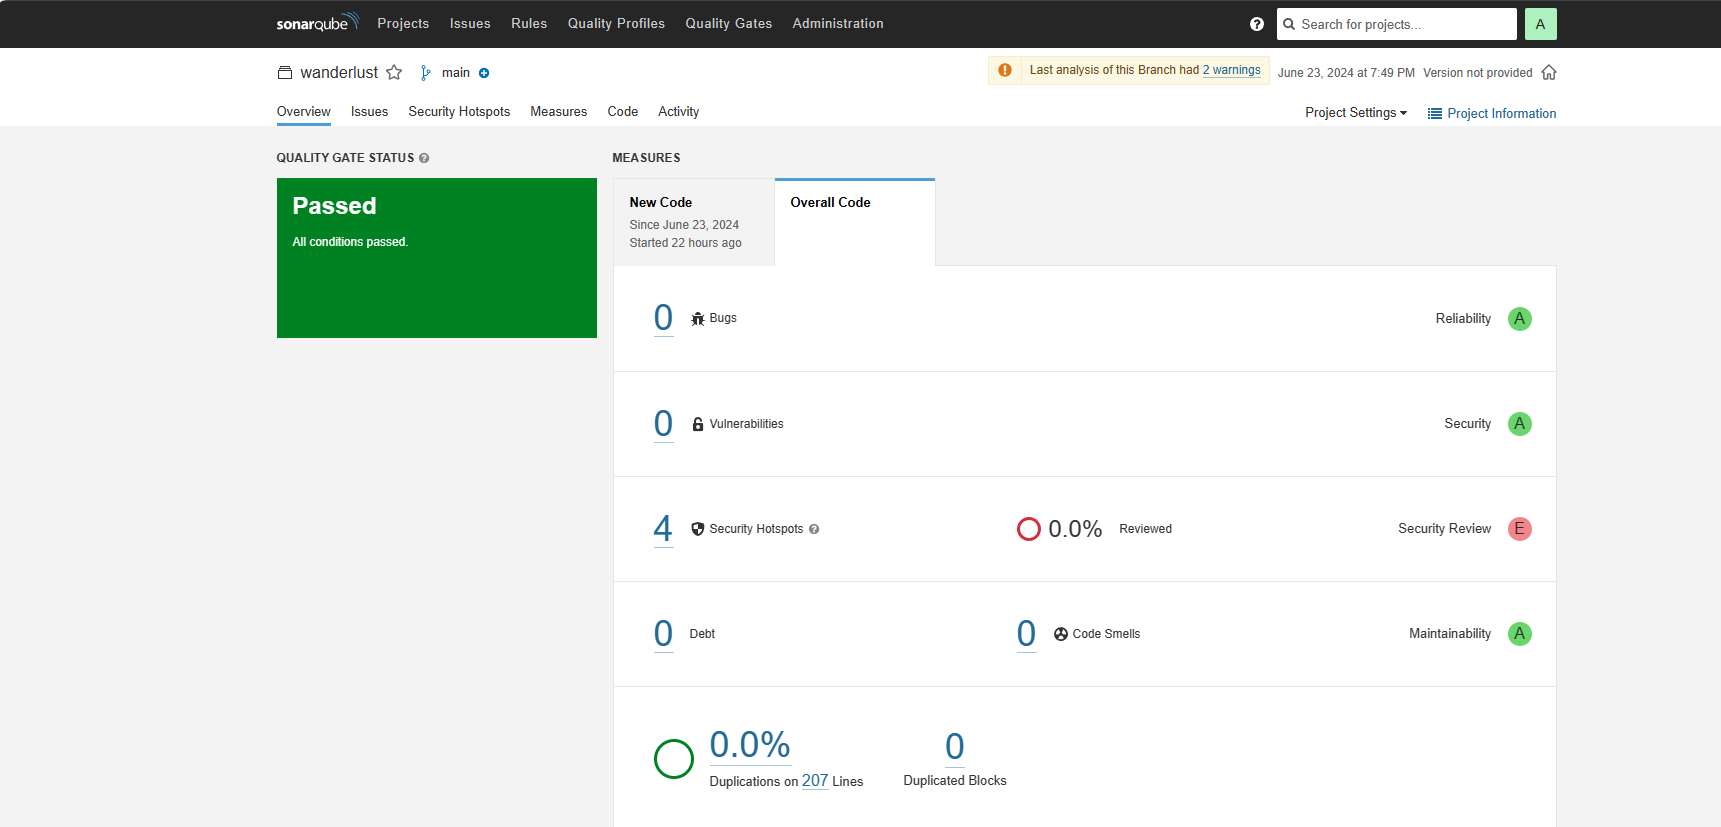
Access the application using the public IP address of the EC2 instance.
http://54.227.197.250:5173
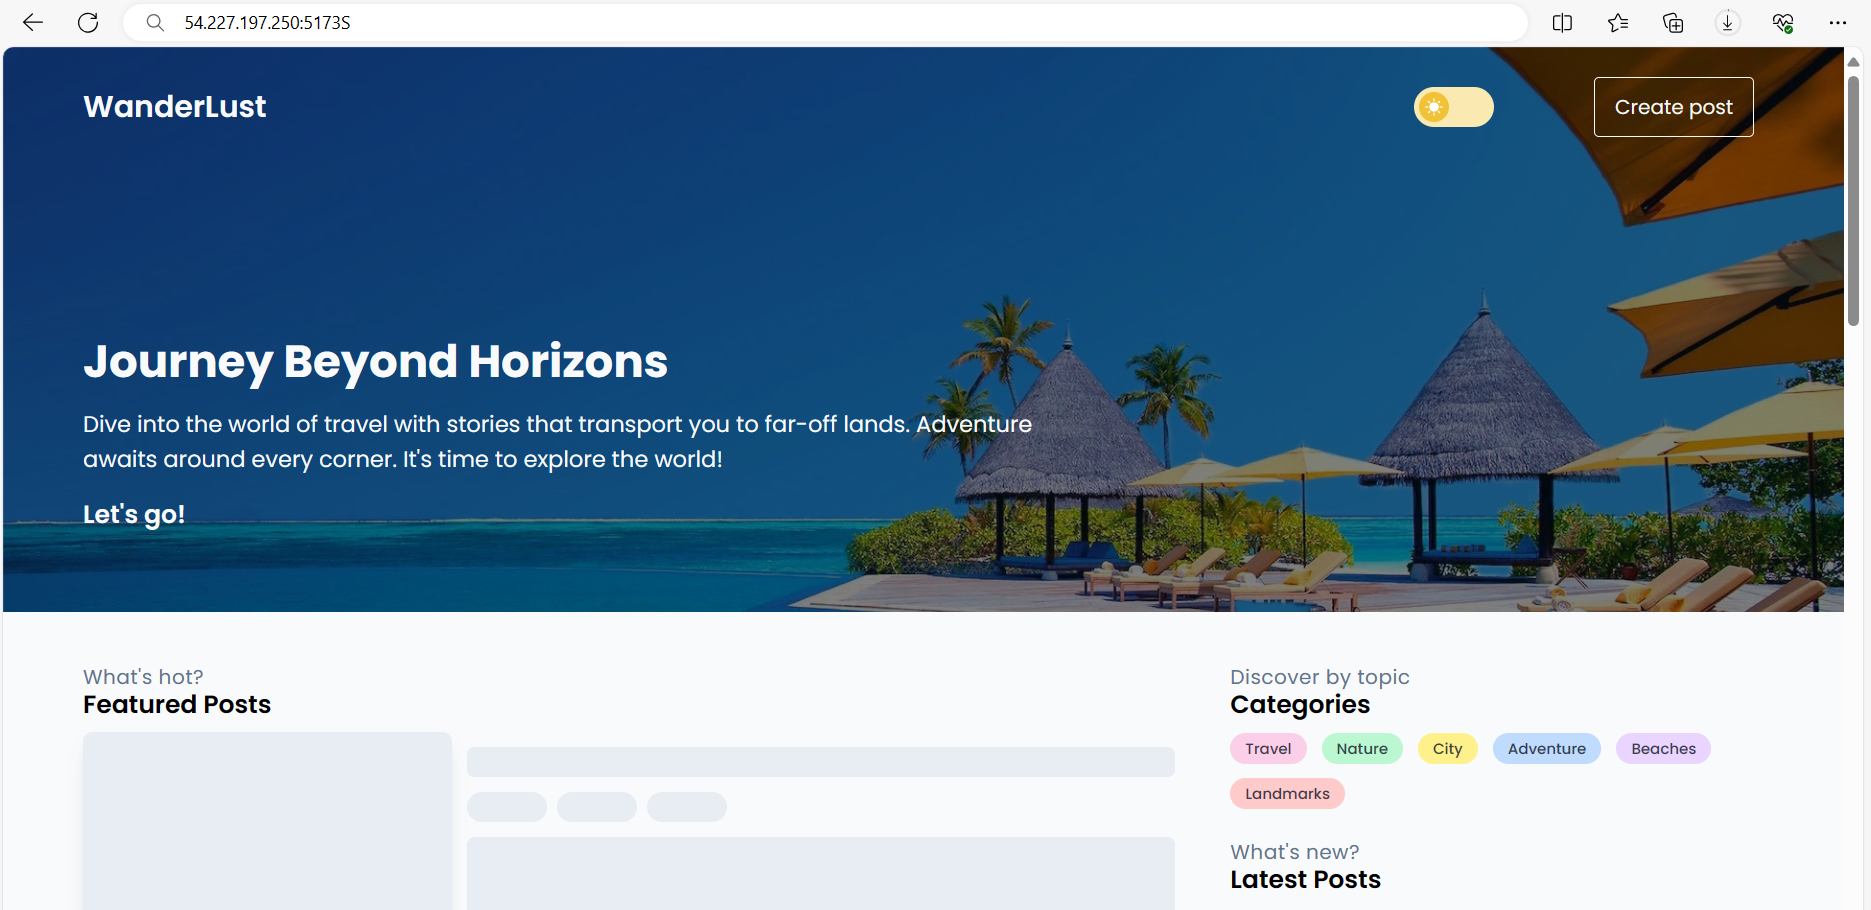
Done!
Stay tuned for my next blog. I will keep sharing my learnings and knowledge here with you.
Let's learn together! I appreciate any comments or suggestions you may have to improve my blog content.
Thank you,
Neha Bawane