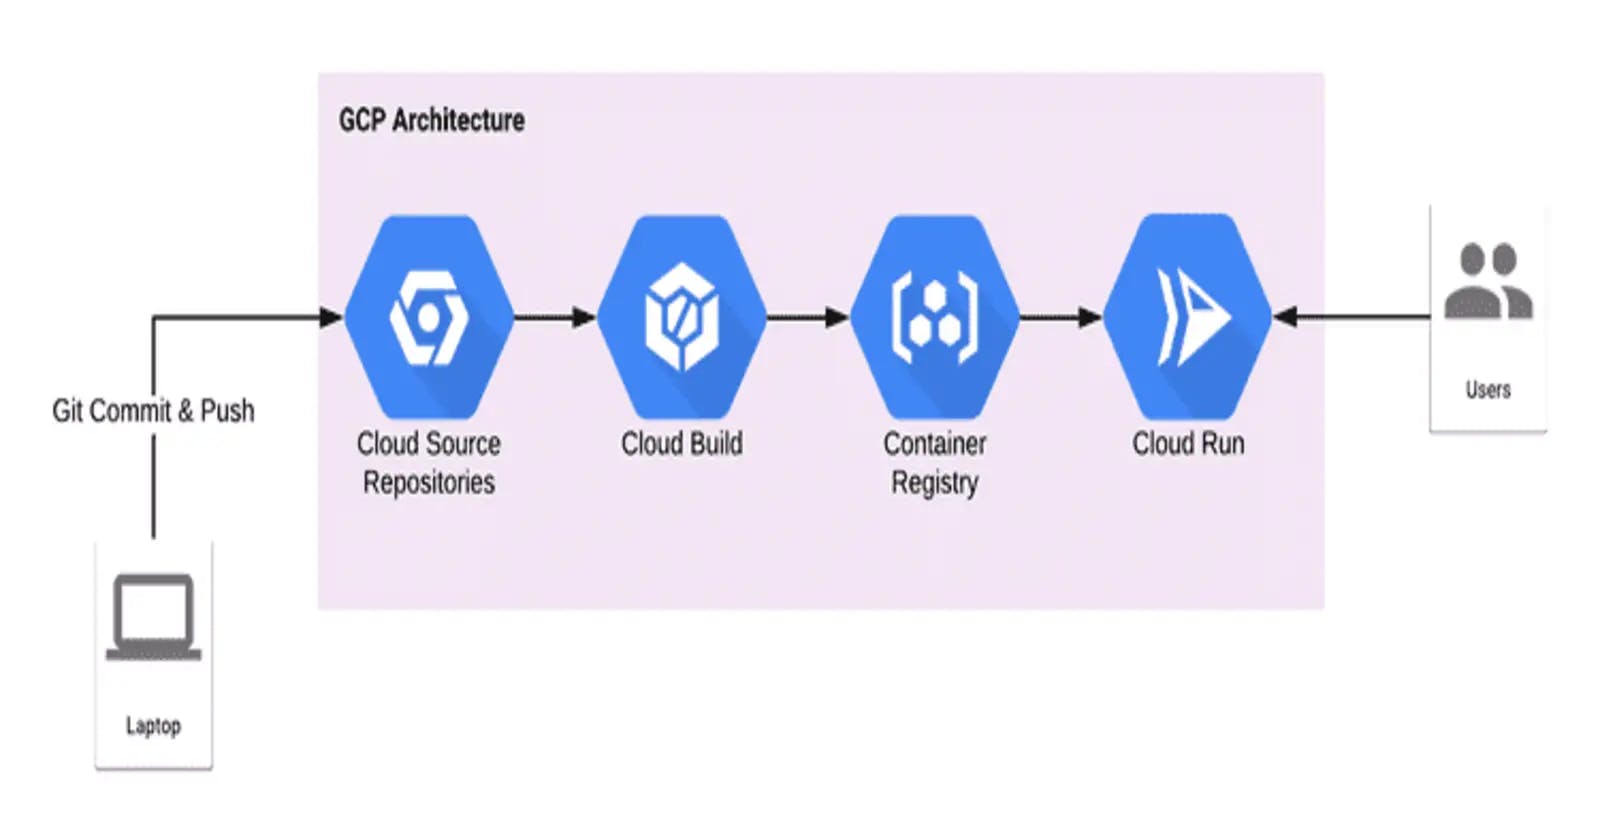
CI/CD Pipeline on Google cloud Platform
using Cloud Source Repository, Cloud Build, Container Registry and Cloud Run


Cloud Source Repository
Google Cloud Source Repositories are fully featured, private Git repositories hosted on Google Cloud Platform. Collaborate easily and securely manage your code on a fully featured, scalable, private Git repository.
Cloud Build
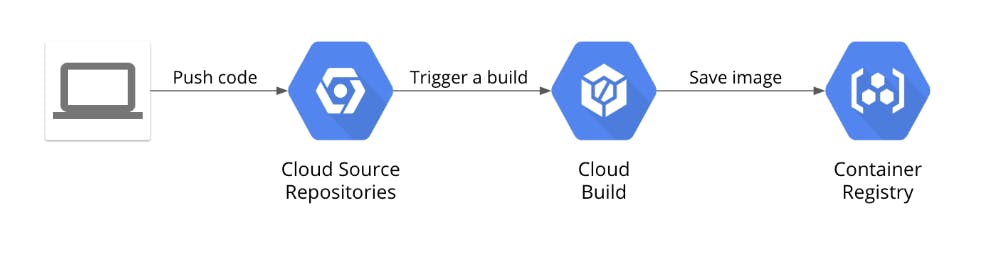
Cloud Build is a service that executes your builds on Google Cloud Platform infrastructure. Cloud Build can import source code from Google Cloud Storage, Cloud Source Repositories, GitHub, or Bitbucket, execute a build to your specifications, and produce artifacts such as Docker containers or Java archives.
Container Registry
Container Registry is a private container image registry that runs on Google Cloud.
Intoduction
In this project, you will build a continuous integration pipeline using Cloud Source Repositories, Cloud Build, build triggers, and Container Registry.
Pre-Requisites
Google Cloud Free Tier Account
Familier with google cloud console
Lets dive into the demo Handson part
Step 1: Create a Git repository
First, you will create a Git repository using the Cloud Source Repositories service in Google Cloud. This Git repository will be used to store your source code. Eventually, you will create a build trigger that starts a continuous integration pipeline when code is pushed to it.
In the Cloud Console, on the Navigation menu, click Source Repositories. A new tab will open.

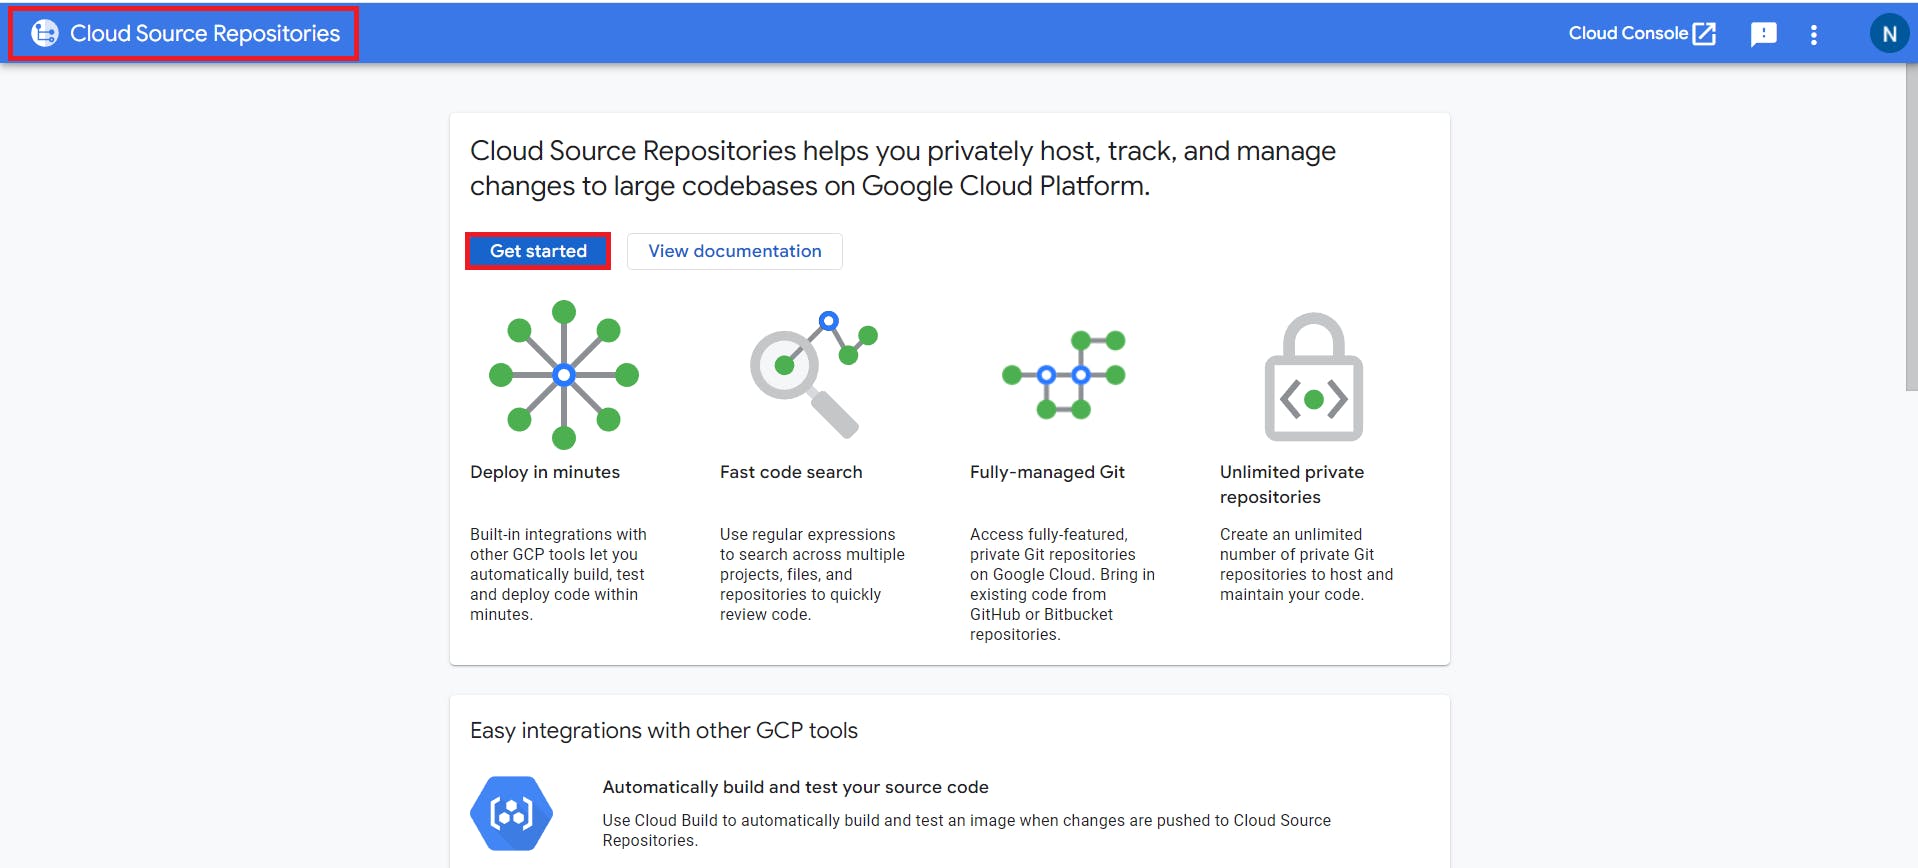
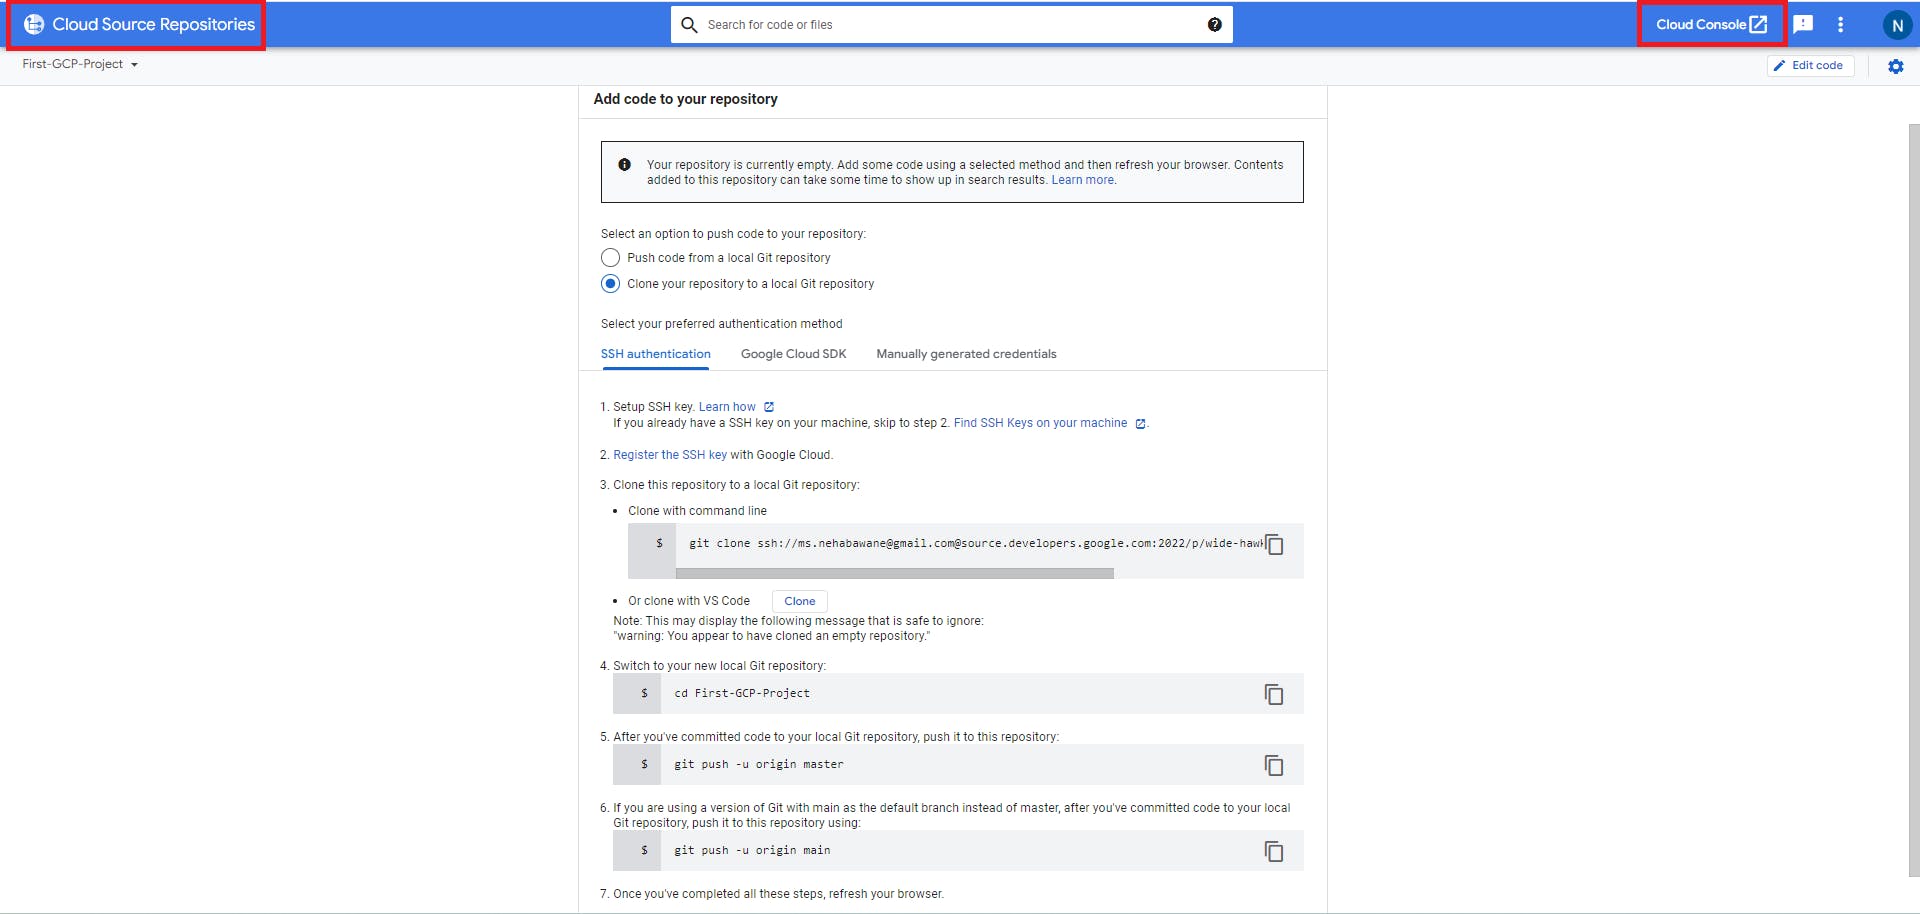
Select Create new repository and click Continue.

Name the repository First-GCP-Project
Select your current project ID from the list.

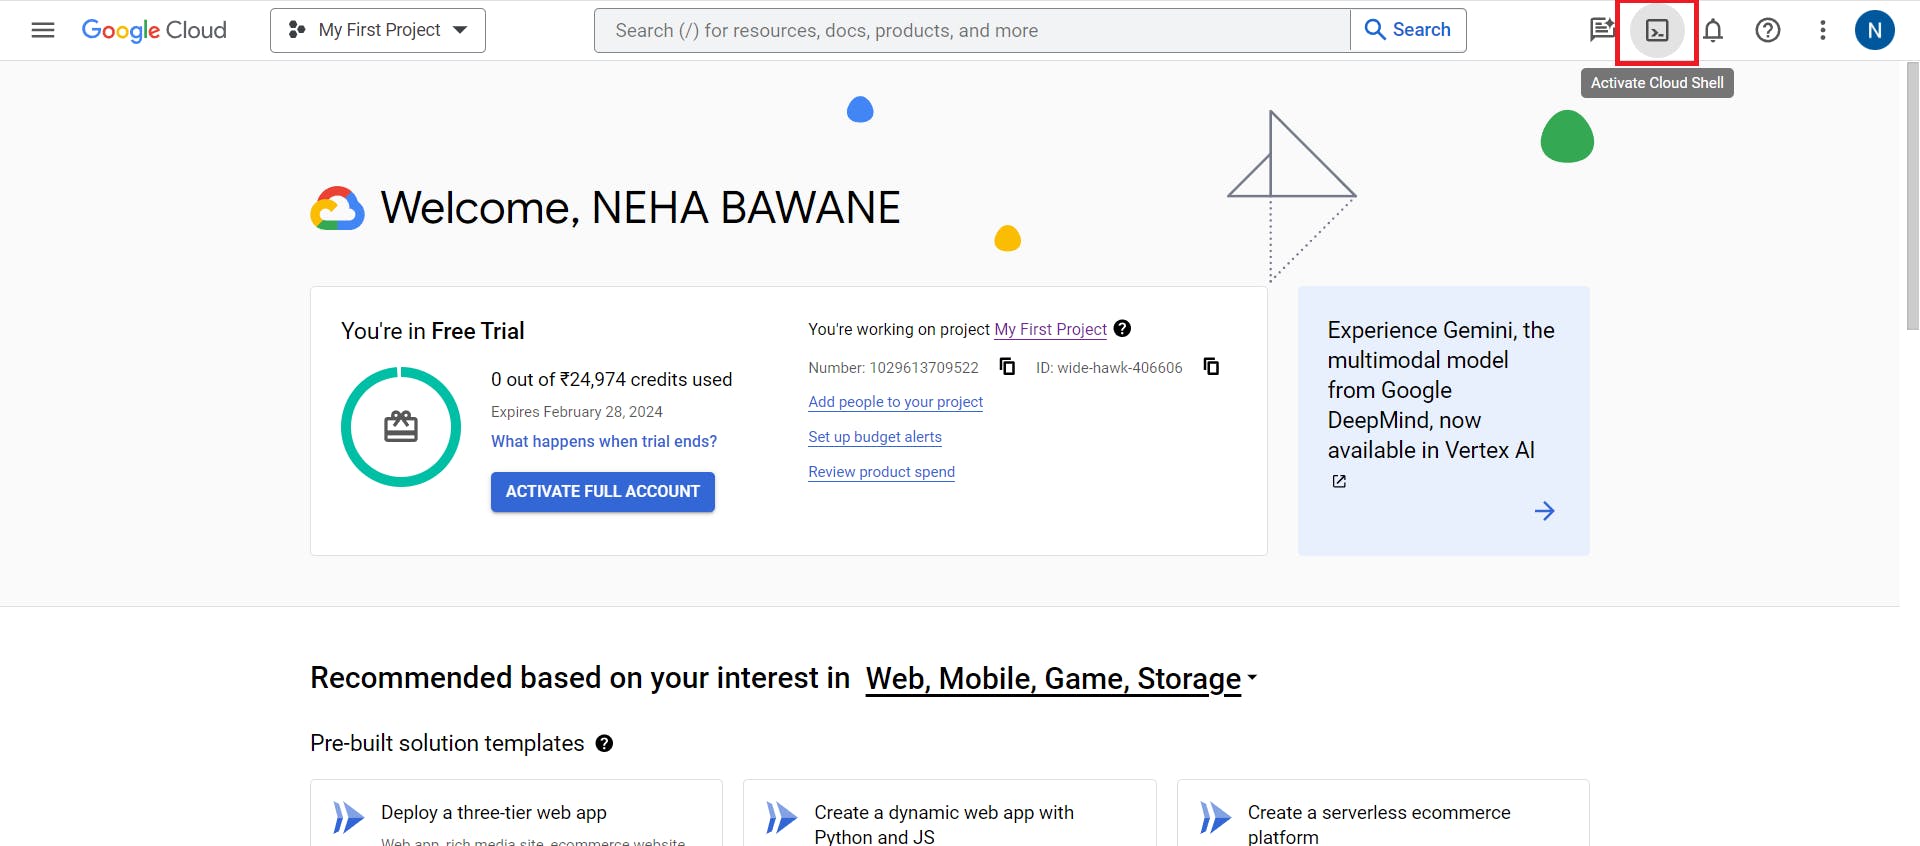
Return to the Cloud Console, and click Activate Cloud Shell (Cloud Shell icon).
Return to the Cloud Console, and click Activate Cloud Shell (Cloud Shell icon).
Enter the following command in Cloud Shell to create a folder called gcp-devops
mkdir gcp-devopsChange to the folder you just created:
cd gcp-devopsNow clone the empty repository you just created
gcloud source repos clone First-GCP-Project

The previous command created an empty folder called First-GCP-Project.
Change to that folder: cd First-GCP-Project

Step 2 : Create a simple Python application
You need some source code to manage. So, you will create a simple Python Flask web application. The application will be only slightly better than "hello world", but it will be good enough to test the pipeline you will build.
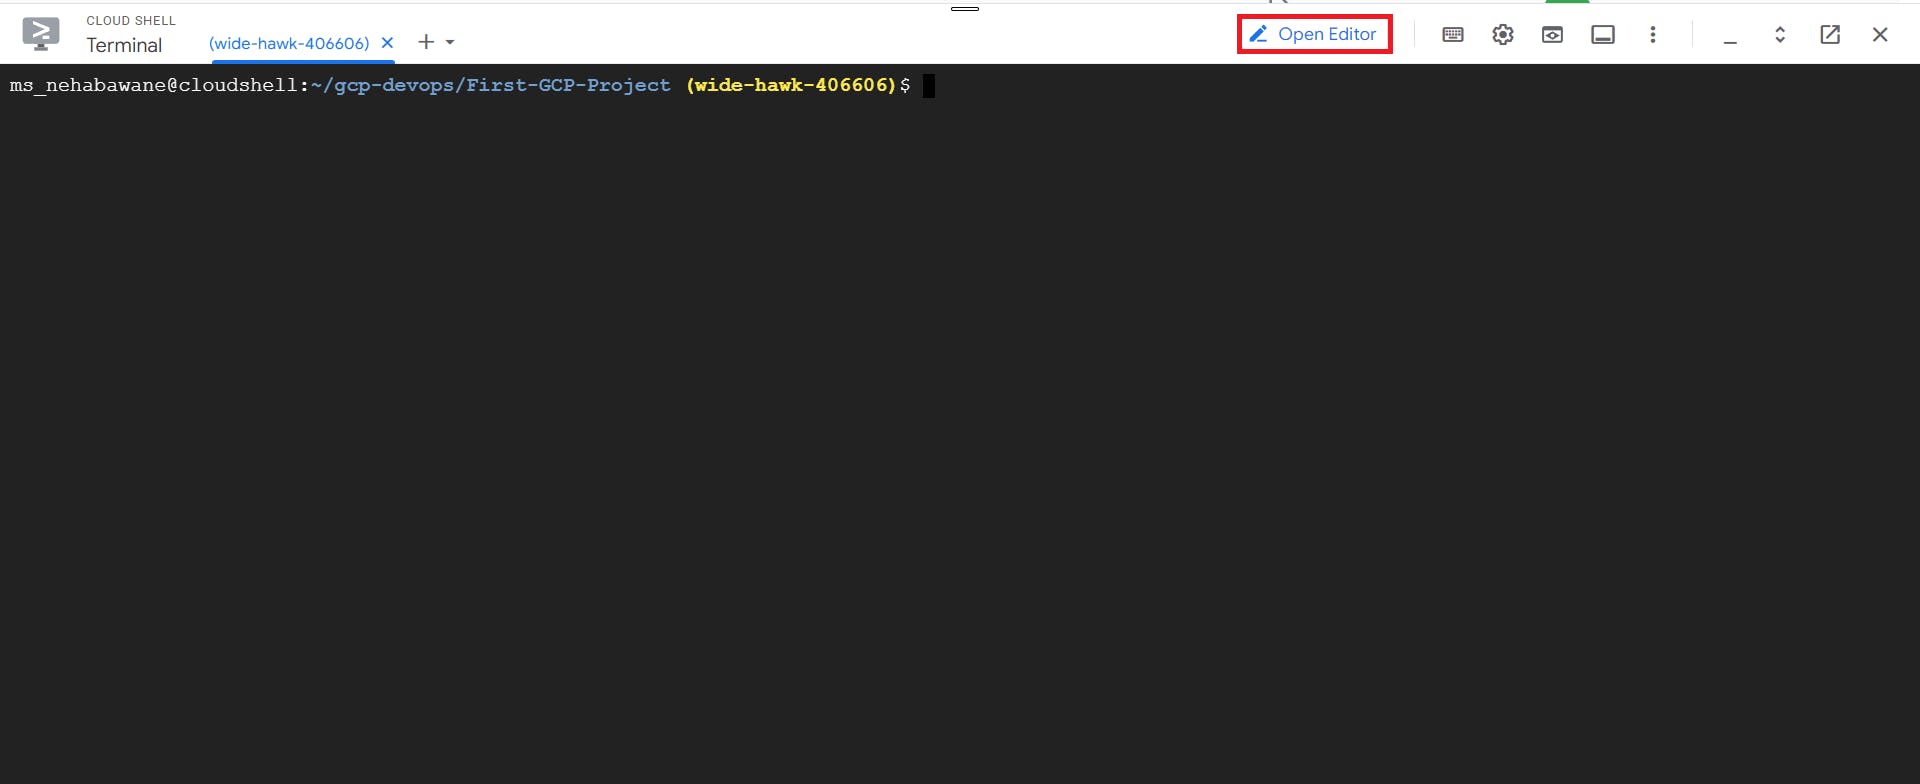
In Cloud Shell, click Open Editor (Editor icon) to open the code editor. If prompted click Open in a new window.

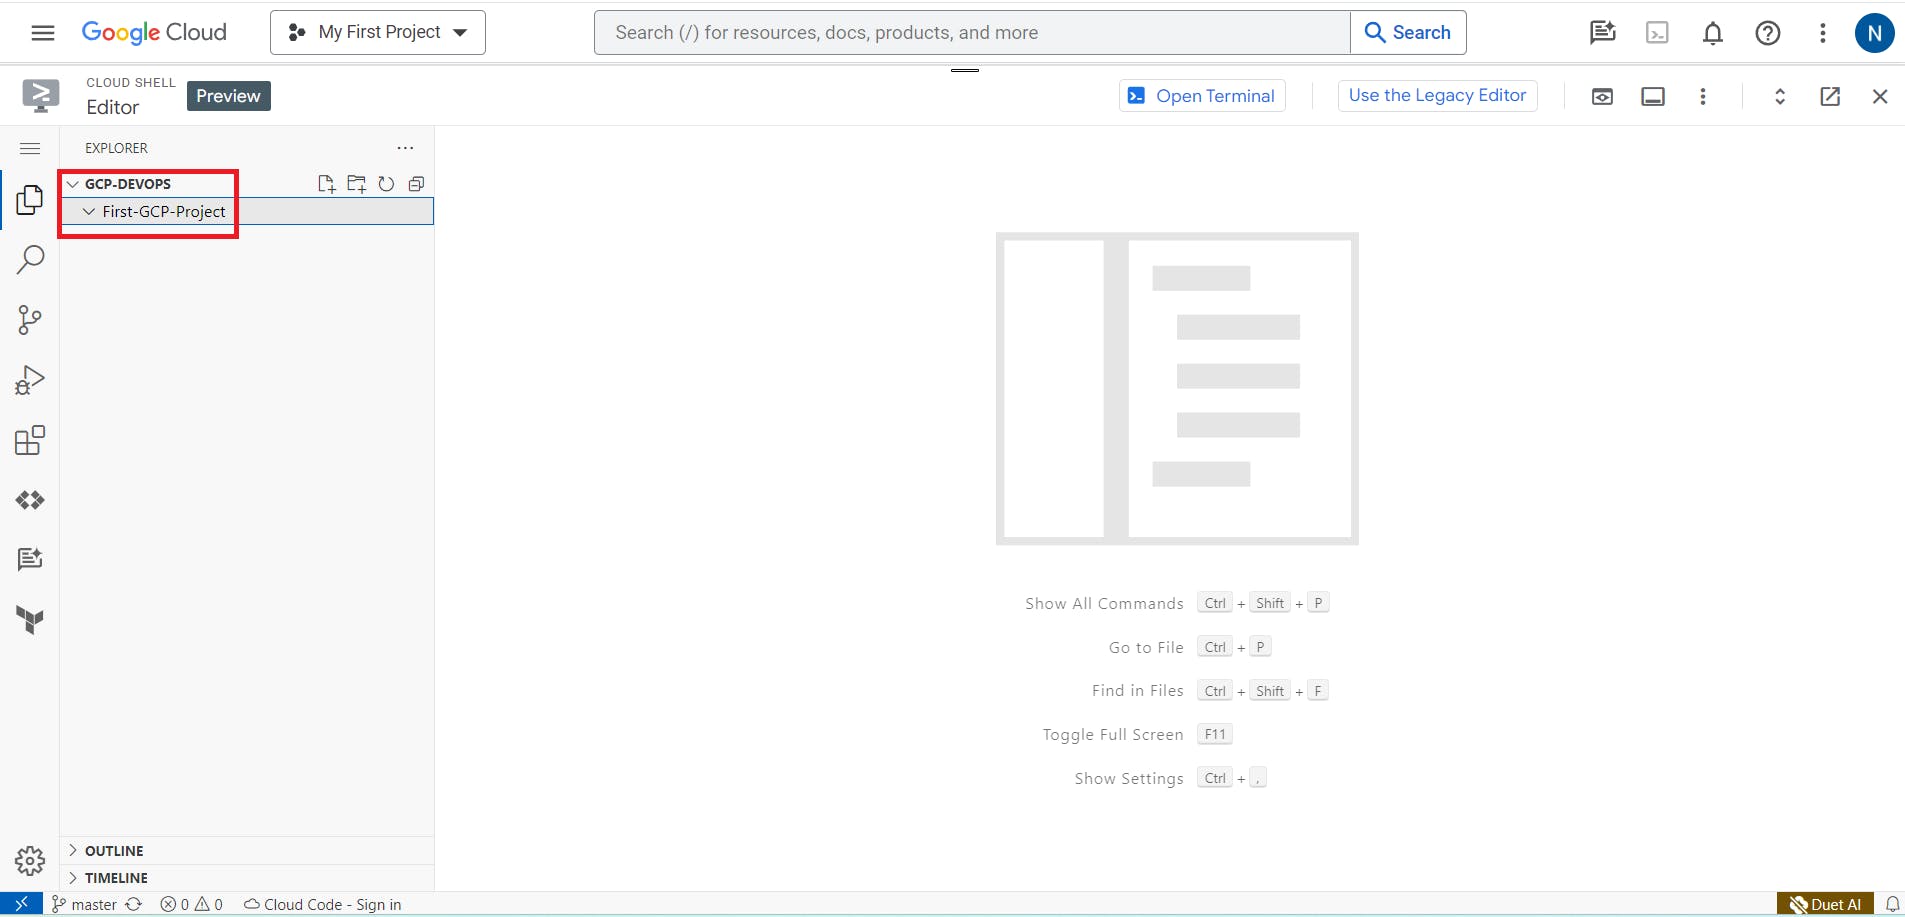
Select the gcp-devops > First-GCP-Project folder in the explorer tree on the left.
Create a new file one by one and paste the below code into it.
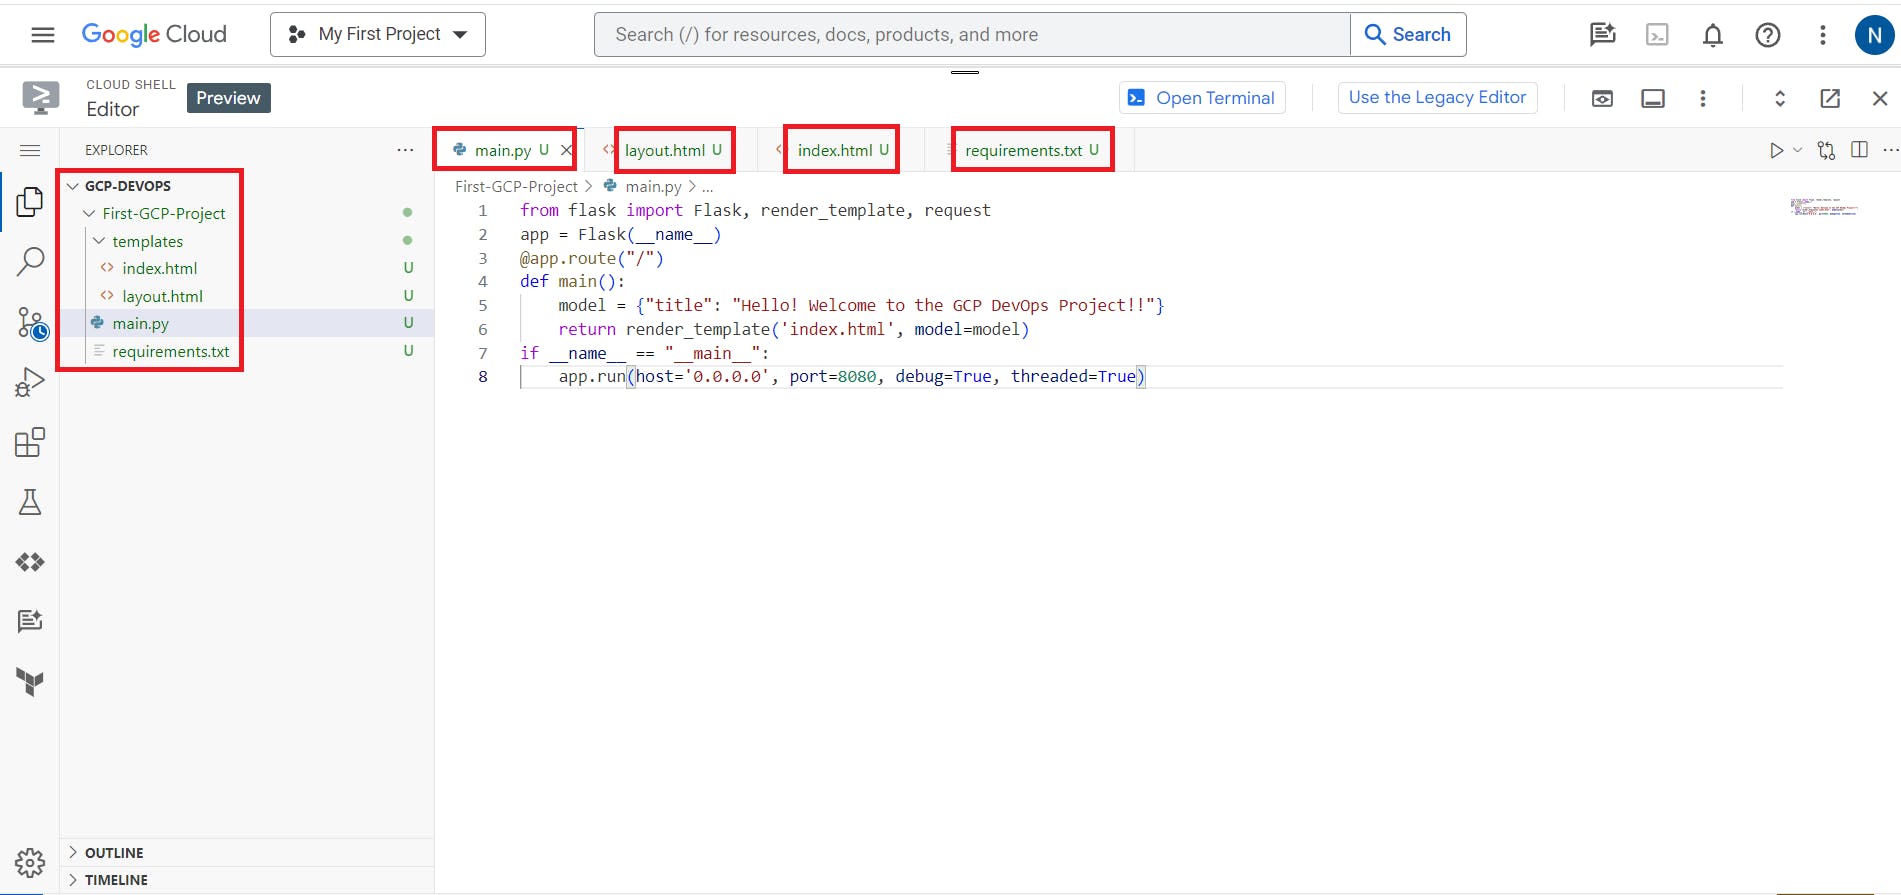
from flask import Flask, render_template, request
app = Flask(__name__)
@app.route("/")
def main():
    model = {"title": "Hello! Welcome to my irst GCP Project!!"}
    return render_template('index.html', model=model)
if __name__ == "__main__":
    app.run(host='0.0.0.0', port=8080, debug=True, threaded=True)
index.html
{% extends "layout.html" %}
{% block content %}
<div class="jumbotron">
    <div class="container">
        <h1>{{model.title}}</h1>
    </div>
</div>
{% endblock %}
layout.html
<!doctype html>
<html lang="en">
<head>
    <title>{{model.title}}</title>
    <!-- Bootstrap CSS -->
    <link rel="stylesheet" href="https://stackpath.bootstrapcdn.com/bootstrap/4.4.1/css/bootstrap.min.css">
</head>
<body>
    <div class="container">
        {% block content %}{% endblock %}
        <footer></footer>
    </div>
</body>
</html>
requirements.txt
In Python, application prerequisites are managed using pip. Now you will add a file that lists the requirements for this application.
Flask==2.0.3
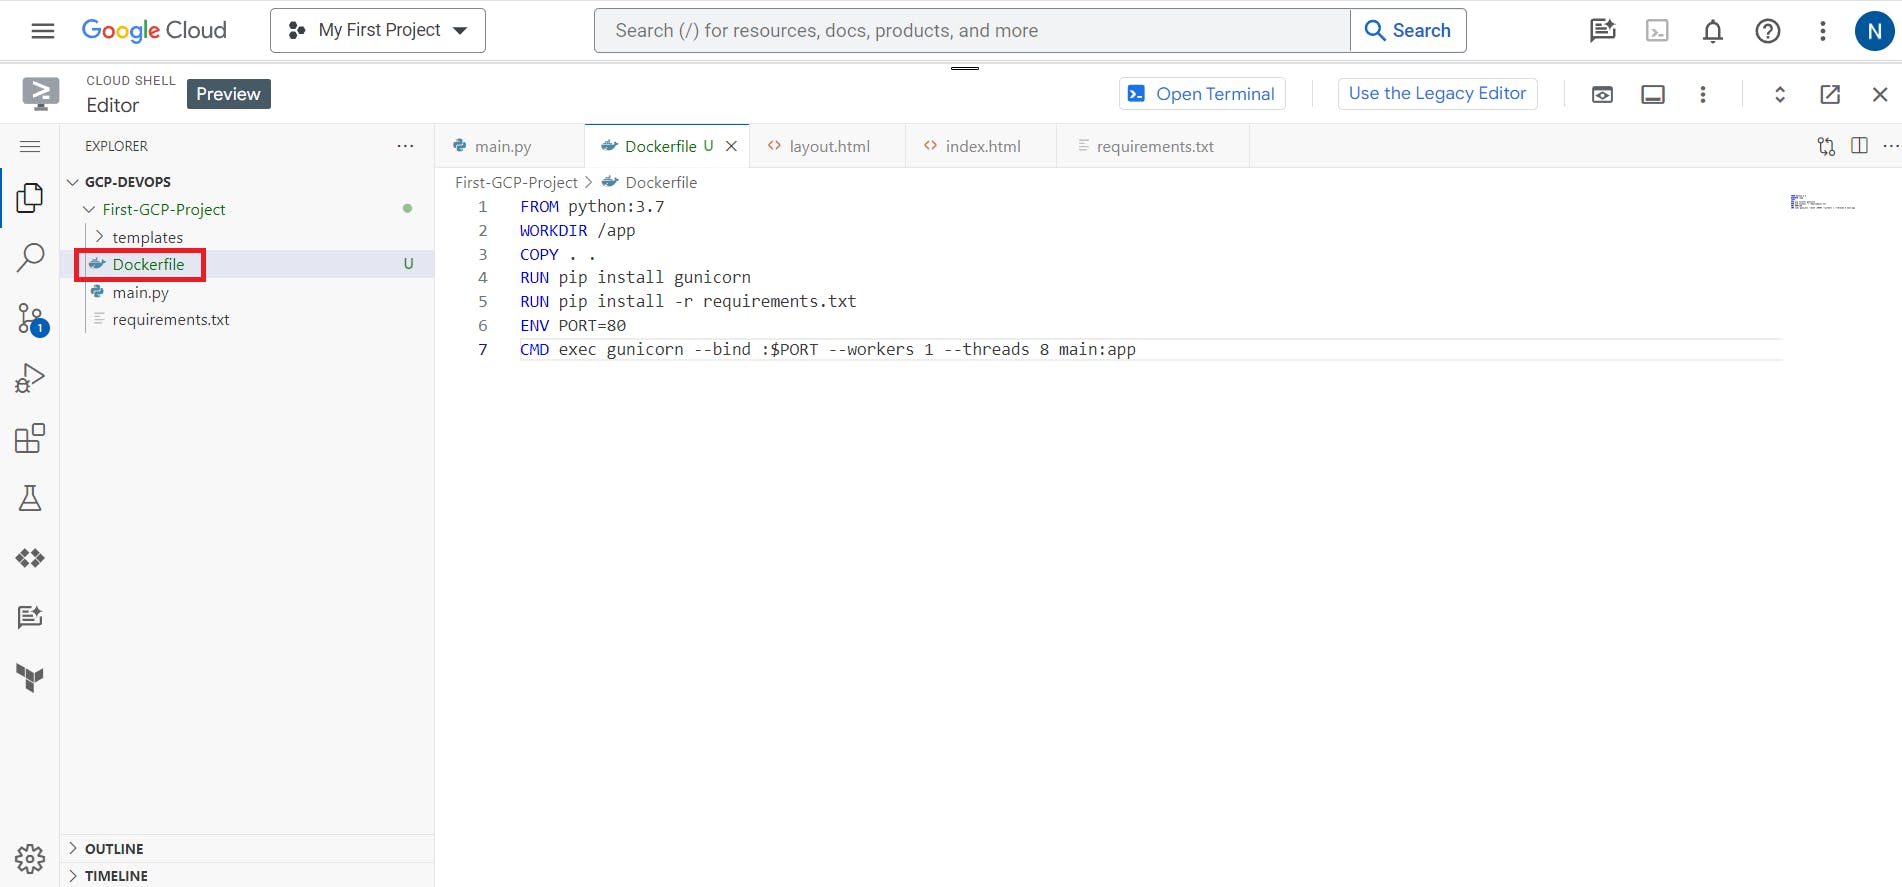
Dockerfile
FROM python:3.7
WORKDIR /app
COPY . .
RUN pip install gunicorn
RUN pip install -r requirements.txt
ENV PORT=80
CMD exec gunicorn --bind :$PORT --workers 1 --threads 8 main:app
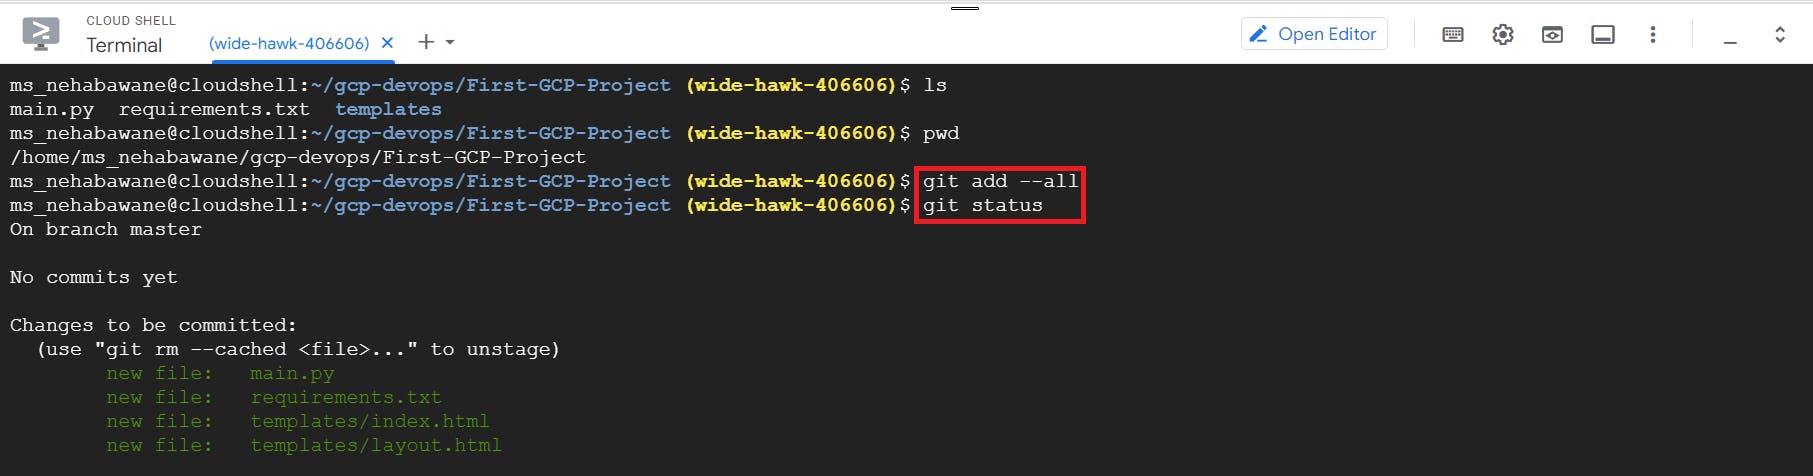
You have some files now, so save them to the repository. First, you need to add all the files you created to your local Git repo. In Cloud Shell, enter the following code: cd ~/gcp-devops/First-GCP-Project git add --all
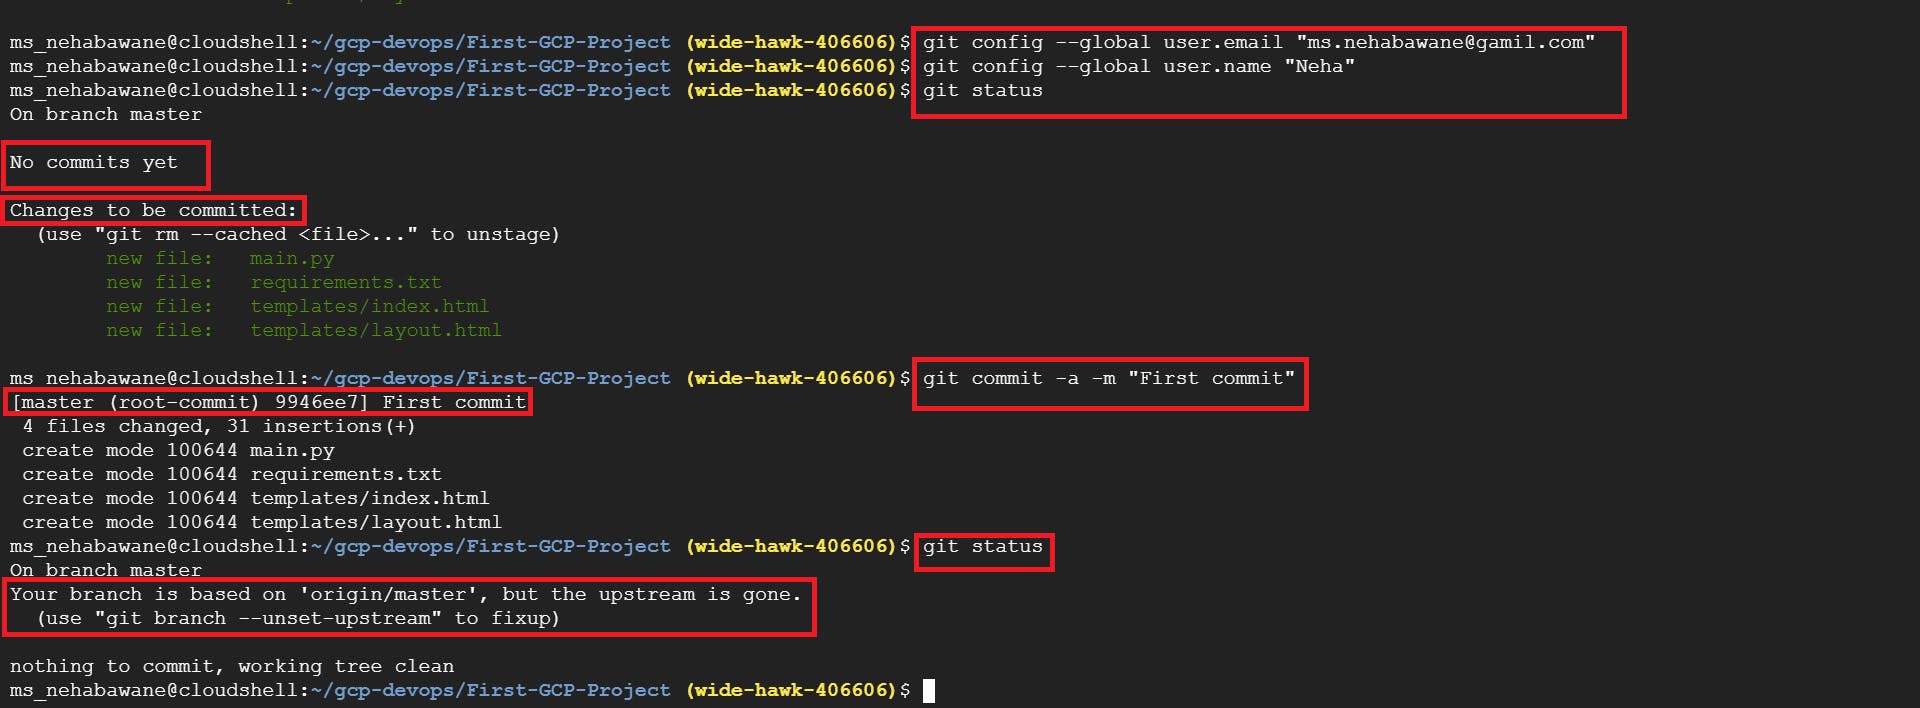
To commit changes to the repository, you have to identify yourself. Enter the following commands, but with your information (you can just use your Gmail address or any other email address): git config --global user.email "you@example.com" git config --global user.name "Your Name"
Now, commit the changes locally: git commit -a -m "First Commit"
You committed the changes locally, but have not updated the Git repository you created in Cloud Source Repositories. Enter the following command to push your changes to the cloud: git push origin master
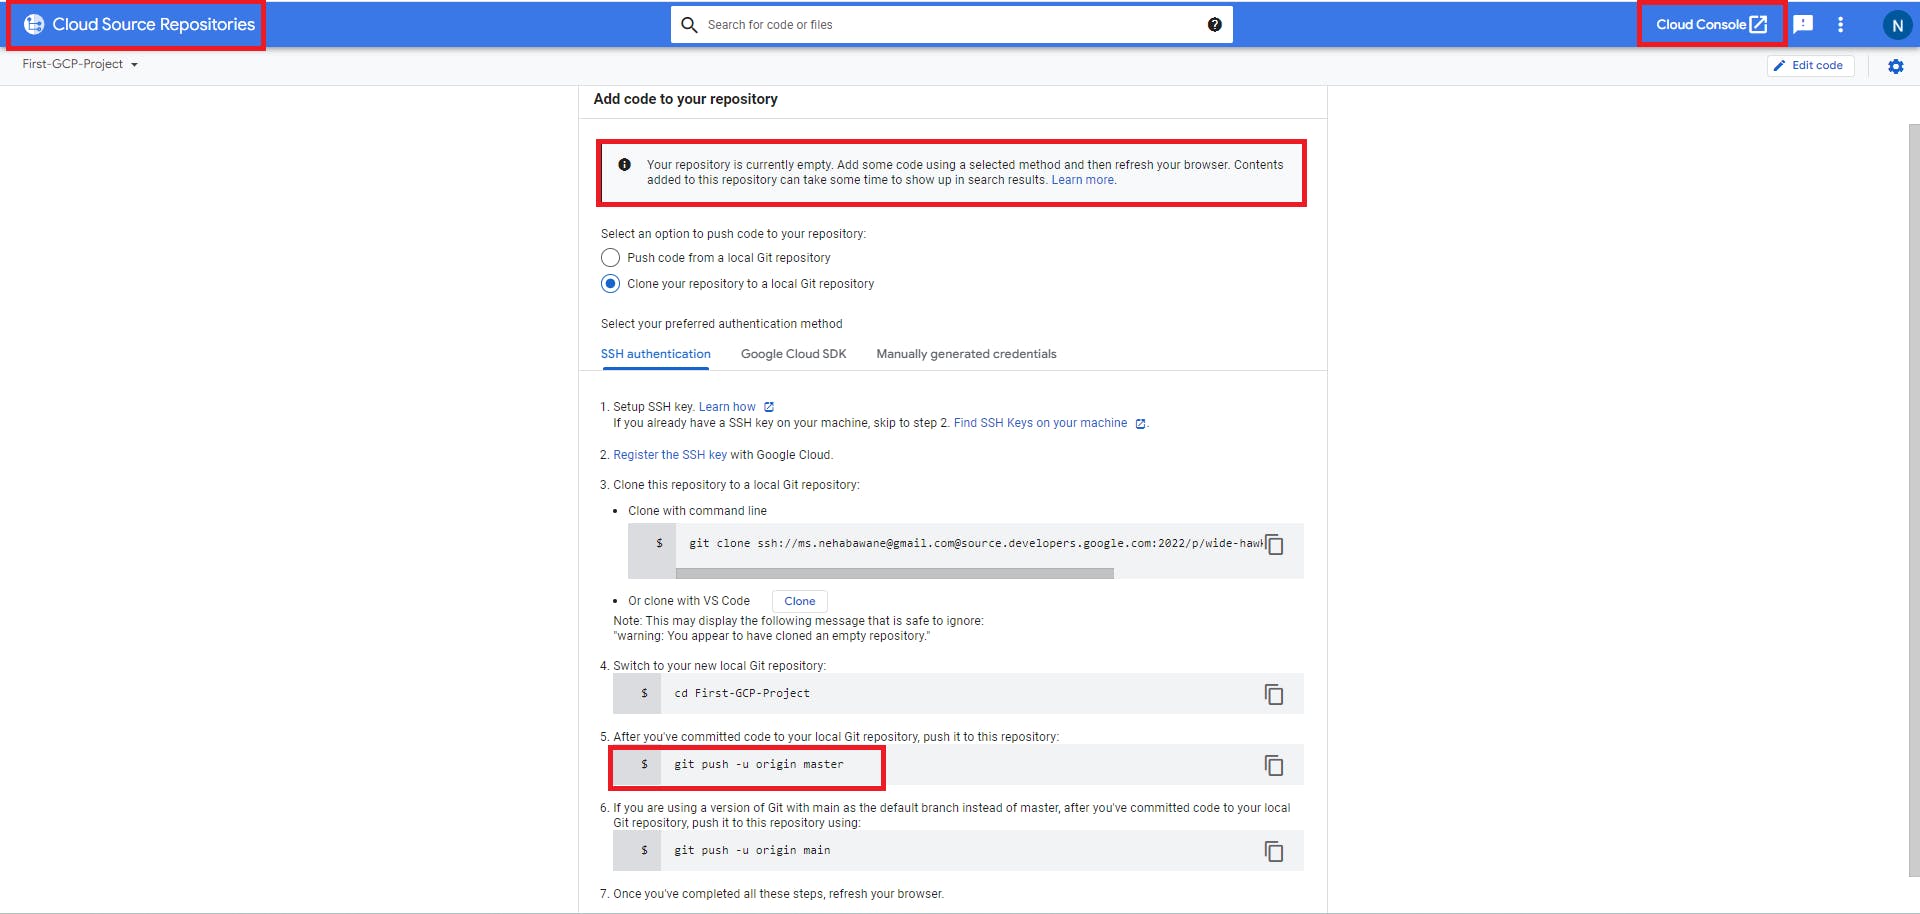

Refresh the Source Repositories web page. You should see the files you just created.

Step 3 :Define a Docker build
The first step to using Docker is to create a file called Dockerfile. This file defines how a Docker container is constructed. we will do that now.
In the Cloud Shell Code Editor, expand the gcp-devops/First-GCP-Project folder. With the First-GCP-Project folder selected, on the File menu, click New File and name the new file Dockerfile. The file Dockerfile is used to define how the container is built.
Step 4 : Manage Docker images with Cloud Build and Container Registry
The Docker image has to be built and then stored somewhere. You will use Cloud Build and Container Registry.
Return to Cloud Shell terminal. Make sure you are in the right folder: cd ~/gcp-devops/First-GCP-Project
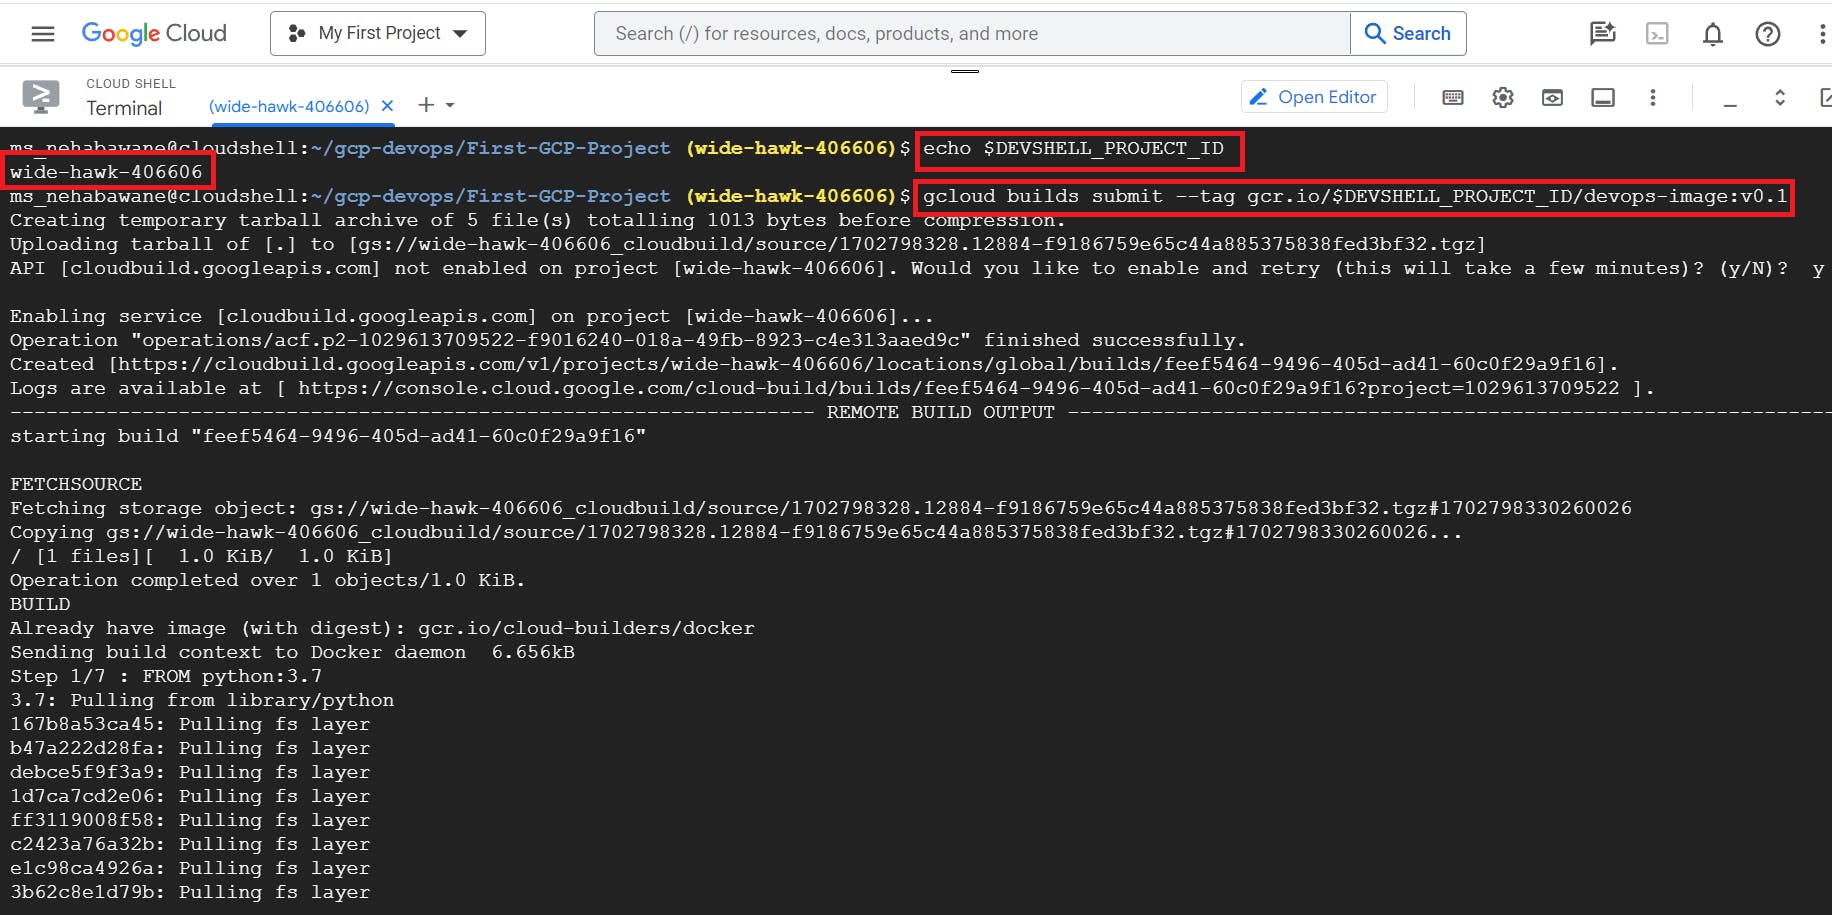
The Cloud Shell environment variable DEVSHELL_PROJECT_ID automatically has your current project ID stored. The project ID is required to store images in Container Registry. Enter the following command to view your project ID:
echo $DEVSHELL_PROJECT_IDEnter the following command to use Cloud Build to build your image:
gcloud builds submit --taggcr.io/$DEVSHELL_PROJECT_ID/devops-image:v0.1. Notice the environment variable in the command. The image will be stored in Container Registry.
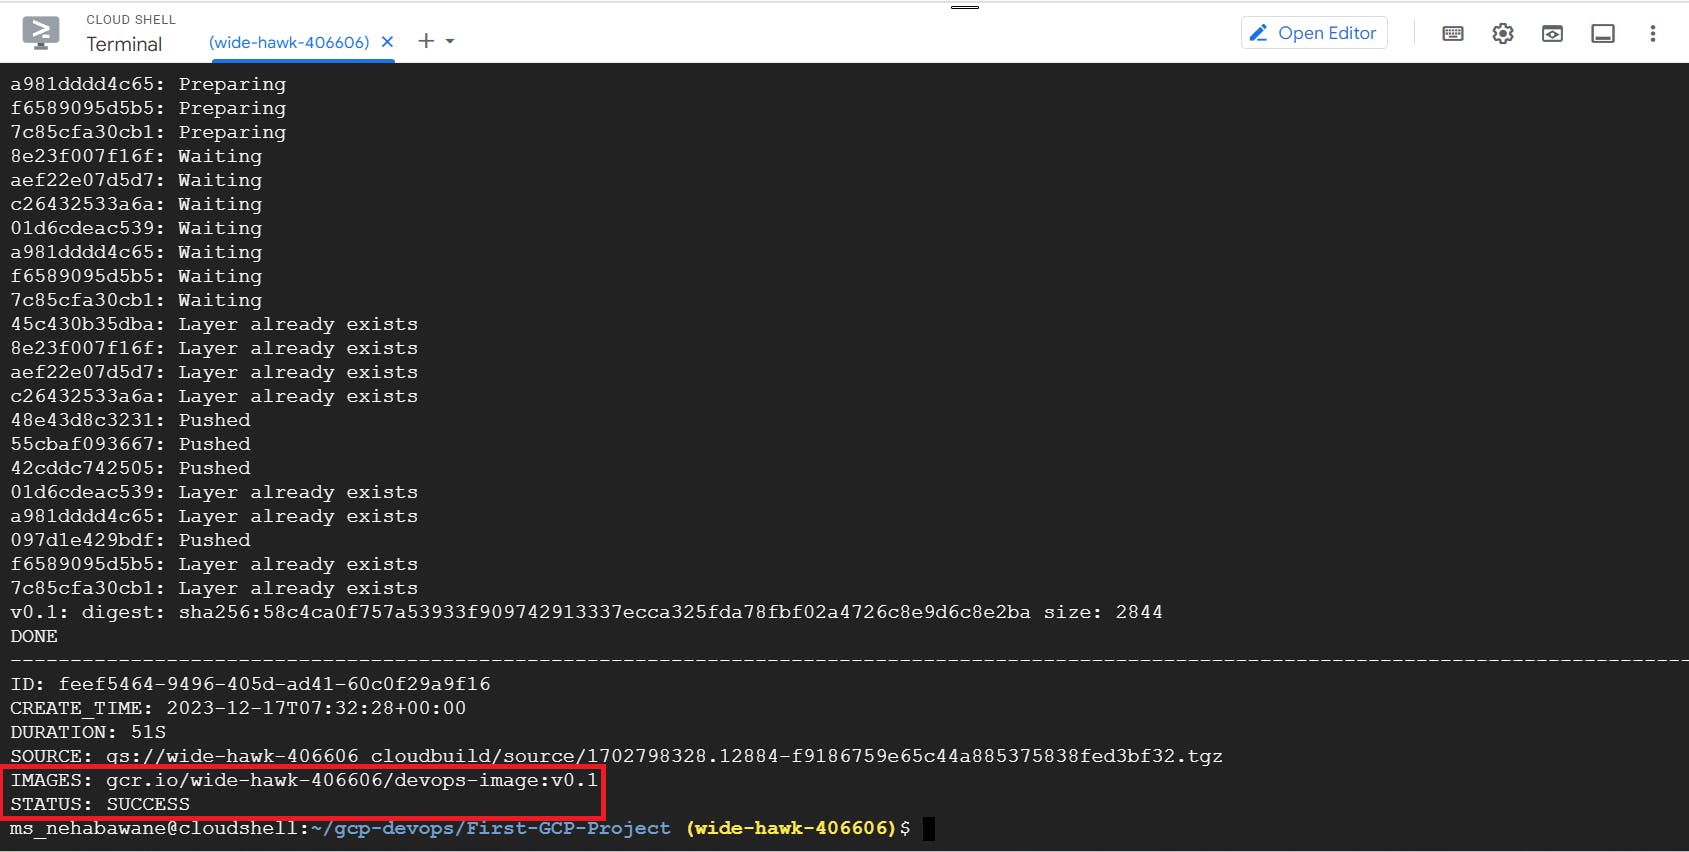
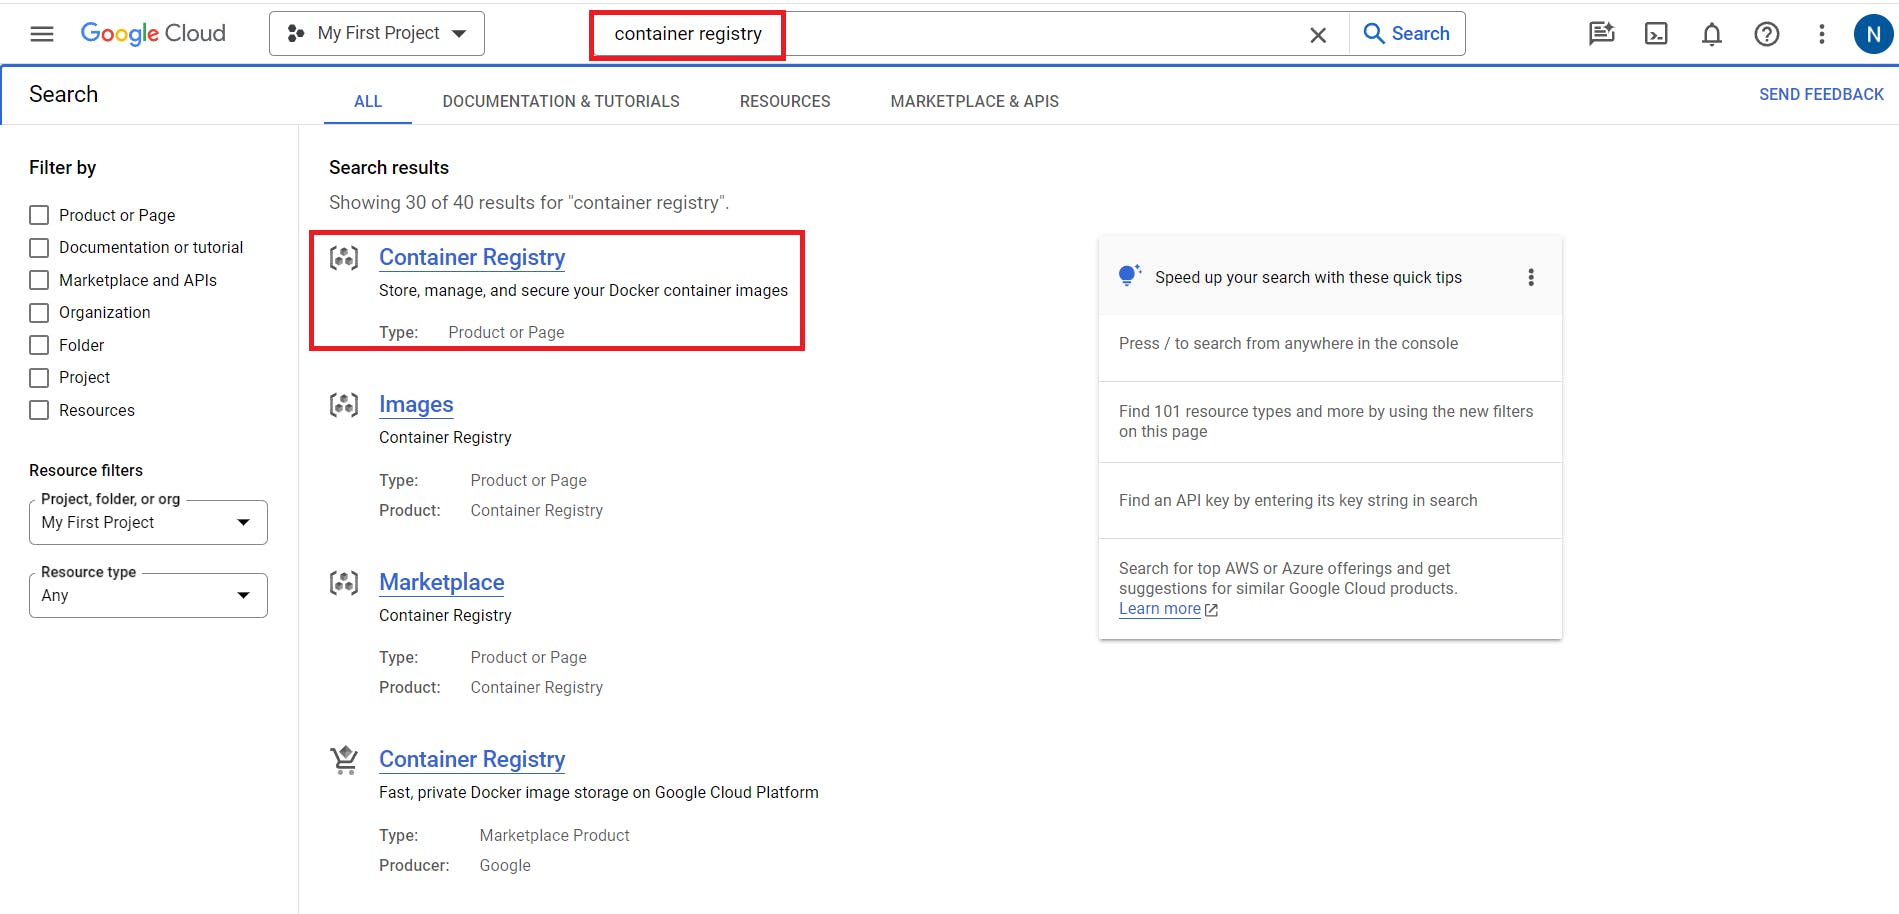
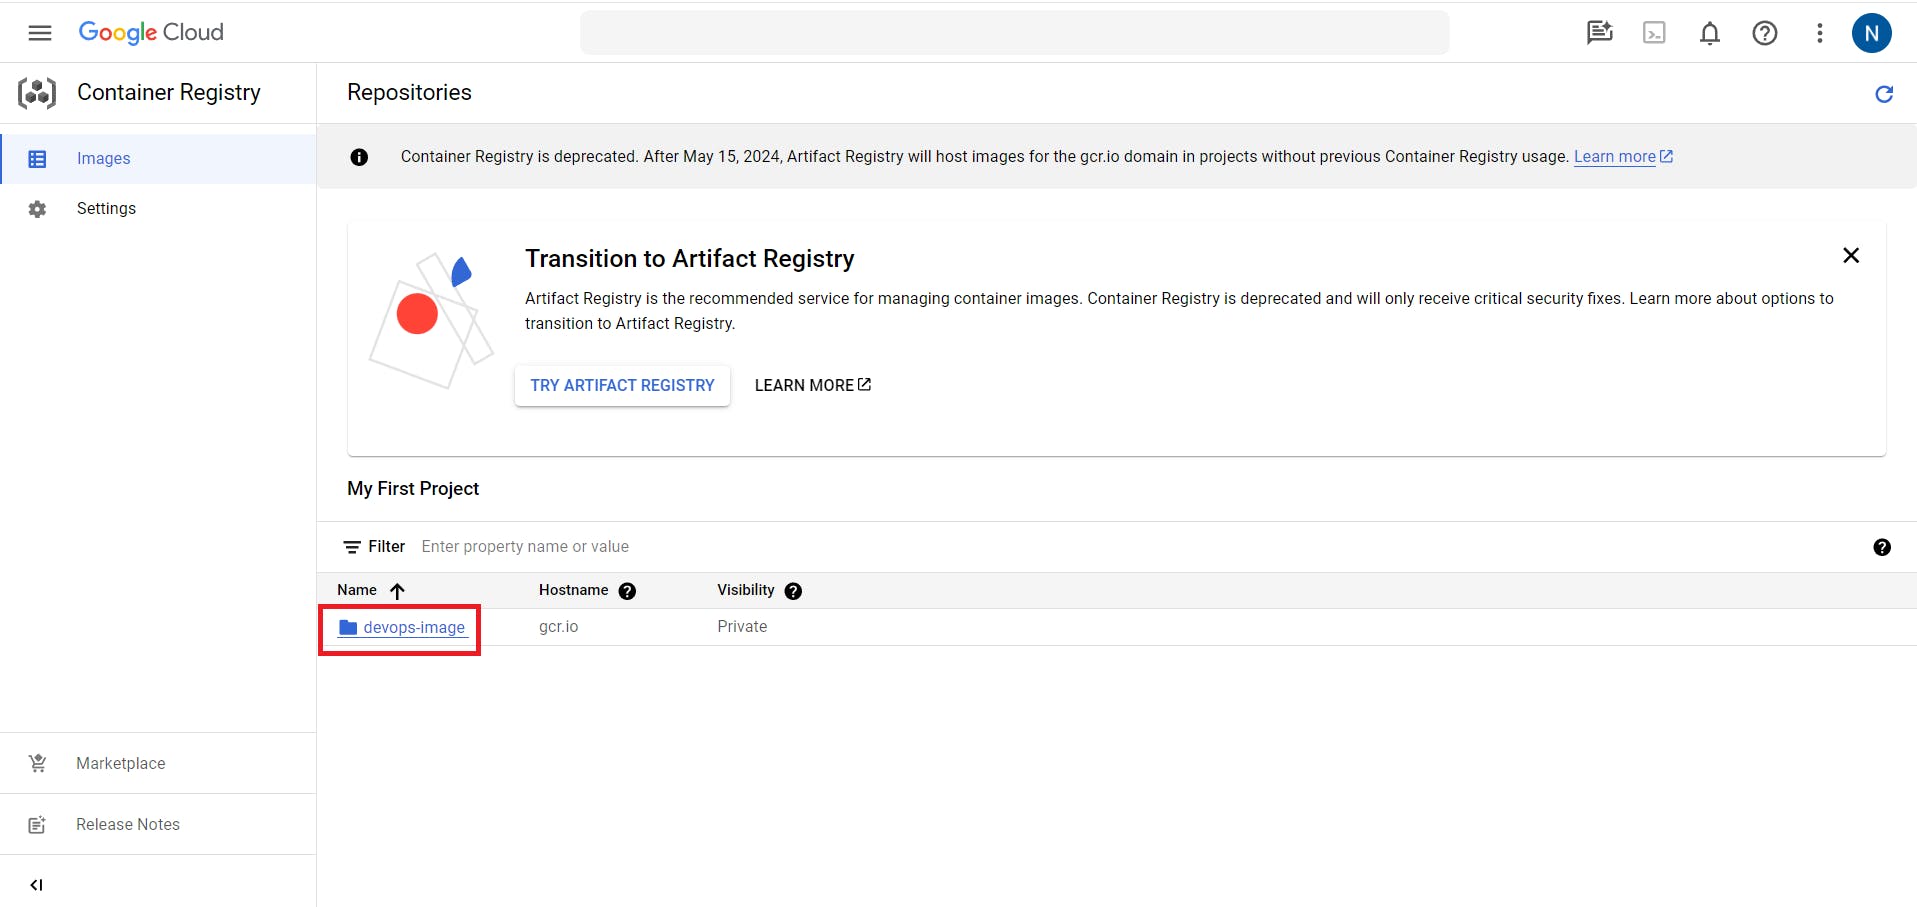
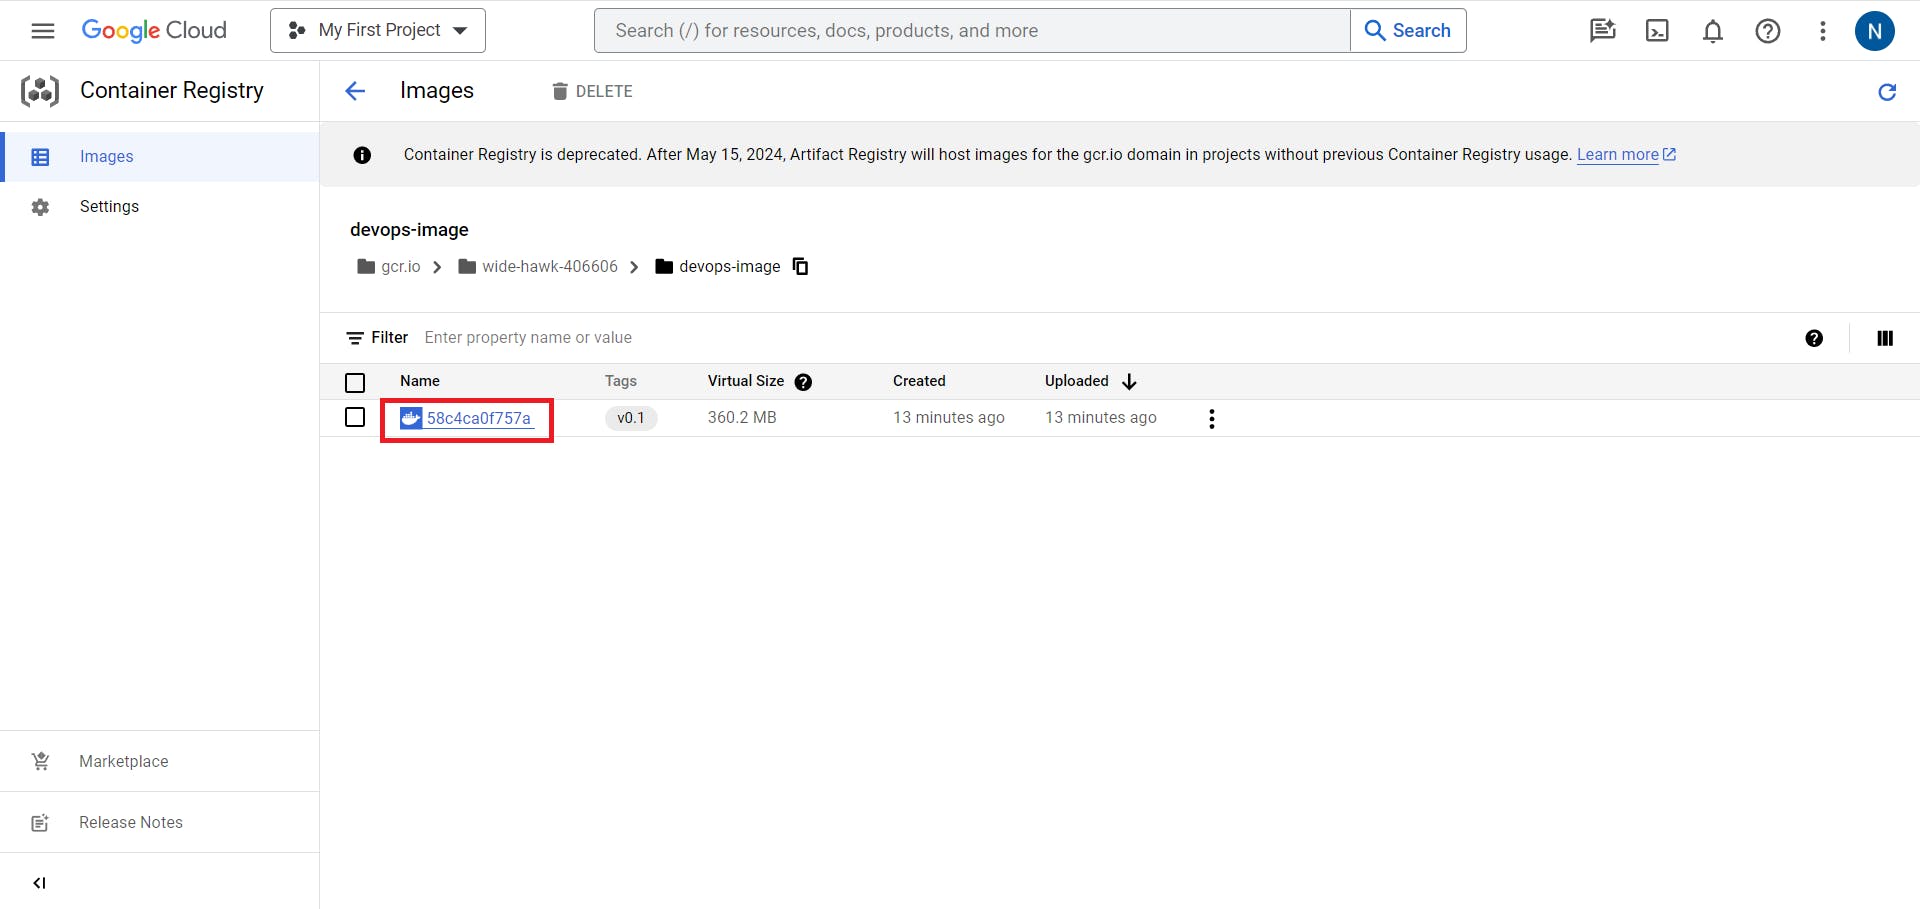
Return to the cloud console and go to container registry Your image should be on the list.
Here is our Image devops-image
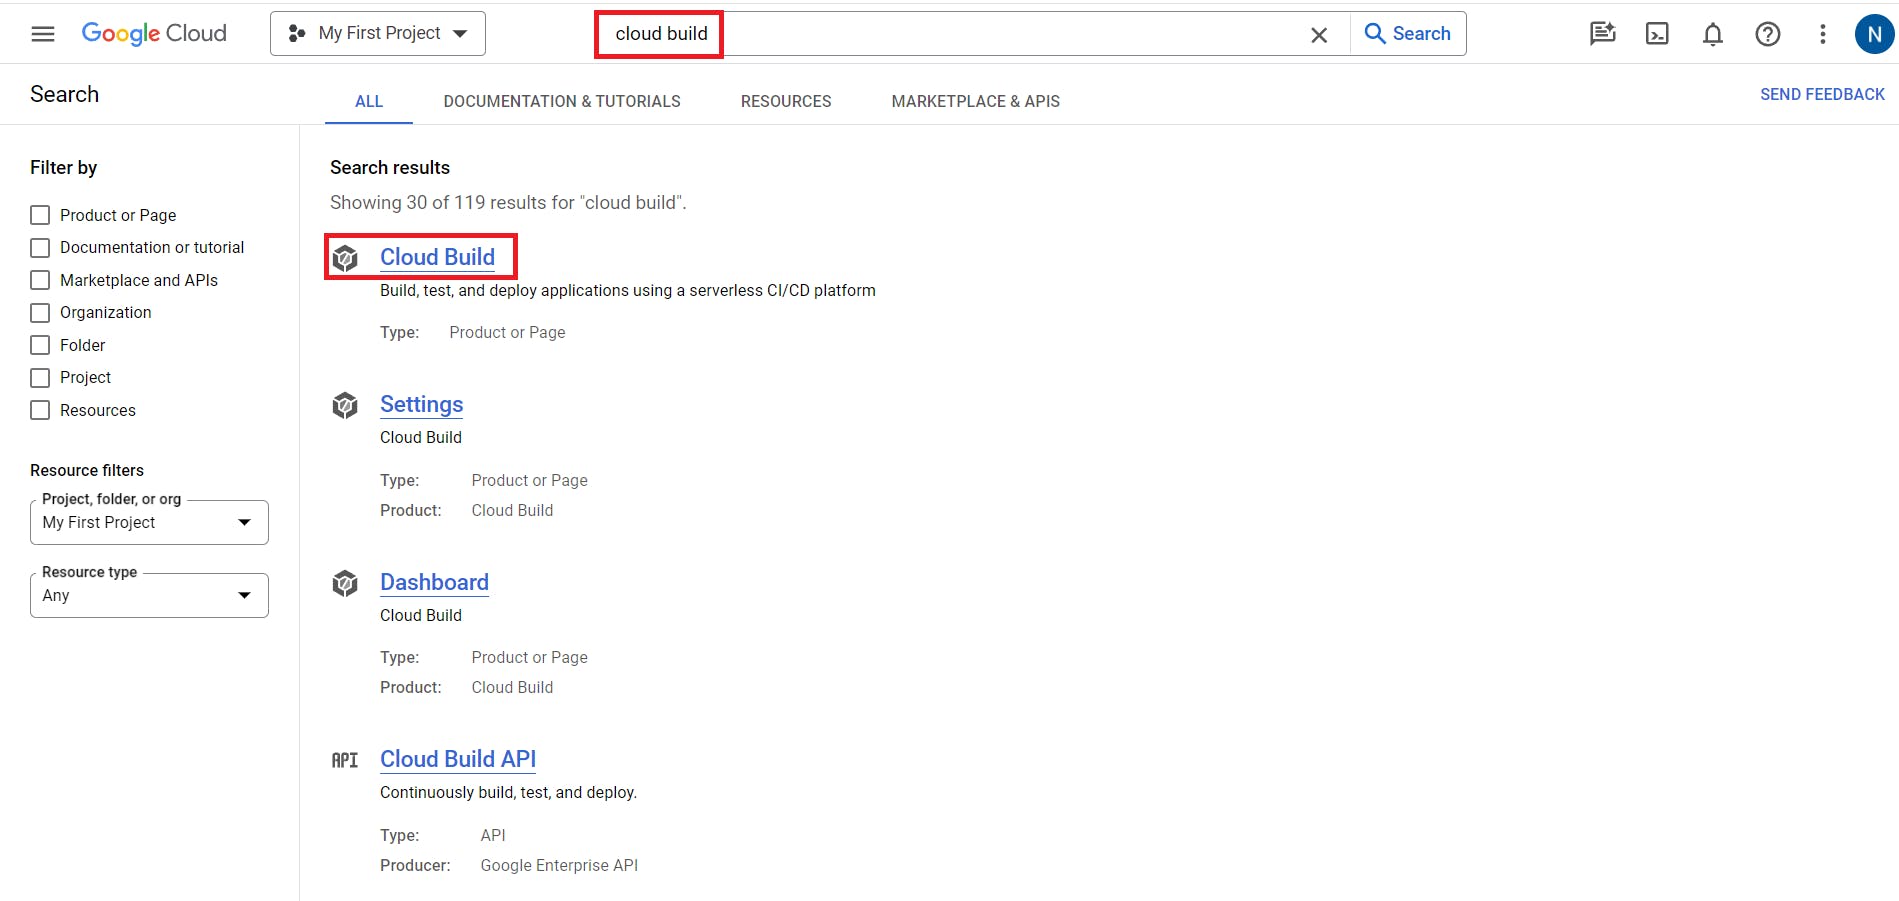
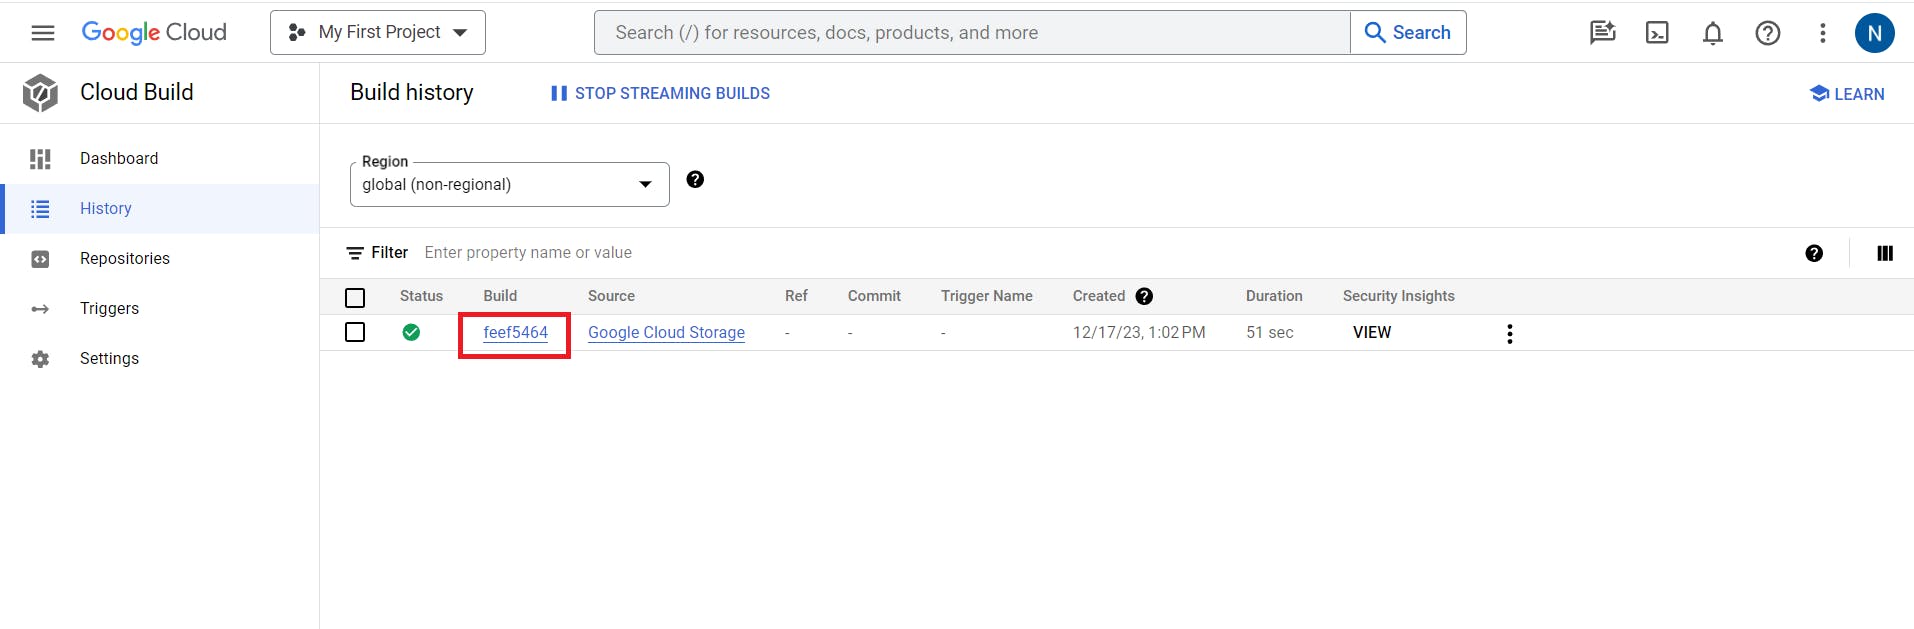
Now navigate to the Cloud Build service, and your build should be listed in the history.

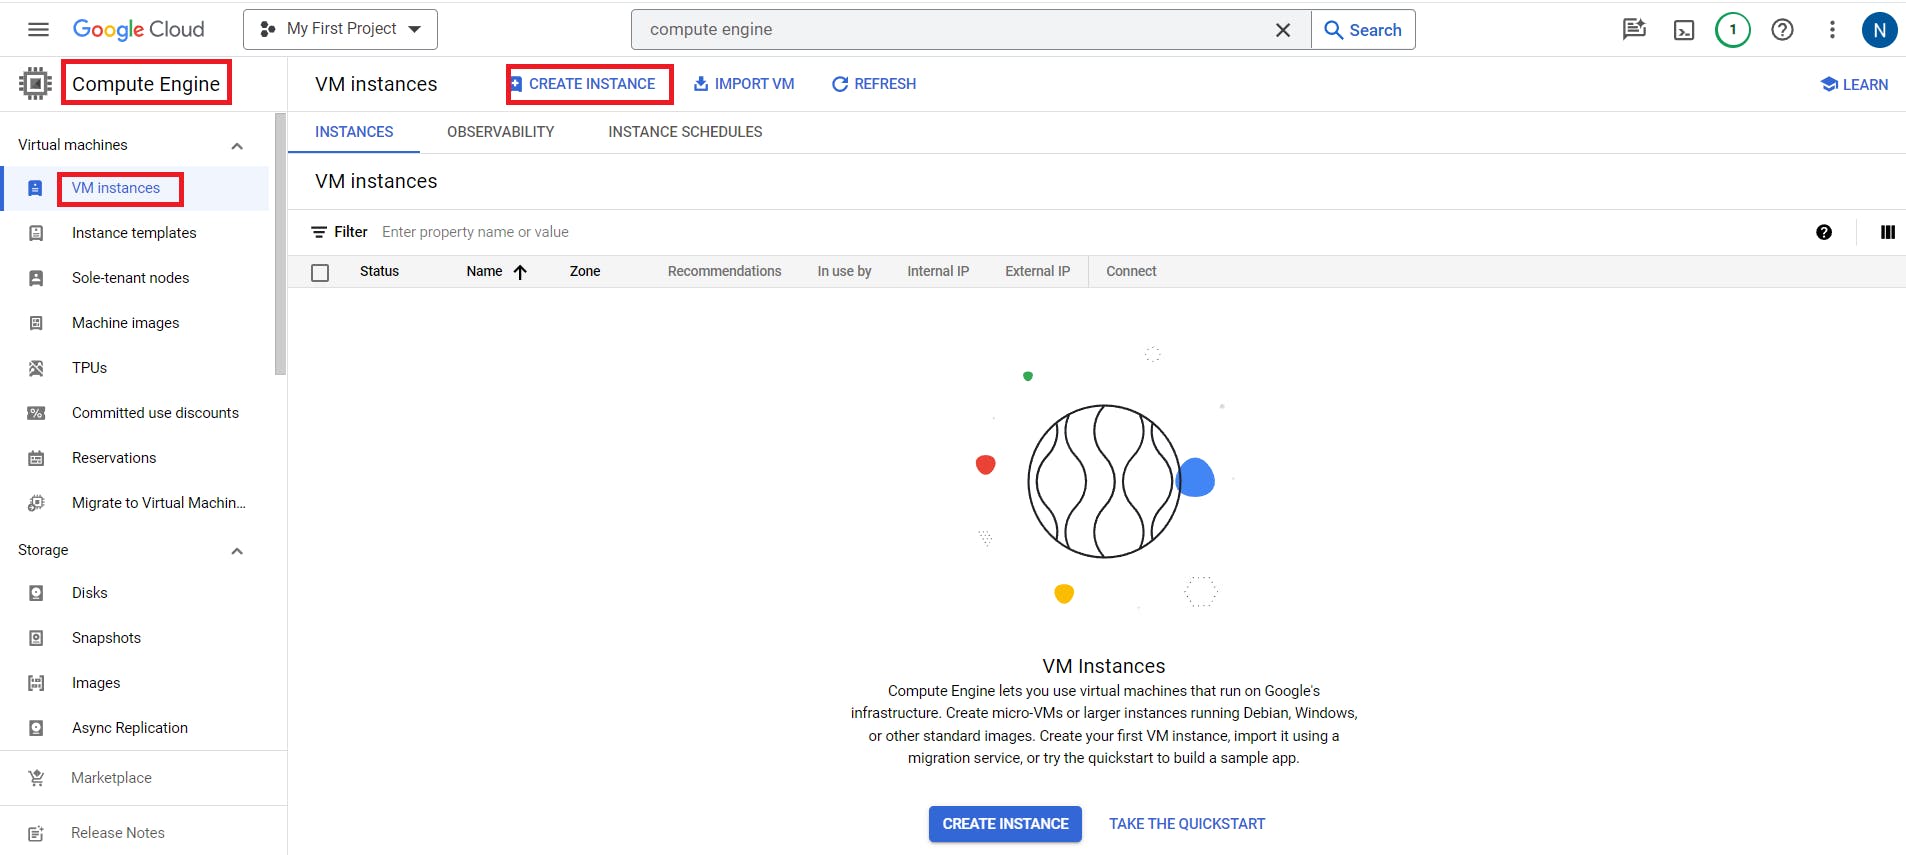
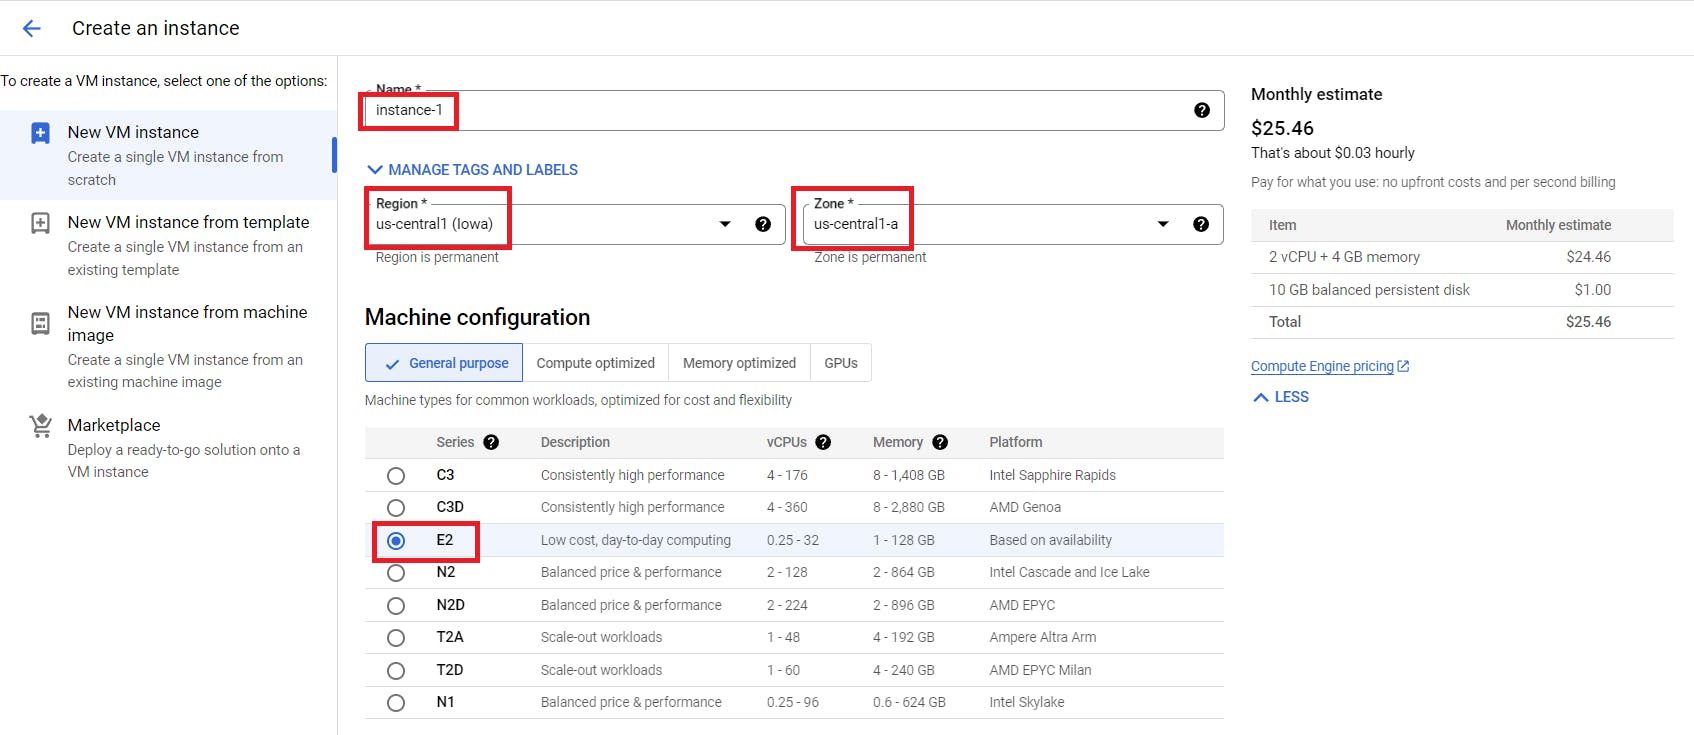
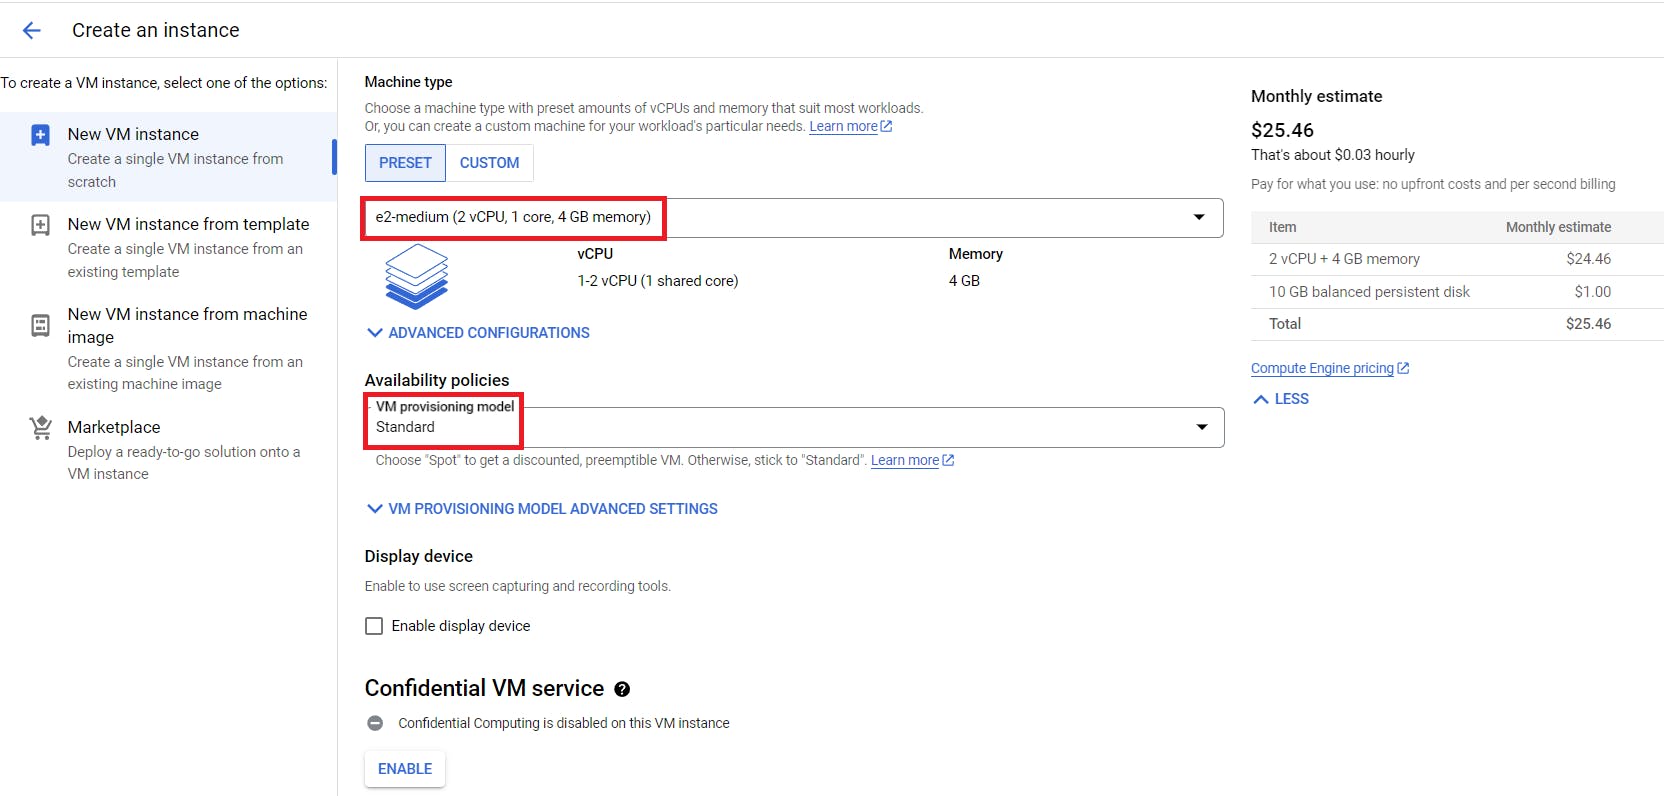
You will now try running this image from a Compute Engine virtual machine.
Navigate to the Compute Engine service.
Click Create Instance to create a VM.


Navigate to the cloud shell terminal
You will now save your changes to your Git repository. In Cloud Shell, enter the following to make sure you are in the right folder and add your new Dockerfile to Git: cd ~/gcp-devops/First-GCP-Project git add --all
Commit your changes locally: git commit -am "added support of docker"

- Push your changes to Cloud Source Repositories:
git push origin master

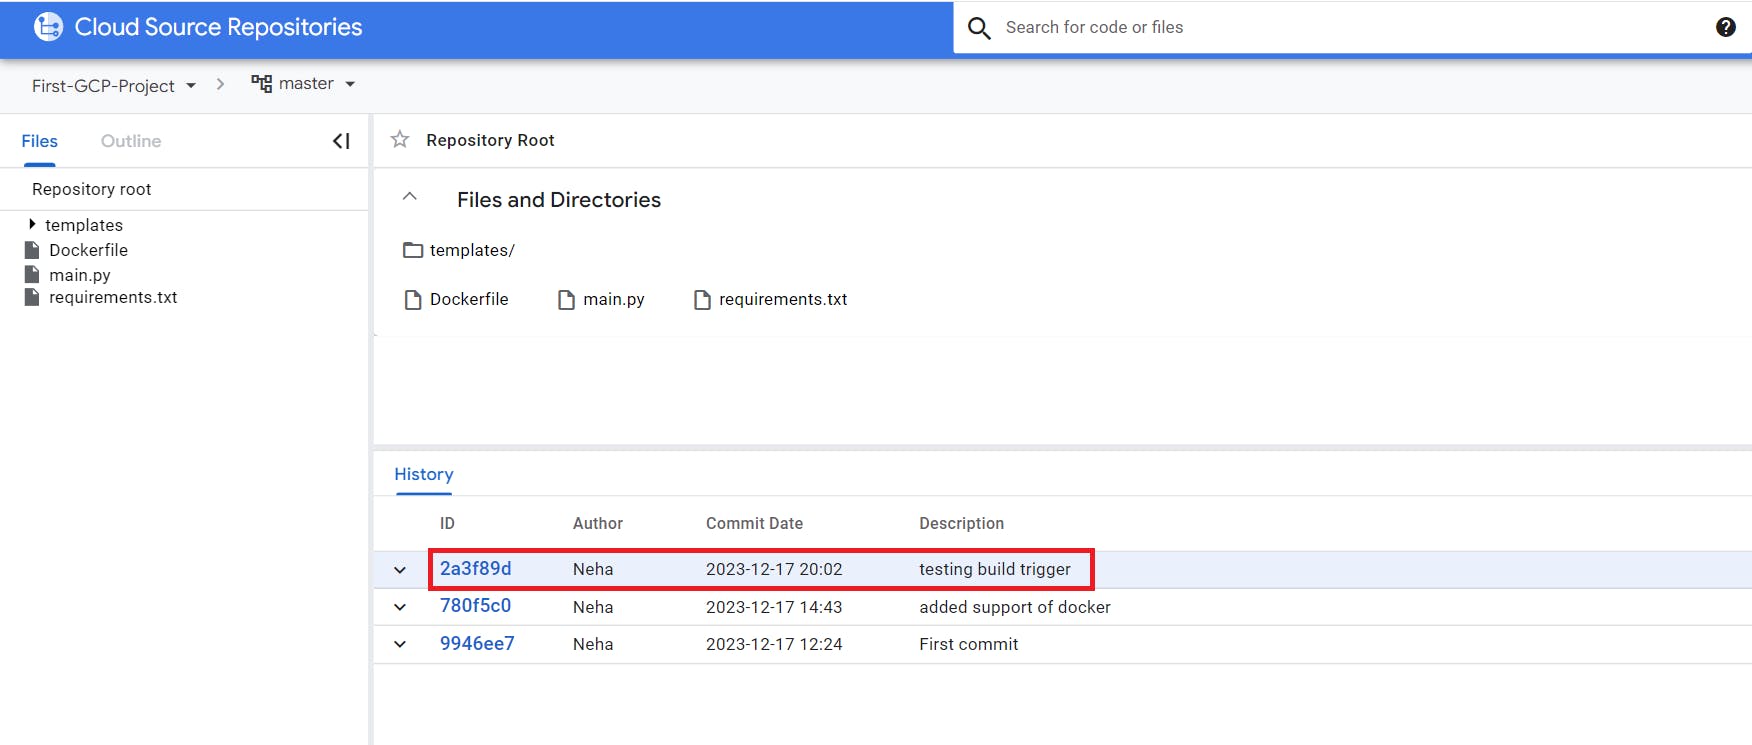
Return to Cloud Source Repositories and verify that your changes were added to source control.

Step 5 :Automate builds with triggers
On the Navigation menu (Navigation menu icon), click Container Registry. At this point, you should have a folder named devops-image with at least one container in it.
On the Navigation menu, click Cloud Build. The Build history page should open, and one or more builds should be in your history.
- Click the Triggers link on the left.
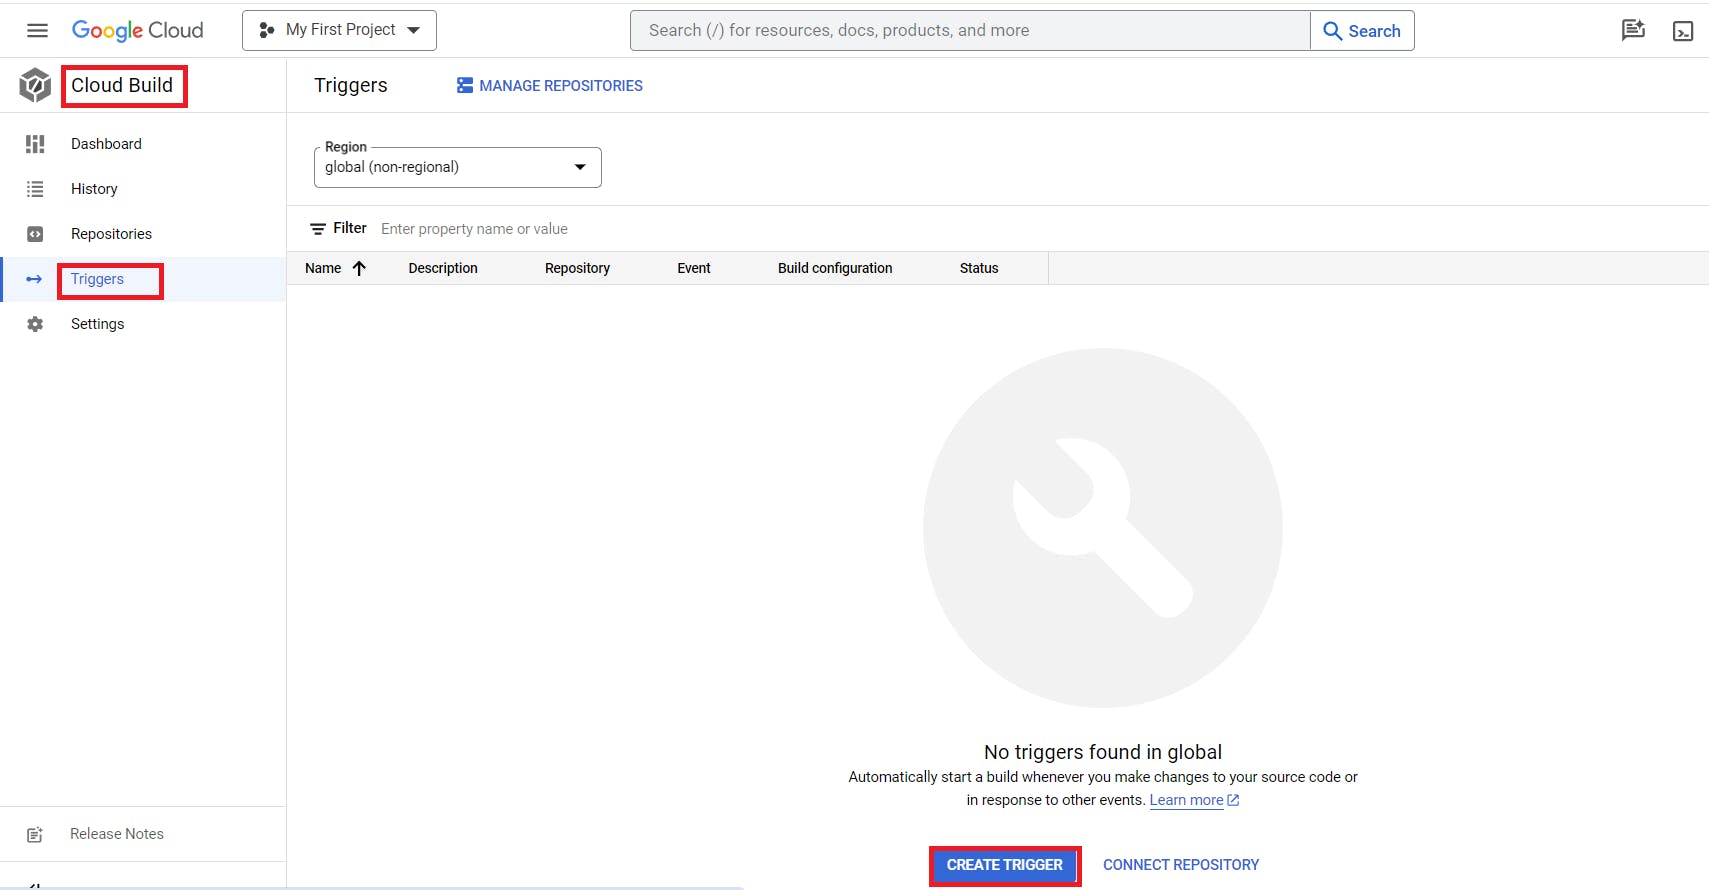
Click Create trigger, Name the trigger devops-trigger,
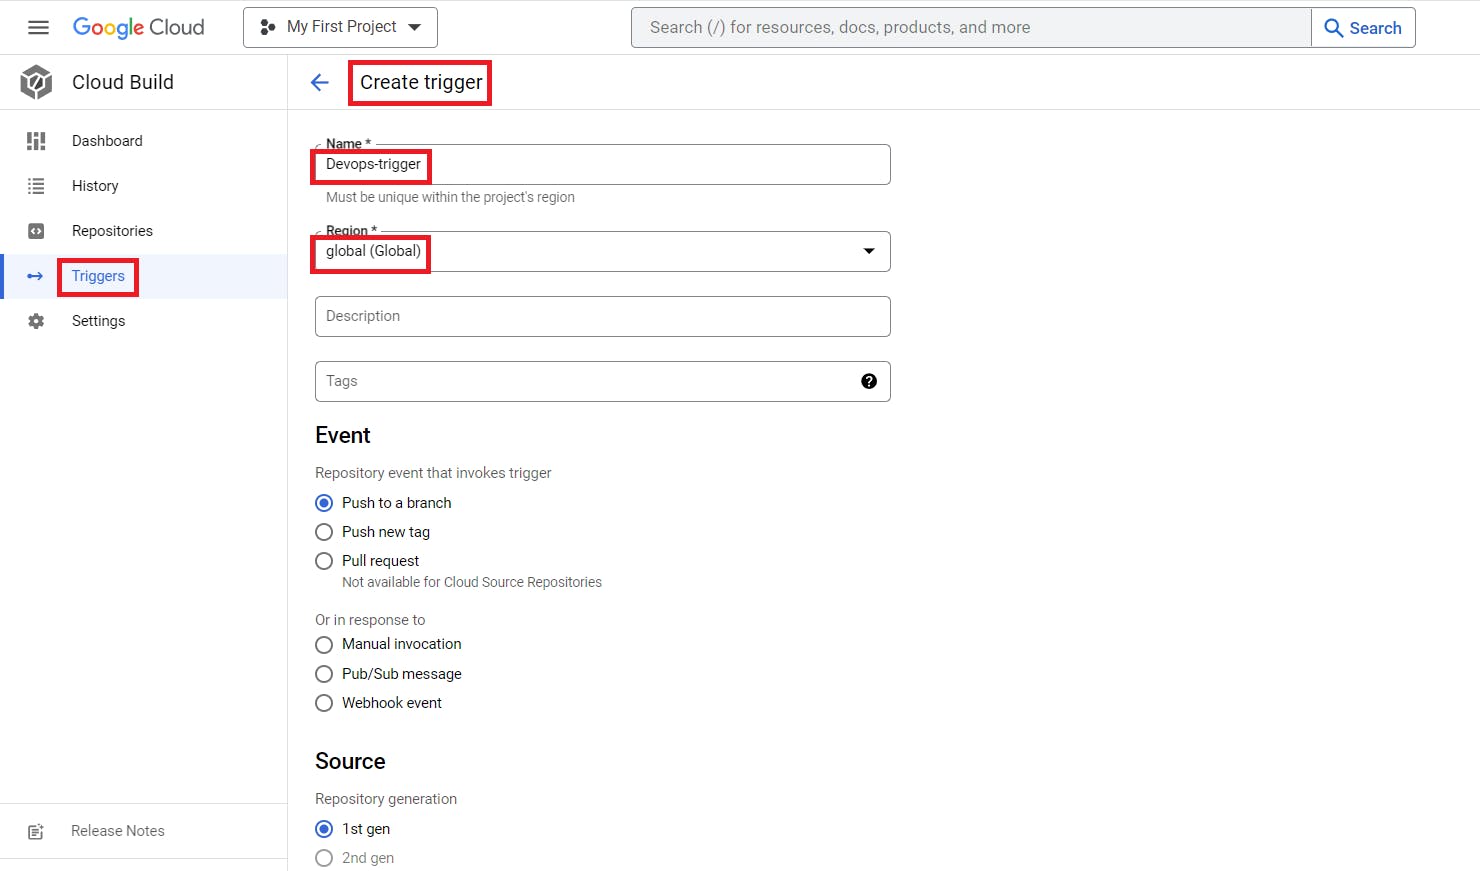
Select your First-GCP-Project Git repository under repository dropdown.
Select .*(any branch) for the branch.
Choose Dockerfile for Configuration and select the default image.

Accept the rest of the defaults, and click Create.

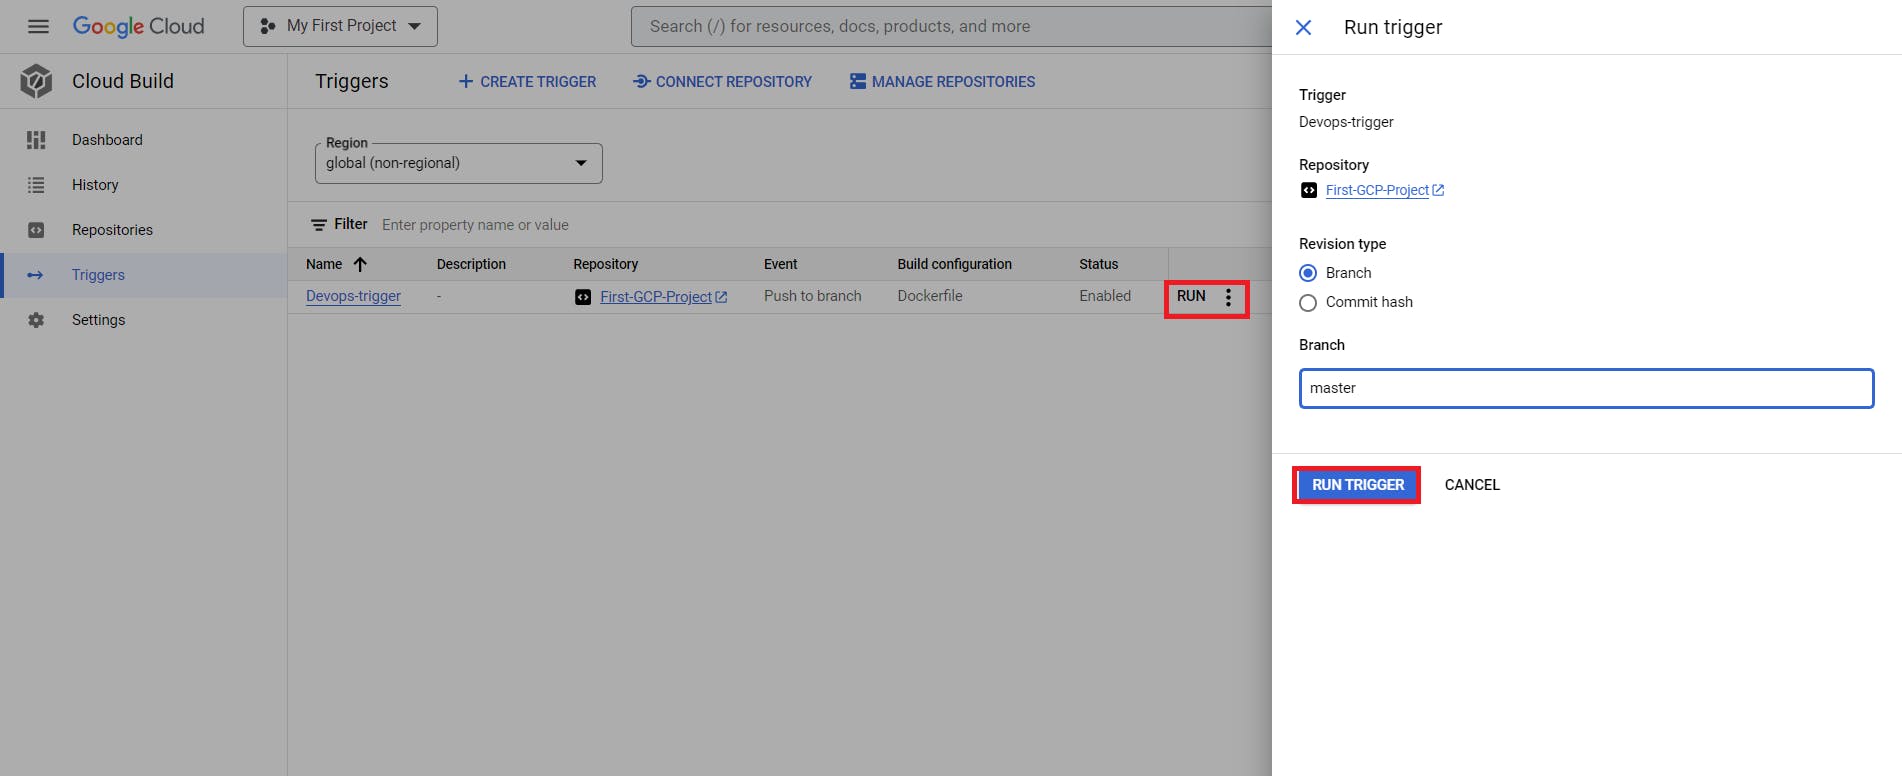
To test the trigger, click Run and then Run trigger.

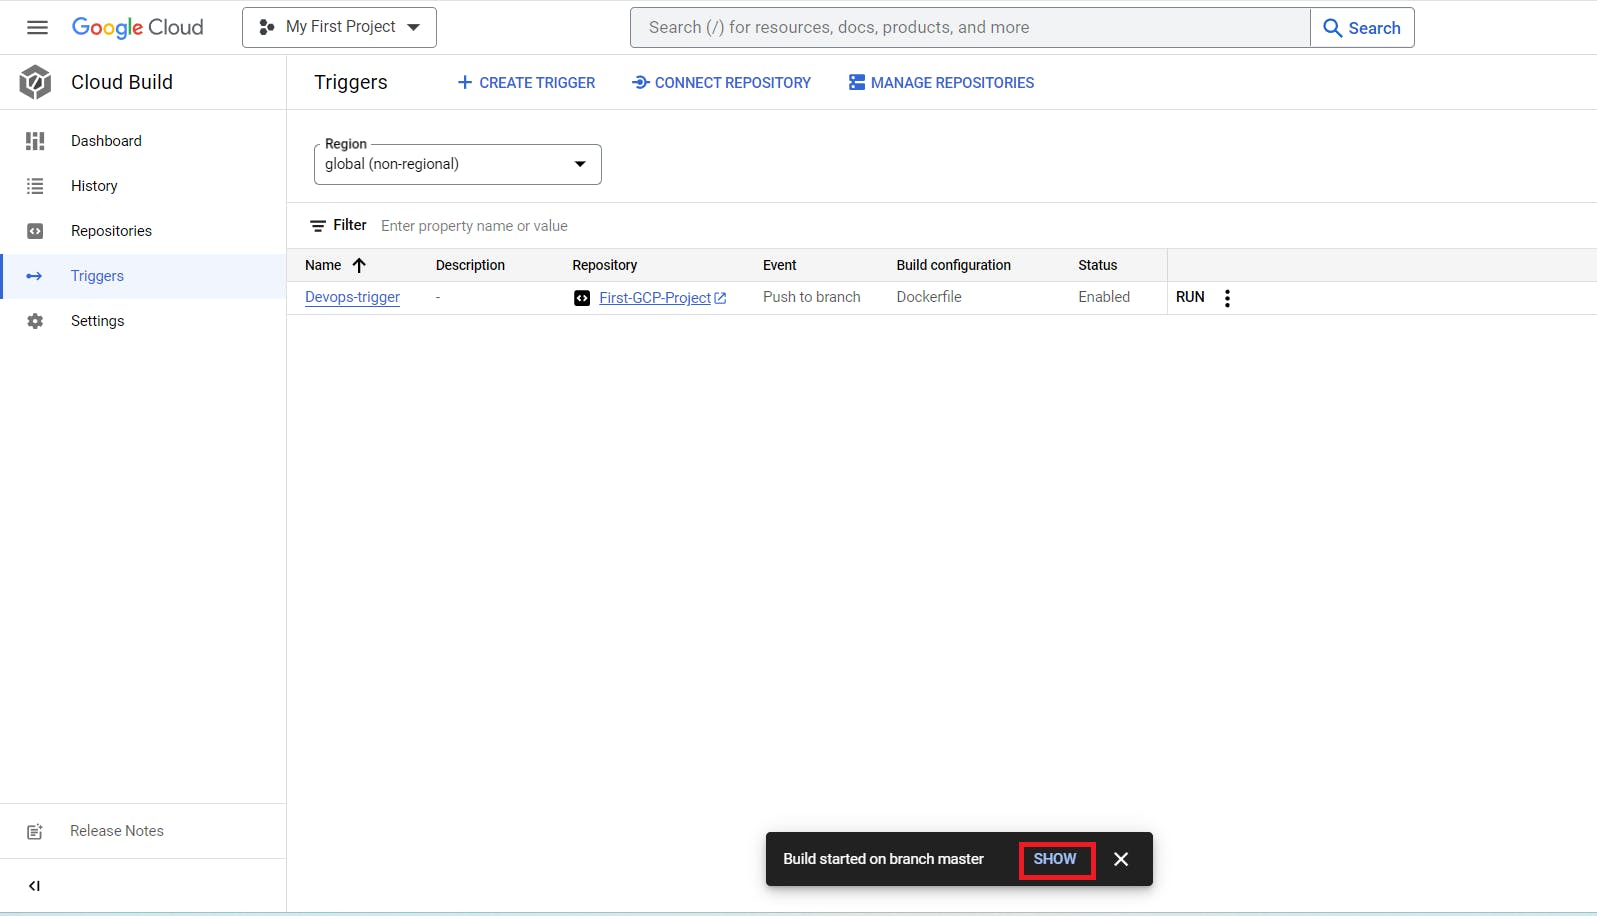
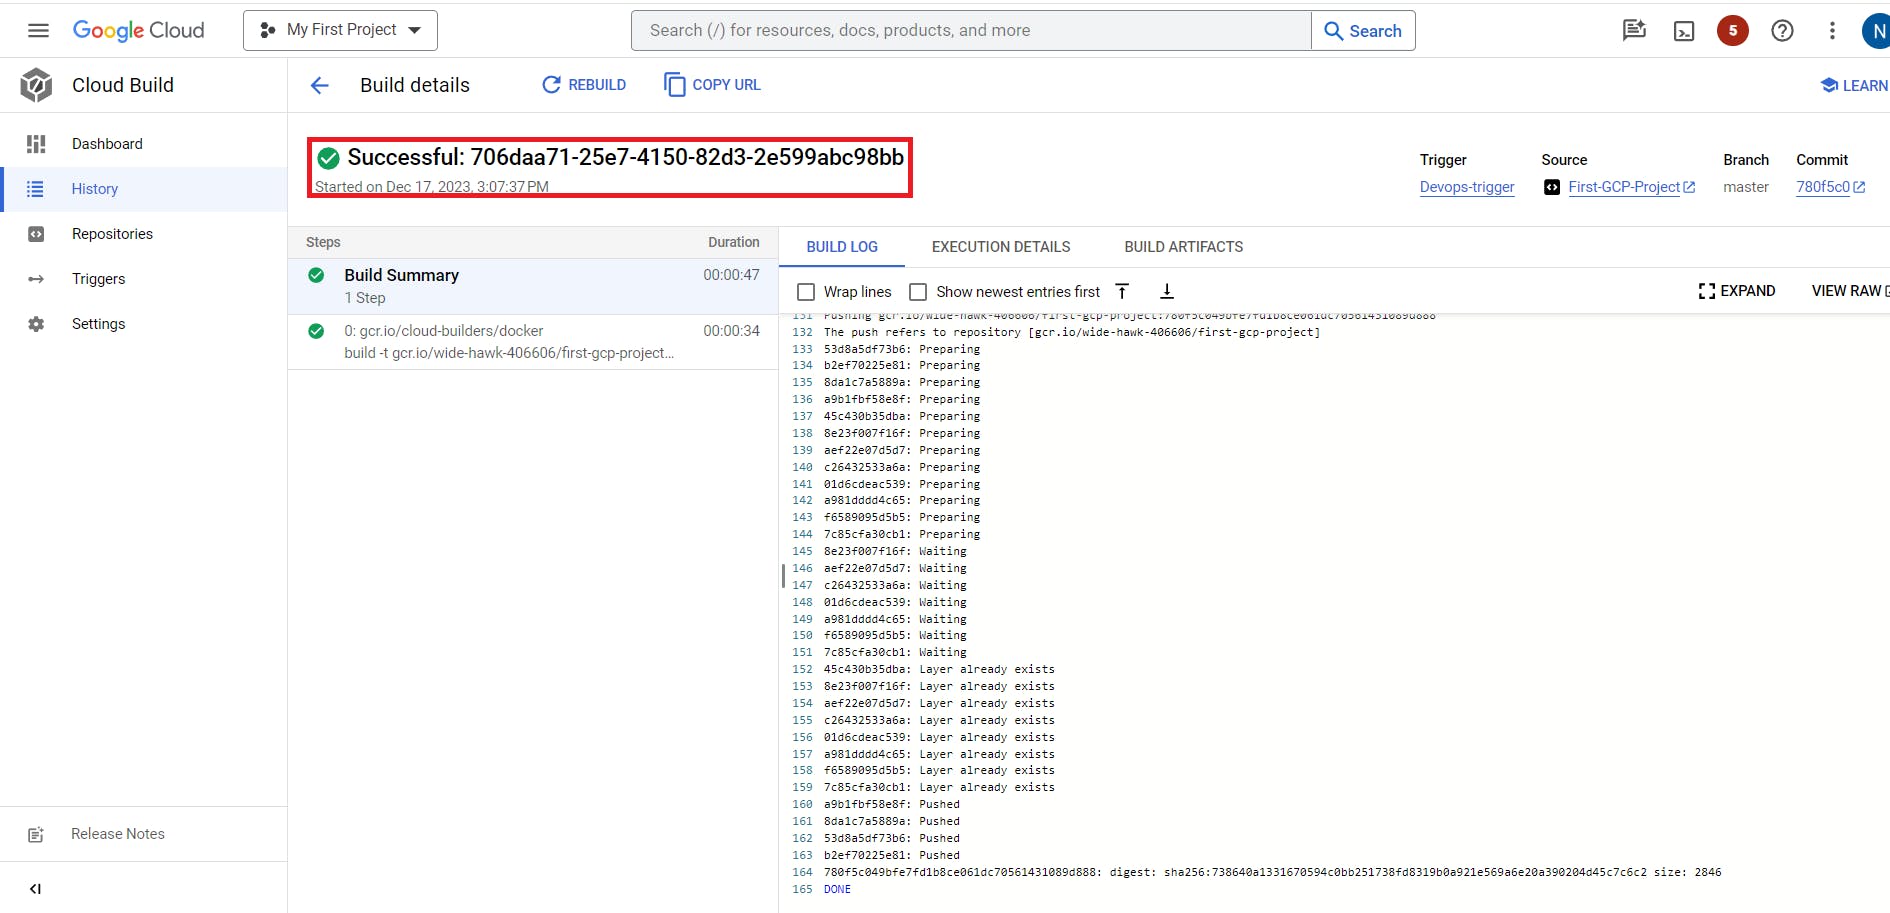
Click the History link and you should see a build running. Wait for the build to finish, and then click the link to it to see its details.
Scroll down and look at the logs. The output of the build here is what you would have seen if you were running it on your machine.

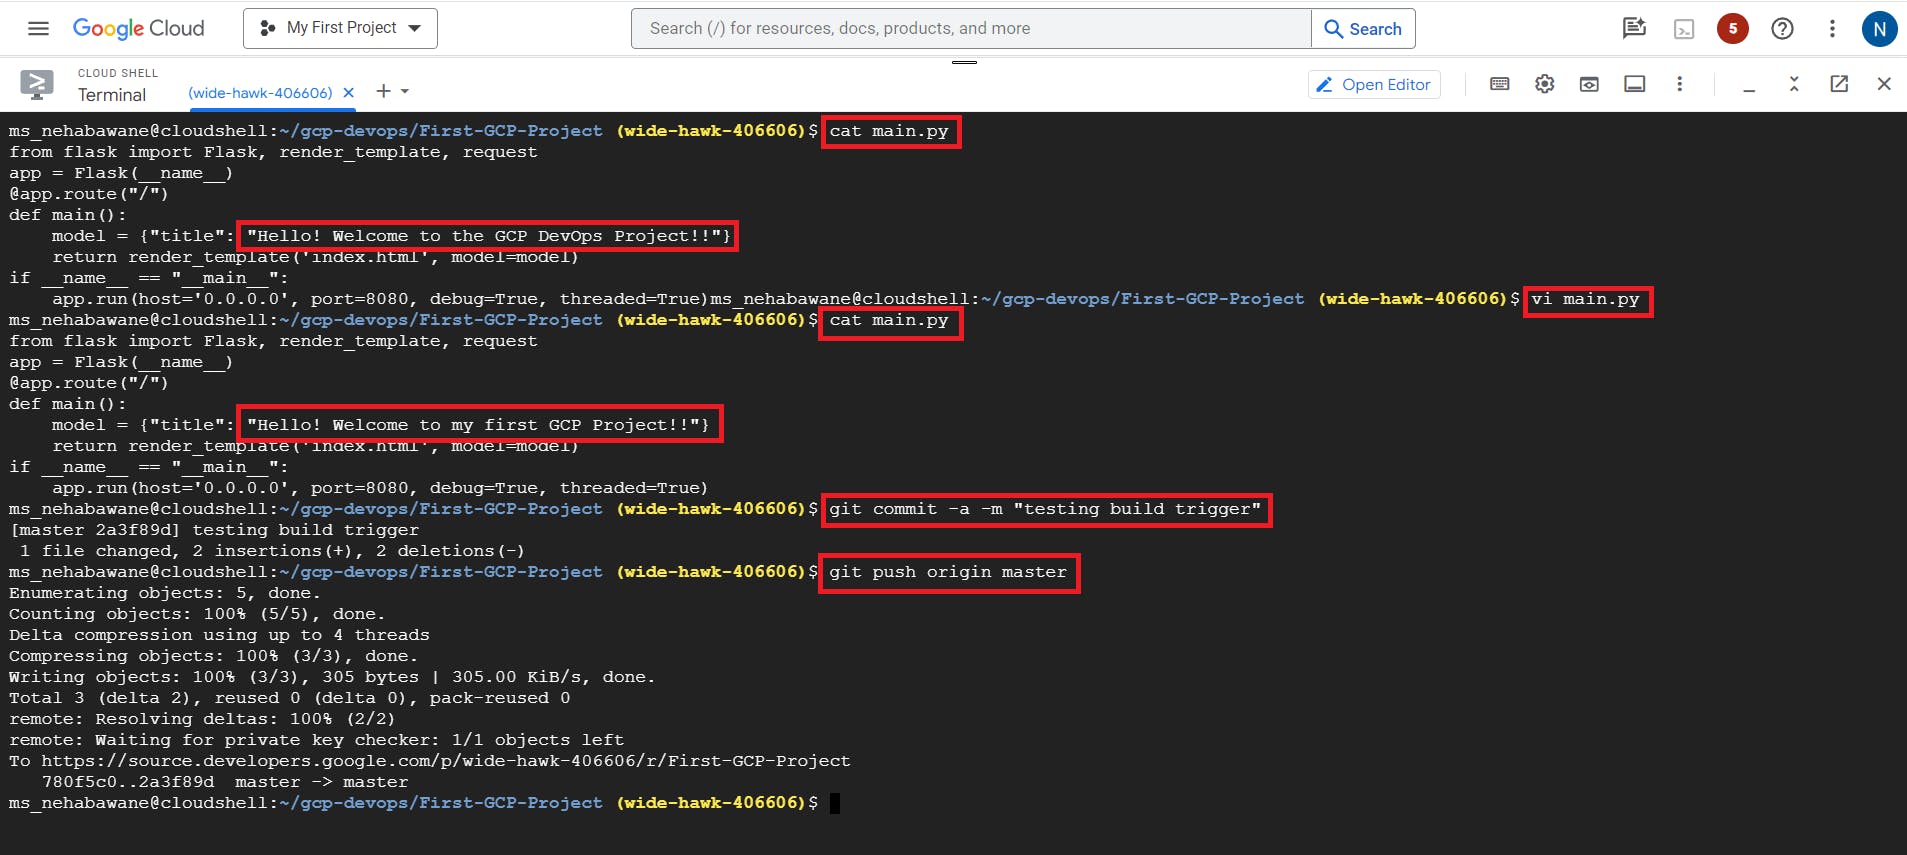
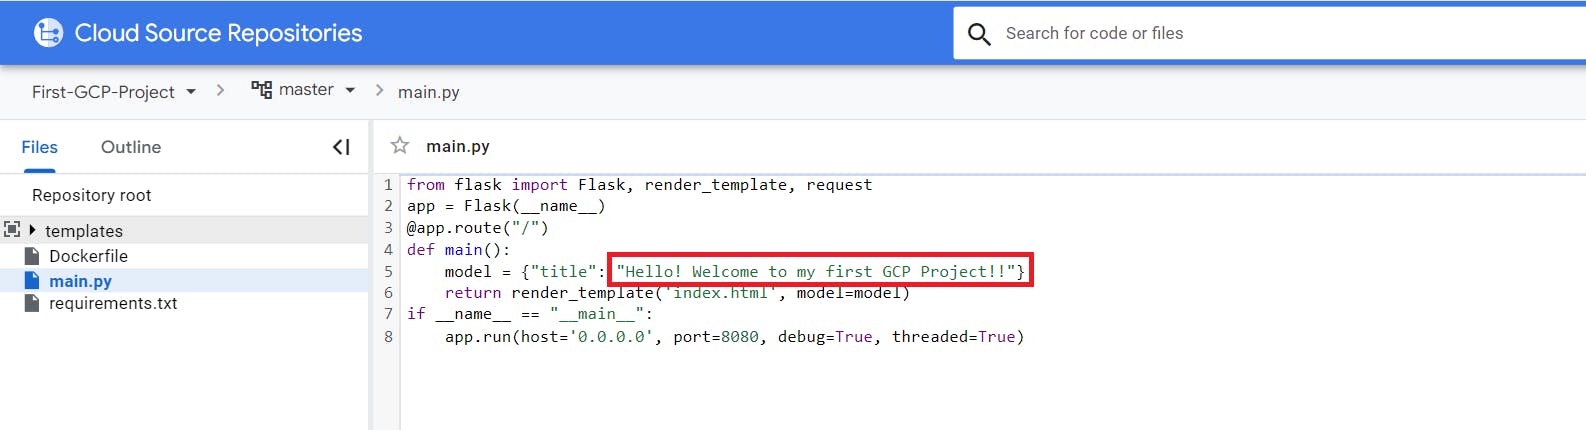
Return to the Cloud Shell Code Editor. Find the file main.py in the gcp-course/devops-repo folder.
In the main() function, change the title property to "title": "Hello! Welcome to my first GCP Project!!." as shown below:
Commit the change with the following command: cd ~/gcp-devops/First-GCP-Project git commit -a -m "testing build trigger"
Enter the following to push your changes to Cloud Source Repositories: git push origin master
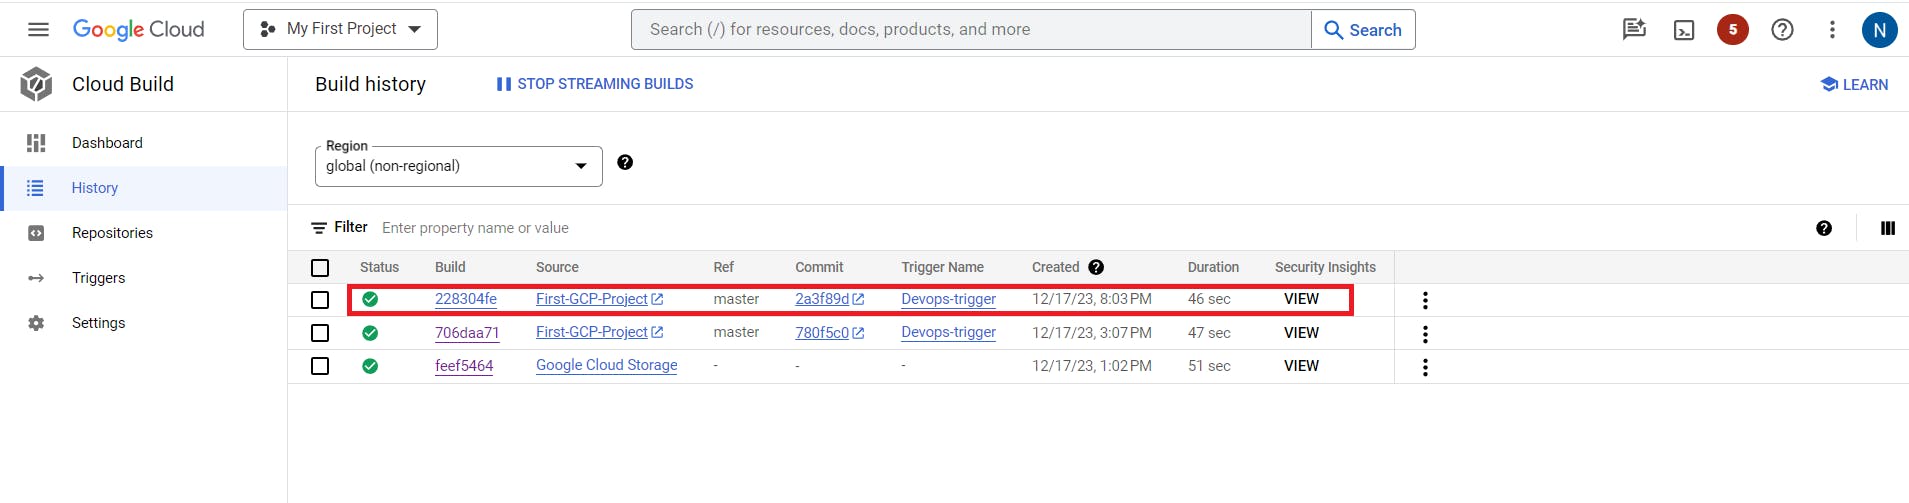
Return to the Cloud Console and the Cloud Build service. You should see another build running.
Step 6 :Test your build changes
When the build completes, click on it to see its details. Under Execution Details, copy the Image link, format should be https://gcr.io/wide-hawk-406606/devops-image:v0.1
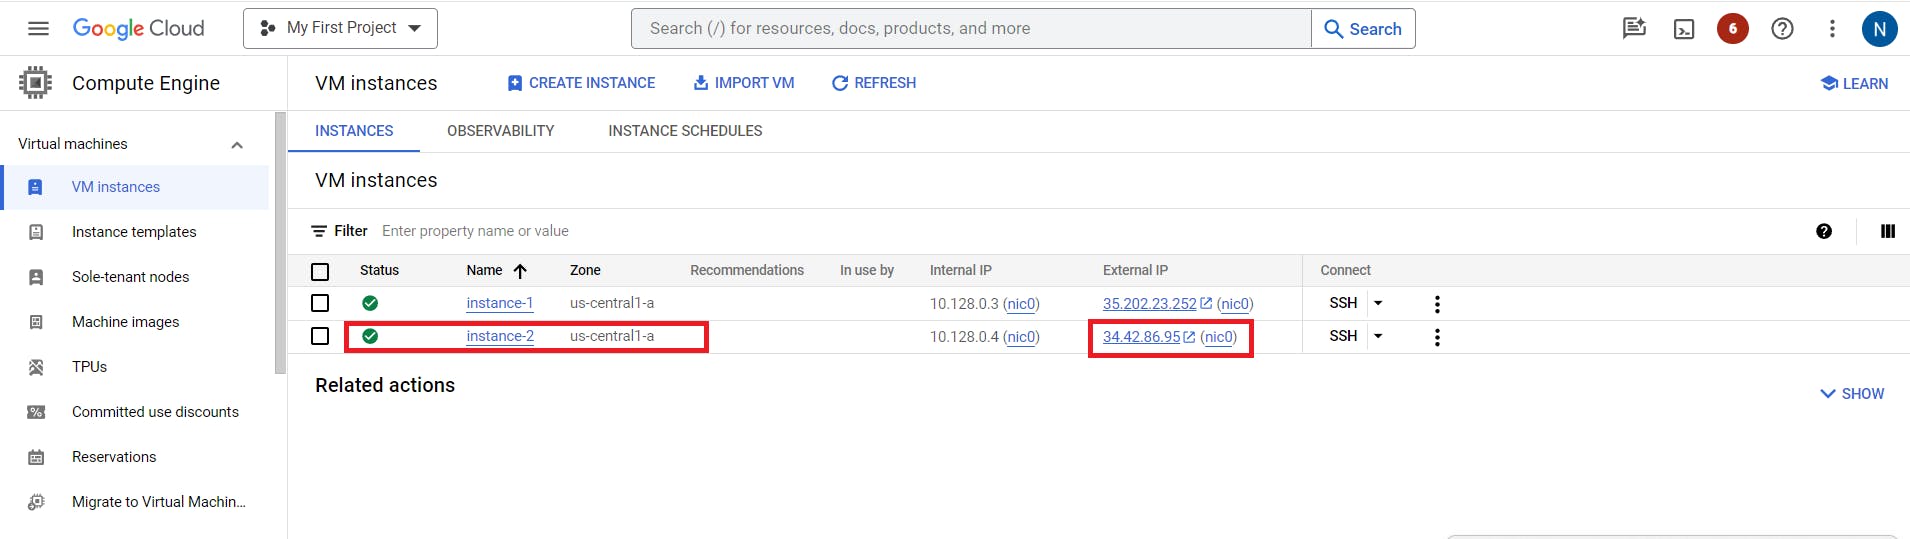
Go to the Compute Engine service. As you did earlier, create a new virtual machine to test this image. Click DEPLOY CONTAINER and paste the image you just copied.
Select Allow HTTP traffic.
When the machine is created, test your change by making a request to the VM's external IP address in your browser. Your new message should be displayed. Note: You might have to wait a few minutes after the VM is created for the Docker container to start.

Congratulations! In this lab, you built a continuous integration pipeline using the Google Cloud tools Cloud Source Repositories, Cloud Build, build triggers, and Container Registry.
Thanks For Reading! Stay Tuned! 🤗
Happy Learning!
Neha Bawane!